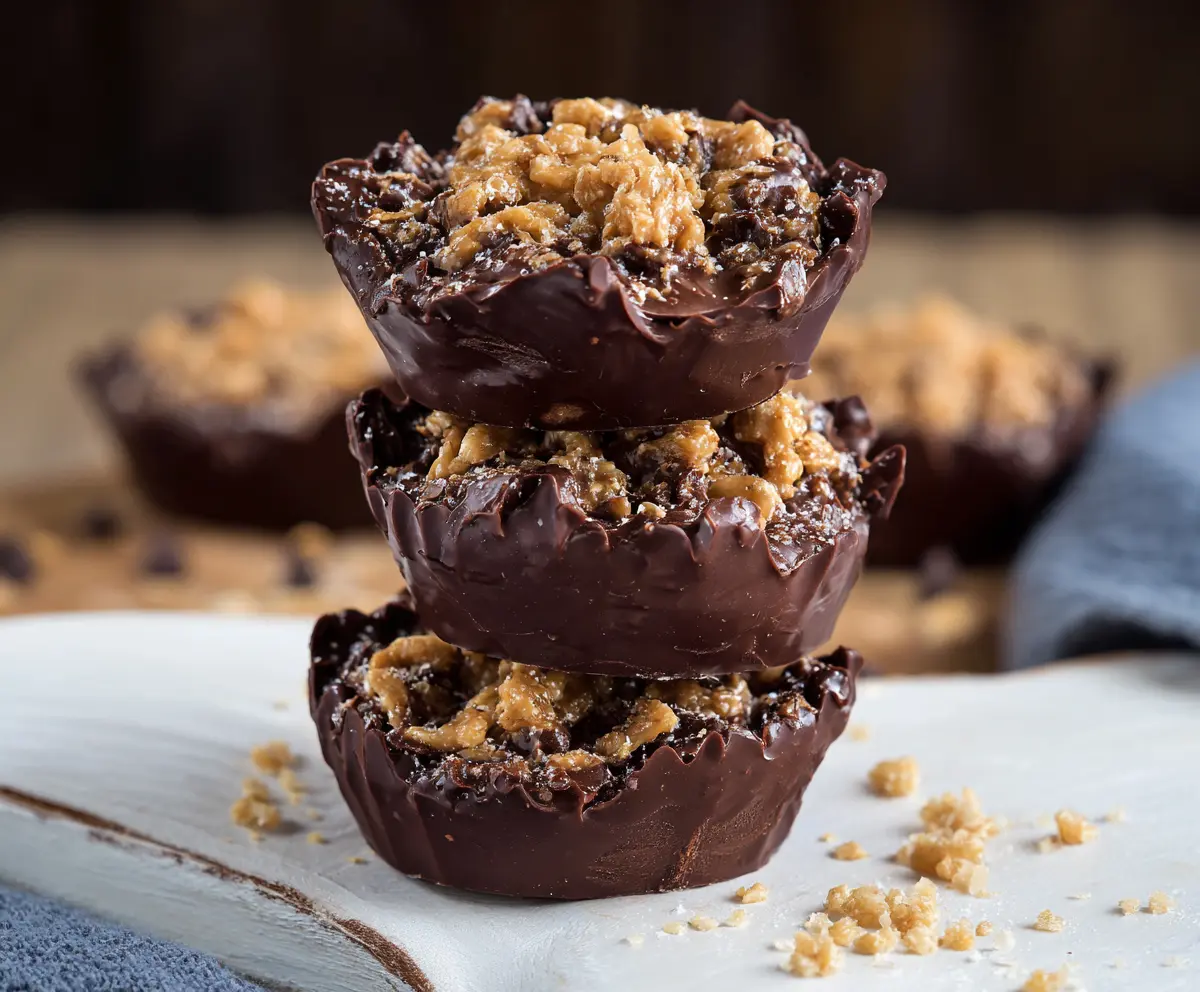
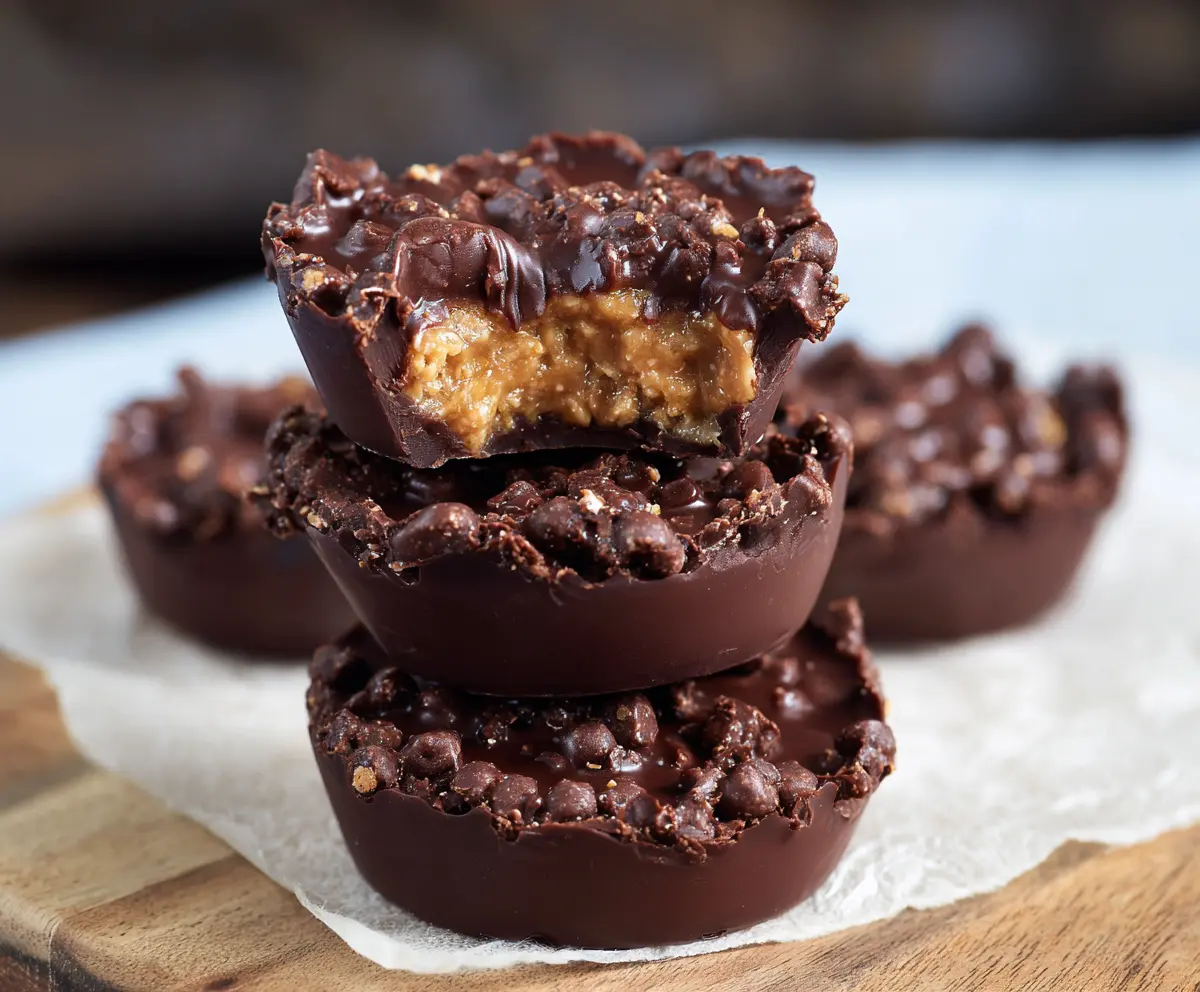
These Chocolate Peanut Butter Crunch Cups are a sweet treat that everyone will love! Imagine creamy peanut butter wrapped in rich chocolate, with a satisfying crunch in every bite.
Making them is super simple; just mix, fill, and chill! I often make a batch and hide some for myself – they’re too good to share! 🍫🥜
Key Ingredients & Substitutions
Semi-sweet chocolate: This is perfect for a nice balance of sweetness with the peanut butter. If you prefer a darker taste, you can use dark chocolate. For a sweeter version, milk chocolate works too!
Peanut butter: Creamy peanut butter gives a smooth filling. If you’re looking for a healthier option, natural peanut butter is a great choice. If someone has a nut allergy, sun butter or almond butter can be excellent substitutes.
Crispy rice cereal: This adds the crunch factor! If you don’t have rice cereal, try crushed graham crackers or pretzels for a different texture.
Powdered sugar: This is optional but helps sweeten the peanut butter mix. If you want it less sugary, feel free to skip it or use a sugar alternative like powdered erythritol.
How Do You Properly Melt Chocolate Without Burning It?
Melting chocolate can be tricky, but here’s a simple method to get it just right:
- Use a microwave-safe bowl to avoid any chemical reactions with other materials. Microwave the chocolate in 30-second intervals.
- Stir the chocolate after each interval to help it melt evenly and prevent burning.
- If you’re using the double boiler, make sure the bottom bowl doesn’t touch the water, as too much heat can scorch the chocolate.
- Take your time! Patience is key — better to melt slowly than risk burning it.
Following these tips will give you the smooth, melted chocolate you need to create beautiful cups!
Delicious Chocolate Peanut Butter Crunch Cups Recipe
Ingredients You’ll Need:
- 2 cups semi-sweet chocolate chips or chopped chocolate
- 1 cup creamy peanut butter (natural or regular)
- 1 cup crispy rice cereal or crushed rice krispies
- 1/4 cup powdered sugar (optional, for sweetness in peanut butter filling)
- 1 tablespoon unsalted butter (optional, for a richer peanut butter filling)
- Pinch of sea salt (for garnish, optional)
Time Needed:
This delightful treat will take around 15 minutes of prep time and about 1 hour to chill in the refrigerator. So in total, you’re looking at about 1 hour and 15 minutes before you can enjoy these tasty cups.
Step-by-Step Instructions:
1. Prepare Your Tin:
Start by lining a muffin tin with paper liners. If you prefer, you can lightly grease the tin with butter to make it easier to remove the cups later. This step is important for getting those crunchy cups out smoothly!
2. Melt the Chocolate:
In a microwave-safe bowl, melt the chocolate chips. Heat them in 30-second intervals, stirring after each interval until the chocolate is completely smooth. If you prefer using the stove, you can do this over simmering water using a double boiler for gentle melting.
3. Create the Chocolate Shells:
Once melted, spoon about 1 to 1.5 tablespoons of the melted chocolate into each muffin cup. Use the back of the spoon to spread the chocolate evenly up the sides to form a nice shell. After you’ve done this, place the muffin tin in the refrigerator for about 10 minutes to let the chocolate set.
4. Make the Peanut Butter Filling:
While the chocolate is chilling, grab a mixing bowl and combine the creamy peanut butter, powdered sugar (if using), and unsalted butter (if using) until it’s smooth. Then, gently fold in the crispy rice cereal, being careful not to crush it too much as you mix.
5. Fill the Chocolate Cups:
Take the muffin tin out of the fridge. Now, spoon the peanut butter crunch mixture into each chocolate shell, pressing lightly to fill them up without overflowing. This is where the magic happens!
6. Seal with More Chocolate:
To finish, cover the peanut butter filling with a thin layer of the remaining melted chocolate. Make sure it’s well-sealed — this is what keeps your filling cozy inside!
7. Add a Touch of Salt:
If you like, sprinkle a tiny pinch of sea salt on top of each cup for a perfect sweet and salty contrast.
8. Chill to Set:
Put the cups back in the refrigerator and chill for at least 1 hour until they are completely firm. This step is important because it helps them hold their shape.
9. Serve and Enjoy:
Once set, carefully peel off the paper liners. Your Chocolate Peanut Butter Crunch Cups are ready to be served! Store any leftovers in an airtight container in the fridge, but these are so good they might not last long!
Enjoy your decadent treats that combine rich chocolate with a crunchy, sweet peanut butter center—a delightful bite every time!
Can I Use Dark Chocolate Instead of Semi-Sweet?
Absolutely! Feel free to substitute dark chocolate for a richer flavor. Just keep in mind that it may be less sweet than semi-sweet, so adjust the sweetener in the peanut butter filling if needed.
Can I Make These Cups Vegan?
Yes! To make these cups vegan, use dairy-free chocolate and skip the butter or use a plant-based butter substitute. The filling with peanut butter can be naturally vegan-friendly as well!
How Can I Store Leftovers?
Store any leftover cups in an airtight container in the refrigerator for up to one week. If you want to keep them longer, they can also be frozen for up to three months. Just thaw them in the fridge before eating!
Can I Add Other Mix-Ins?
Definitely! You can mix in mini chocolate chips, chopped nuts, or even dried fruit into the peanut butter filling for added texture and flavor. Just make sure not to overload it, so the cups still hold their shape well!