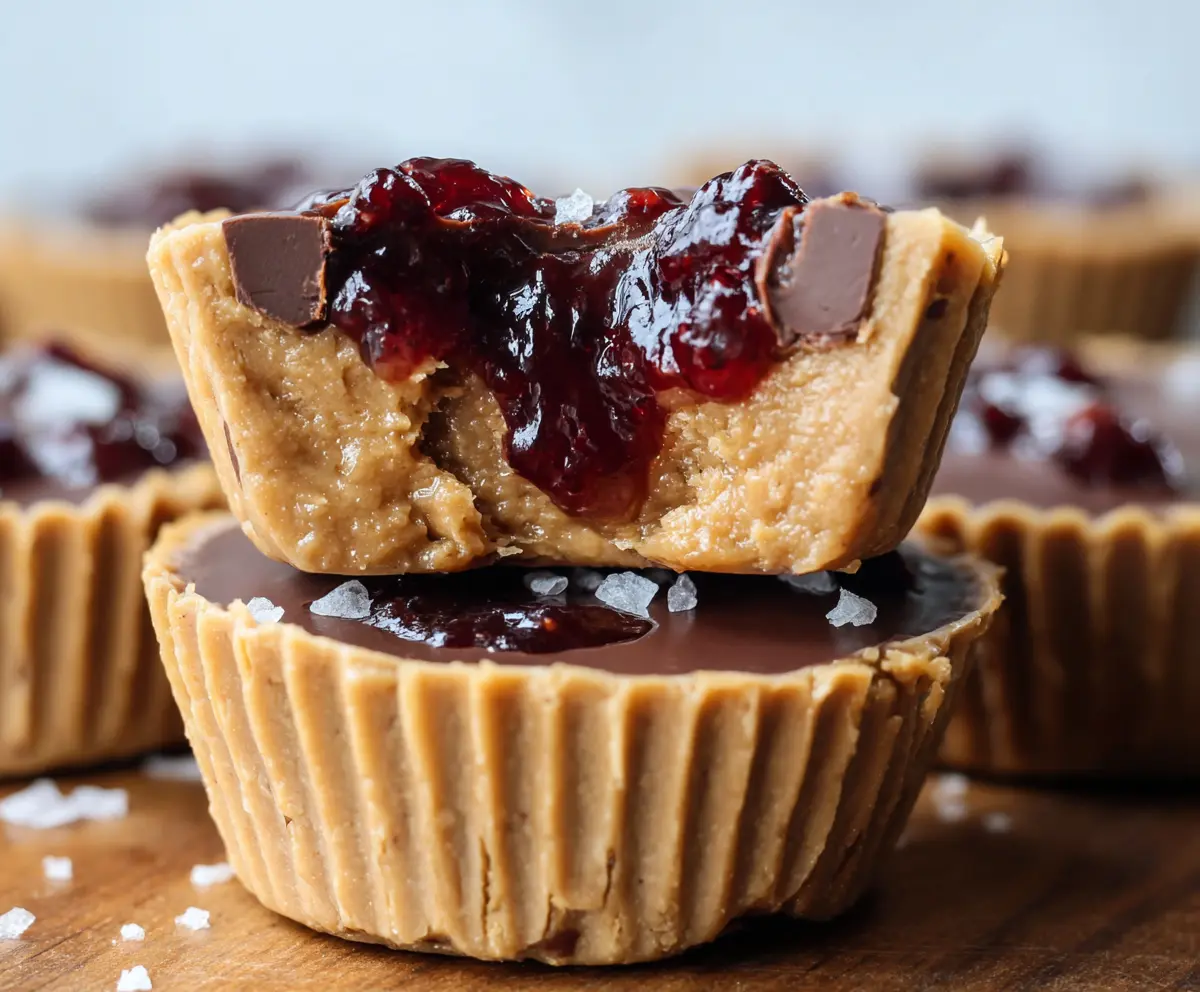
These Healthy Peanut Butter and Jelly Cups are a fun twist on a classic treat! They have a creamy peanut butter filling and a fruity jelly center, all wrapped in a delicious dark chocolate shell.
Perfect for snack time or dessert, they’re easy to make and guilt-free. I love making a batch and sharing them with friends—everyone gets excited when they see these cute cups coming out!
Key Ingredients & Substitutions
Natural Peanut Butter: This is the star of the cups! Choose either smooth or crunchy based on your texture preference. If you’re looking for a nut-free option, sunflower seed butter works great.
Coconut Oil: This helps create a creamy texture. If you don’t have it, you can use unsalted butter or a different neutral oil like avocado oil. Keep in mind the flavor may vary slightly.
Maple Syrup or Honey: Both are sweeteners that keep it healthy. For a vegan option, stick with pure maple syrup. If you’re watching sugar, consider stevia or a sugar-free syrup.
Dark Chocolate: Go for chocolate that’s at least 70% cacao for health benefits. If dairy is a concern, there are dairy-free dark chocolate options available. Regular semi-sweet chocolate also works if you prefer it a bit sweeter.
Fruit Jam or Jelly: Select a jam with no added sugar for a healthier option. You can use any fruit flavor you like! If you want it sugar-free, check for sugar-free fruit preserves at the store.
How Do I Achieve Smooth Chocolate Coating?
Melting chocolate without seizing it can be tricky. Here’s how to do it right:
- Use a double boiler or microwave. If using a microwave, melt in short bursts (about 20 seconds) to prevent overheating.
- Stir frequently as it melts. This ensures even heating and helps avoid lumps.
- If chocolate feels too thick, you can add a splash of coconut oil or a tiny bit of milk to smooth it out.
With these tips, you will have a smooth, luscious chocolate coating that pairs perfectly with the peanut butter filling!
Healthy Peanut Butter And Jelly Cups
Ingredients You’ll Need:
- 1 cup natural peanut butter (smooth or crunchy)
- 1/4 cup coconut oil, melted
- 2-3 tbsp pure maple syrup or honey (adjust for sweetness)
- 1/2 tsp vanilla extract
- 1/4 tsp salt (optional, depending on peanut butter saltiness)
- 1/2 cup dark chocolate chips or chopped dark chocolate (at least 70% cacao)
- 1/4 cup natural fruit jam or jelly (preferably no added sugar, e.g., raspberry or strawberry)
How Much Time Will You Need?
This recipe takes about 15 minutes to prepare, plus an additional 30 minutes to chill in the freezer. It’s a quick and fun treat to make, and the final result is well worth the wait!
Step-by-Step Instructions:
1. Prepare the Peanut Butter Mixture:
In a bowl, mix together the natural peanut butter, melted coconut oil, maple syrup (or honey), vanilla extract, and salt until everything is well blended and smooth. This mixture will create a delicious filling for our cups.
2. Line the Muffin Tin:
Grab a muffin tin and place paper cupcake liners inside each cup. This makes it super easy to remove the cups once they are set.
3. Create the Chocolate Base:
Now, let’s melt the dark chocolate! You can use a double boiler or microwave it in 20-second intervals, stirring between each burst until it’s all smooth and melted. Make sure not to overheat it!
4. Layer the Chocolate:
Using a spoon, add about 1 teaspoon of the melted chocolate into the bottom of each cupcake liner. Tilt the liners gently to evenly coat the bottom. Then, pop the muffin tin into the freezer for about 5 minutes for the chocolate to harden.
5. Add the Peanut Butter Filling:
Once the chocolate is firm, remove the muffin tin from the freezer. Carefully spoon the peanut butter mixture on top of the hardened chocolate layer, filling each cup to about 3/4 full.
6. Add the Jelly Center:
With a small spoon or the back of a teaspoon, create a little indentation in the center of each peanut butter layer. Now fill each hole with about 1/2 teaspoon of your favorite jelly or jam. It adds a delicious fruity flavor!
7. Top with Chocolate:
Now that the jelly is in, spoon the remaining melted chocolate over the peanut butter and jelly layers, covering everything completely. This seals in the fillings!
8. Chill to Set:
Return the muffin tin to the freezer for at least 30 minutes or until the cups are completely solid. This helps the layers set perfectly.
9. Serve and Store:
Once they’re ready, remove them from the muffin tin and peel off the paper liners. Store any leftovers in an airtight container in the refrigerator or freezer until you’re ready to enjoy more of these delicious treats!
Enjoy your Healthy Peanut Butter And Jelly Cups, a delightful combination of flavors that are sure to satisfy both your sweet tooth and your cravings for something nutritious!
Can I Use Different Nut Butters?
Absolutely! You can substitute the peanut butter with almond butter, cashew butter, or even sunflower seed butter for a nut-free option. Just keep in mind that the flavor will change slightly depending on the nut butter you choose!
How Do I Store These Cups?
Store your Peanut Butter and Jelly Cups in an airtight container in the refrigerator for up to a week. They also freeze well! Just be sure to separate them with layers of parchment paper if stacking in the freezer, and they can last up to 3 months.
Can I Adjust the Sweetness?
Yes, feel free to adjust the sweetness to your liking! Start with 2 tablespoons of maple syrup or honey, taste the peanut butter mixture, and add more if you prefer it sweeter. Just keep in mind that the jelly also adds sweetness!
What If My Chocolate Seizes Up While Melting?
If your chocolate seizes, don’t worry! You can add a small amount of coconut oil or a bit of water to help smooth it out. Just be sure to add it gradually to avoid making it too runny.