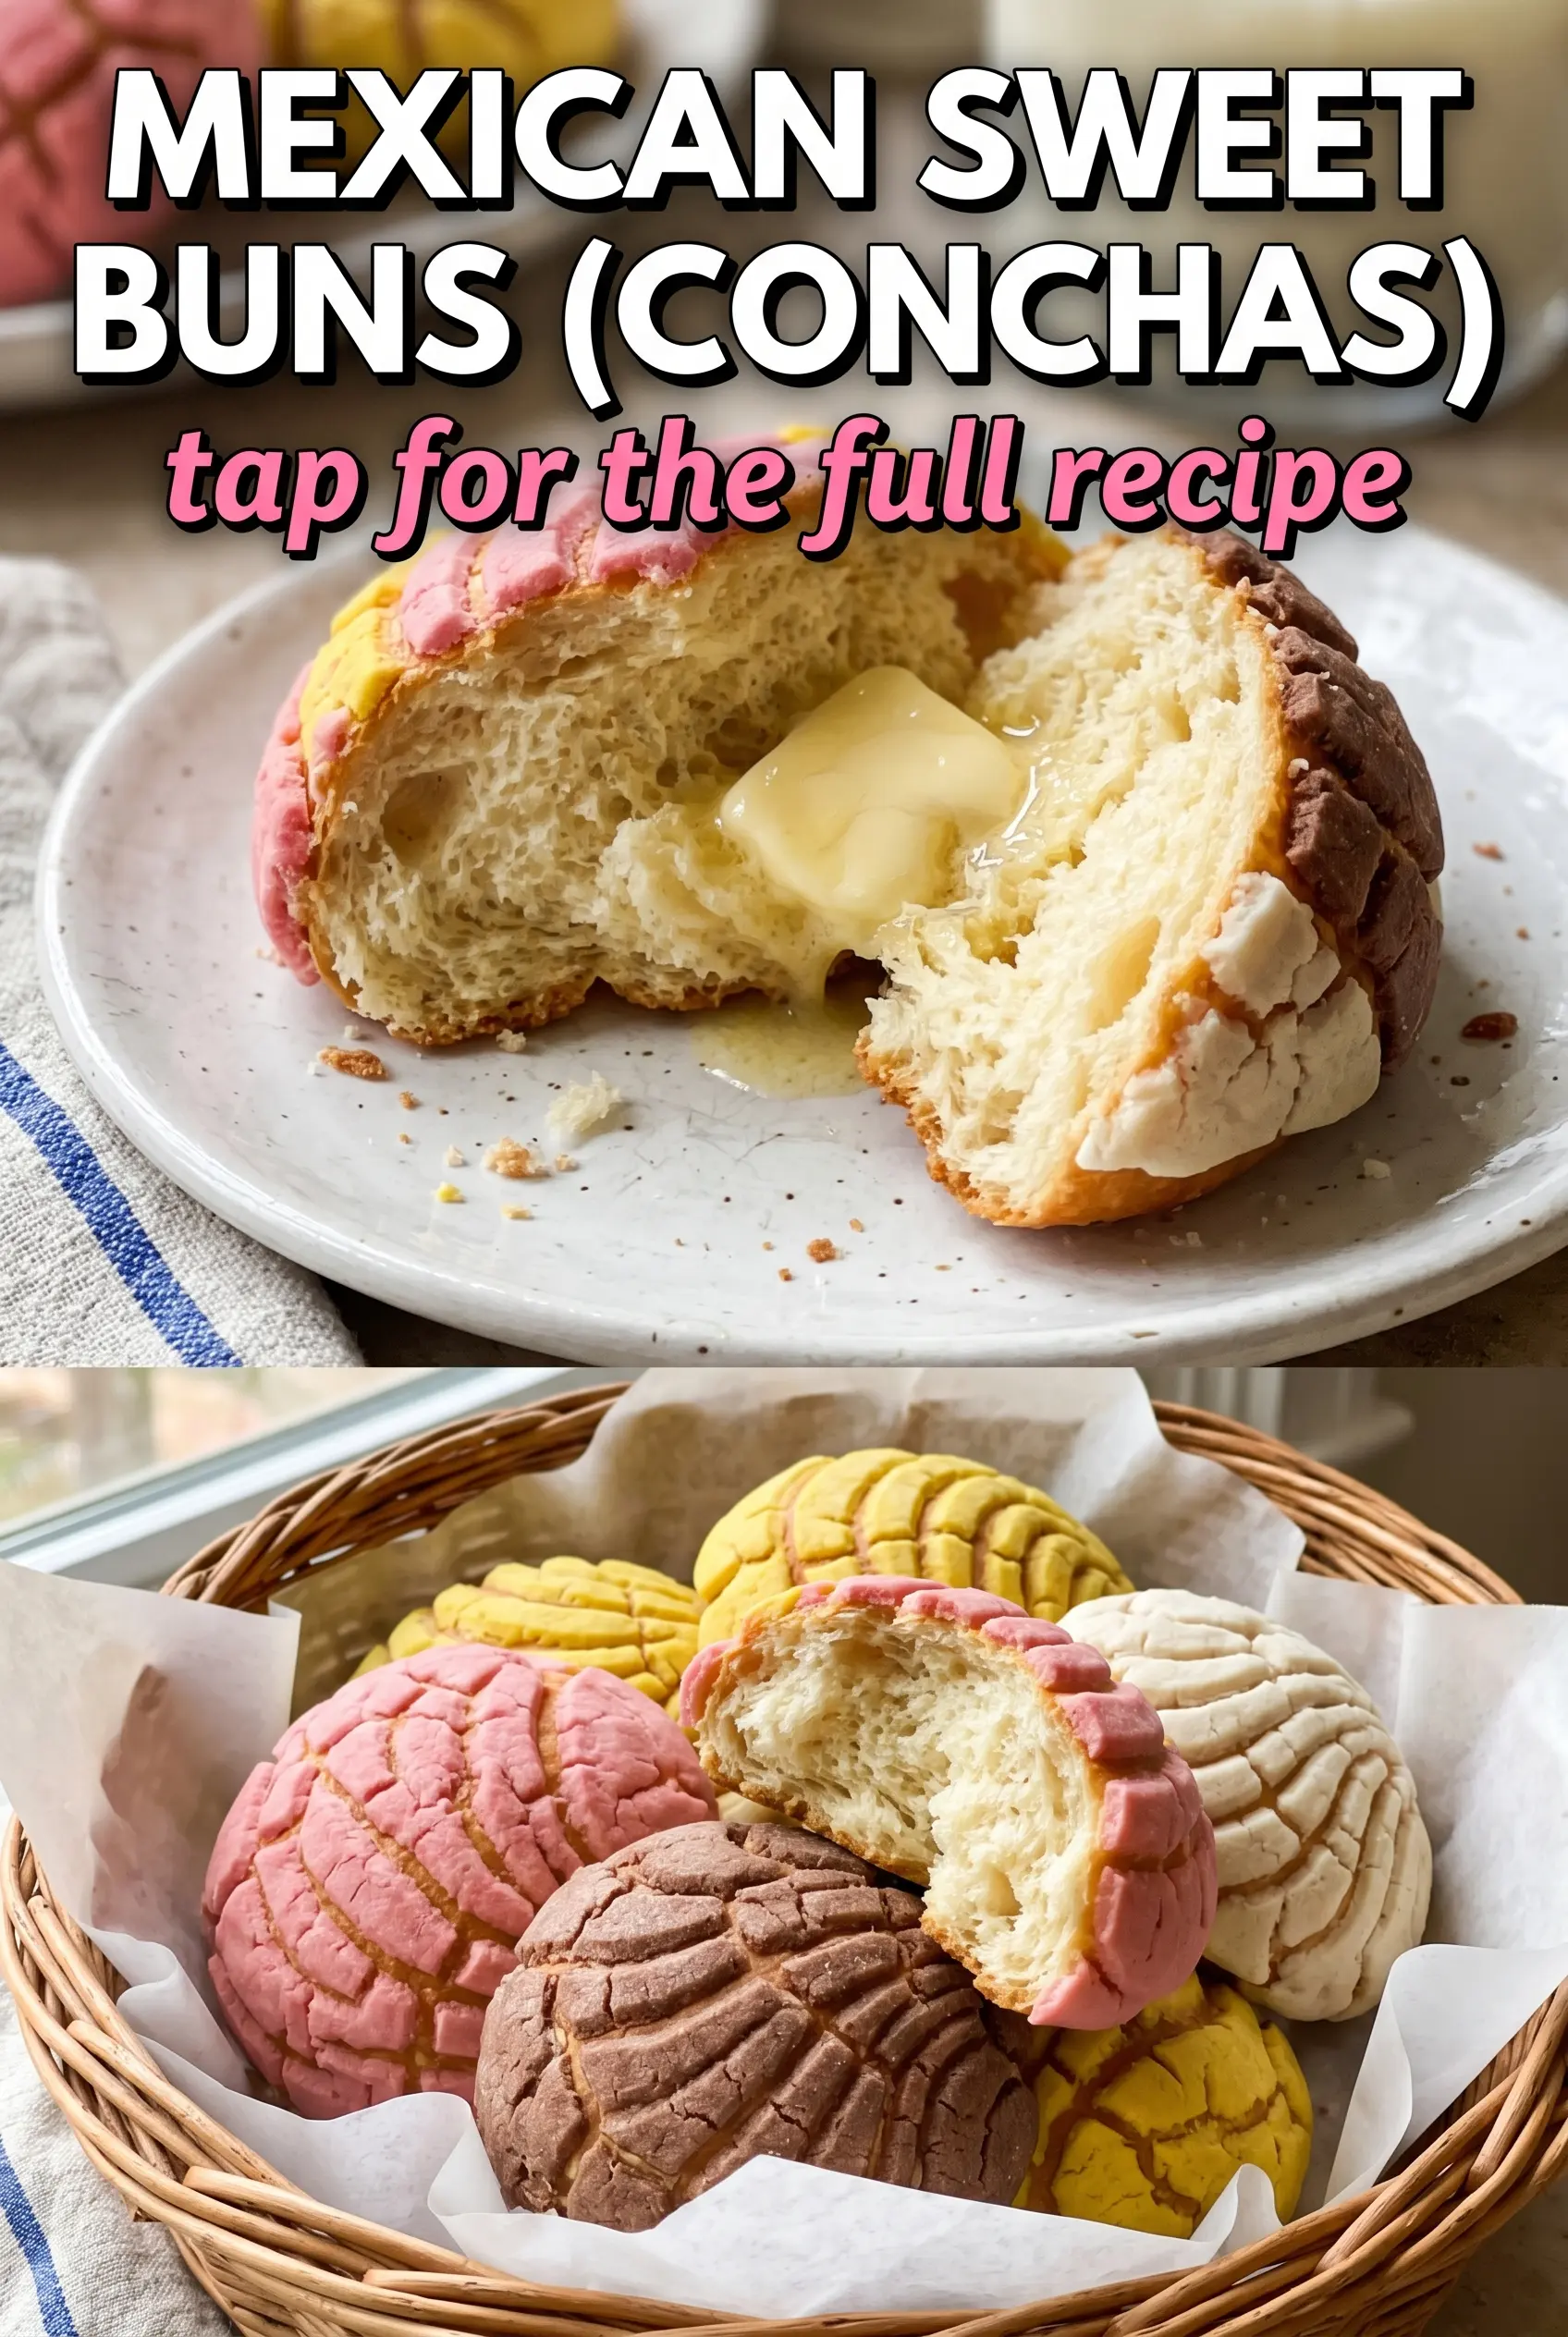
Mexican sweet buns with their signature shell-patterned tops bake up with a soft, enriched crumb and a tender, cookie-like crust that cracks just a little when you bite in. The contrast is what makes conchas worth baking at home: pillowy bread underneath, buttery sweetness on top, and those pastel colors that turn an ordinary tray into something people hover around before the buns have even cooled.
The dough here is enriched with milk, butter, eggs, and vanilla, which gives it that bakery-style softness without turning it heavy. The topping is where a lot of home bakers go wrong. If it’s too warm, it smears. If it’s too dry, it won’t hold the shell design. The sweet paste should feel pliable, almost like modeling clay, so you can press it onto the buns and score it cleanly before baking.
Below, you’ll find the trick that keeps the dough tender instead of dense, plus the little timing detail that helps the topping stay crisp and defined in the oven. Once you make these once, the process settles in fast.
The topping held its shell pattern perfectly, and the buns stayed soft even the next morning. I cut one open while it was still a little warm and the crumb pulled apart like the ones from our neighborhood panadería.
Love the soft crumb and shell-topped look of conchas? Save this Mexican sweet bun recipe for the next time you want bakery-style bread at home.
Why the Topping Has to Be the Right Texture Before You Score It
The topping on conchas does more than decorate the bread. It bakes into a thin, sweet shell that protects the top of the bun and gives you that classic crackled pattern. If the paste is too soft, the knife drags through it and the design collapses in the oven. If it’s too stiff, it won’t spread evenly and the shell pattern looks jagged instead of neat.
The buns themselves need a full rise before baking, or the topping can overpower the dough and make the finished bread feel dense. You want the rounds puffy and relaxed, not tight or tense. That gives the topping enough room to sit on top without sinking into the dough.
- Instant yeast — This keeps the rise straightforward and reliable. If you use active dry yeast, dissolve it in the warm milk first and add a few extra minutes to the first rise.
- Butter in both the dough and topping — The dough butter softens the crumb, while the topping butter gives the shell its tender, crumbly bite. Margarine won’t taste the same here and tends to make the topping greasy.
- Powdered sugar — This is what makes the topping smooth instead of grainy. Granulated sugar won’t give you the same paste or the same delicate finish.
- Food coloring — Gel color is the easiest way to get vivid pastel shades without thinning the topping. Use just a little at a time so the paste stays workable.
Building the Dough and Shell Pattern Without Losing the Shape
Mixing the Enriched Dough
Warm the milk until it feels just warm to the touch, not hot. Hot milk can weaken the yeast and make the dough sluggish. Once the wet and dry ingredients come together, the dough should look shaggy at first, then turn smoother as you knead. By the end of the kneading time, it should stretch a little before tearing and feel soft, not sticky.
Letting the First Rise Do Its Job
Cover the bowl and let the dough rise until doubled. The volume matters more than the clock, because a cool kitchen can slow things down. If you rush this stage, the buns bake up tight and the topping may crack in awkward places instead of forming a clean cap. A proper rise gives the bread its airy, bakery-style crumb.
Shaping and Topping the Buns
Divide the dough into even portions and roll each one into a smooth round. When the buns are puffy after the second rise, the topping should sit on top without needing to be pressed down hard. Roll the colored topping between sheets of plastic wrap so it stays even, then cut it into discs or shell shapes that match the buns. After that, score the design with a sharp knife. The cuts should be confident but shallow enough that you’re marking the paste, not slicing into the dough.
Baking to the Right Color
Bake until the buns are golden underneath and the topping looks set on top. The bottoms should sound slightly hollow when tapped, and the shell pattern should stay visible instead of melting into the bread. If you overbake them, the dough dries out before the topping has a chance to stay tender. Pull them as soon as the color deepens and the kitchen smells like warm butter and vanilla.
How to Adapt Conchas for Different Kitchens and Preferences
Dairy-Free Conchas
Swap the butter in both the dough and topping for a good plant-based butter that stays solid when chilled. Use an unsweetened non-dairy milk with a little body, like oat or soy, so the dough still bakes up soft. The flavor shifts a little, but the texture stays close if you keep the dough well-kneaded.
Different Colors for the Topping
Pink is classic, but purple, yellow, or pale green work just as well. Use gel coloring instead of liquid so the topping doesn’t turn loose or sticky. The flavor stays the same, but the visual contrast on the tray changes the whole feel of the bread.
Make Them a Little Less Sweet
You can reduce the granulated sugar in the dough slightly if you want a more bread-forward bun, but don’t cut the topping sugar too much or it loses its delicate shell texture. The topping is supposed to taste like a sweet crust, not just a decoration.
Storage and Reheating
- Refrigerator: Store in an airtight container for up to 4 days. The topping softens a little, but the buns stay usable.
- Freezer: These freeze well after baking. Wrap each bun individually, then store in a freezer bag for up to 2 months.
- Reheating: Warm at 300°F for 5 to 8 minutes or microwave briefly if you only need the center warmed. Don’t overheat them or the topping turns dry and the crumb tightens up fast.
Questions I Get Asked About This Recipe
Mexican Sweet Buns (Conchas)
Ingredients
Equipment
Method
- Combine warm milk, granulated sugar, softened butter, eggs, and vanilla extract in a bowl until smooth.
- Whisk all-purpose flour, instant yeast, and salt in a separate bowl.
- Mix wet ingredients into dry ingredients until a soft dough forms, with no dry flour pockets.
- Knead the dough for 8-10 minutes until smooth and elastic, using firm hand pressure to develop structure.
- Transfer dough to a lightly greased bowl, cover, and let rise for 1 hour until doubled in size.
- Divide the risen dough into 12 portions and shape each into a round bun.
- Place buns on a baking sheet and cover loosely.
- Let buns rise for 30 minutes until noticeably puffy.
- Mix softened butter, powdered sugar, and all-purpose flour until the topping is a cohesive, moldable paste.
- Divide the topping and tint each portion with food coloring (pink, purple, etc.) to create contrasting pastel colors.
- Roll colored topping between plastic wrap and cut into shell shapes, stacking pieces so they hold their pattern.
- Place shell pieces on the buns and score with a knife to create the shell pattern, pressing gently so the design adheres.
- Bake at 375°F for 16-18 minutes until the buns are golden on top and sound set when tapped.