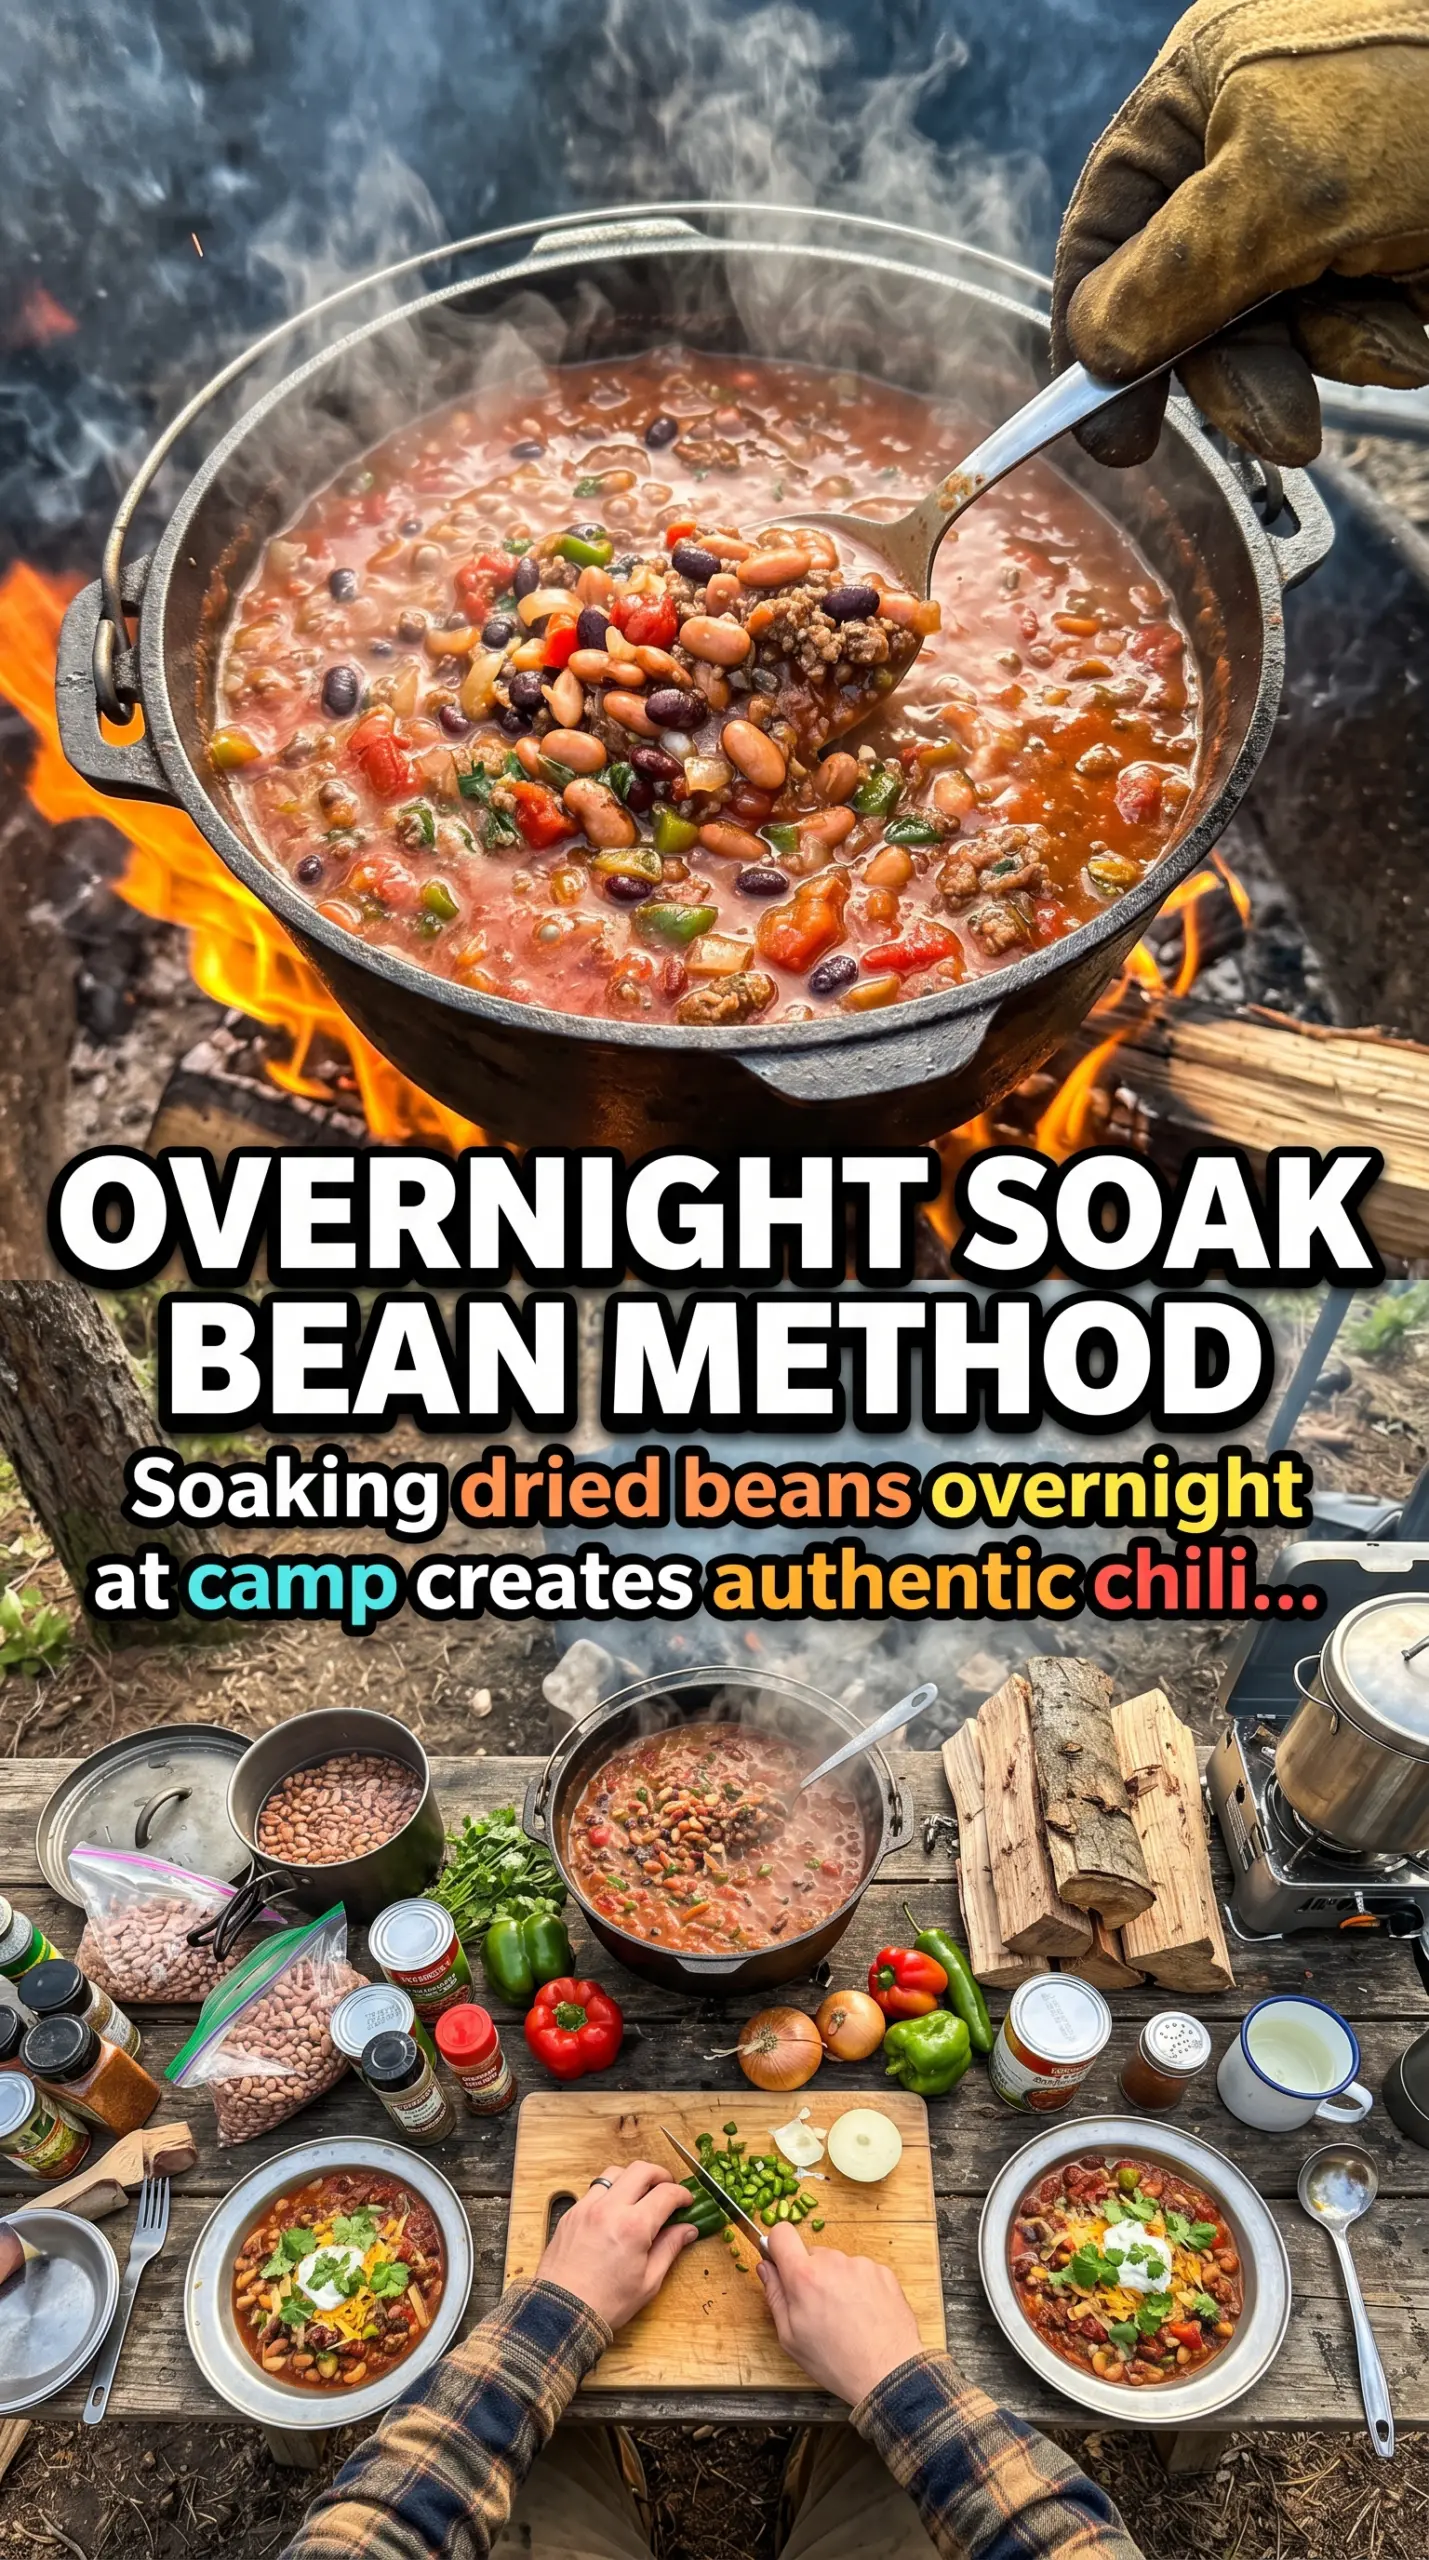
Bubbling chili that’s cooked over a campfire always tastes a little deeper and a little more satisfying than the stovetop version. The beef gets a better browning, the tomatoes mellow as they simmer, and the whole pot picks up that steady, smoky heat that makes people drift back for a second bowl. This is the kind of dinner that earns its place on repeat because it feeds a crowd without turning into a project.
The trick is building the base in stages. Brown the beef first so it can leave behind some flavorful bits in the Dutch oven, then soften the onion and bell pepper in the same pot before the beans, tomatoes, and spices go in. Tomato paste matters here too; it gives the chili body and keeps it from tasting thin, which is especially important when you’re cooking outdoors and the heat can be a little less precise than your kitchen burner.
Below, I’ll walk through the part that matters most: getting the simmer steady enough that the chili thickens instead of just warming through. I’ve also included a few ways to adapt it for what you’ve got on hand, plus the storage notes that help if you end up with leftovers.
The chili thickened up beautifully in the Dutch oven and the beans held their shape without turning mushy. We ate it with crackers and sour cream around the fire, and my husband went back for seconds before I’d even sat down.
Campfire chili with beef, beans, and a thick tomato base is the kind of Dutch oven dinner worth saving for your next night around the fire.
The Secret to Chili That Tastes Rich Instead of Watery
The difference between a chili that tastes finished and one that tastes like spiced soup usually comes down to two things: browning and reduction. If the beef just turns gray, you’ve missed the chance to build flavor at the bottom of the pot. You want actual browning, because those dark bits dissolve into the tomatoes and broth-like juices later and give the whole pot a fuller, meatier taste.
The other trap is rushing the simmer. A steady uncovered or loosely covered simmer helps the liquid cook down so the chili clings to the meat and beans instead of pooling around them. Campfire heat can swing fast, so the goal is a lazy bubble, not a hard boil. If the pot is roaring, the edges will scorch before the center has time to thicken.
What Each Ingredient Is Actually Doing in This Pot
- Ground beef — This gives the chili its backbone. An 80/20 blend is ideal because it browns well and leaves enough flavor in the pot, but you can use leaner beef if you drain it lightly and accept a slightly less rich finish.
- Onion and bell pepper — These soften the savory edges of the beef and add sweetness as they cook. Dice them small so they nearly disappear into the chili instead of staying chunky and crunchy after the simmer.
- Kidney beans — They bring body and make the pot feel substantial. If you swap in pinto beans, the chili will be a little softer and less firm, which works fine if that’s what you like.
- Diced tomatoes and tomato paste — The tomatoes provide the base, but the paste is what gives the chili its deep red color and thickness. Don’t skip it; no substitute gives the same concentrated finish.
- Chili powder and cumin — Chili powder provides the main seasoning, while cumin adds warmth and that classic chili smell the second the lid comes off. If your chili powder is old and dull, the whole pot will taste flatter than it should.
Getting the Dutch Oven Chili from Browning to Simmer
Brown the Beef Until It Actually Colors
Set the Dutch oven over hot coals or a steady fire and cook the ground beef until it loses its pink color and starts picking up browned edges. Those browned bits on the bottom are part of the flavor, so don’t stir constantly. If there’s a lot of excess grease, drain off just enough to keep the chili from turning oily, but leave the fond behind.
Soften the Vegetables in the Same Pot
Add the onion and bell pepper straight into the beef drippings and cook until they soften and the onion turns translucent. The vegetables should smell sweeter and look glossy, not browned. If they’re still firm when the tomatoes go in, they’ll stay a little raw-tasting in the finished chili.
Build the Chili Base and Let It Breathe
Stir in the beans, tomatoes, tomato paste, chili powder, cumin, salt, and pepper until everything looks evenly coated and the tomato paste disappears into the liquid. Bring it up to a simmer, then lower the heat so the pot barely bubbles. Covering it fully can trap too much moisture, so crack the lid or stir occasionally if you want a thicker chili.
Finish with a Slow Simmer
Cook for 35 to 40 minutes, stirring every so often so the bottom doesn’t catch. The chili is ready when it looks thick and glossy, the beans have absorbed the seasoning, and the liquid no longer looks thin around the edges. Taste it near the end and add more salt only if it needs it; the flavors tighten up as the chili reduces.
Three Practical Ways to Adjust This Campfire Chili
Make it beef-free
Use a plant-based ground or extra beans in place of the beef. You’ll lose some of the deep browned flavor, so add a little extra chili powder and let the tomatoes simmer a few minutes longer to build body. The result is still hearty, just a little lighter.
Turn up the heat
Add diced jalapeño with the onion and bell pepper, or stir in a pinch of cayenne with the chili powder. This gives the pot a sharper finish without changing the texture. Start small; fire-cooked chili can taste hotter once it reduces.
Stretch it for a bigger crowd
Add an extra can of beans and another can of tomatoes, then increase the seasoning slightly and simmer a bit longer. The pot will feed more people, but it’ll also need that extra reduction time so it doesn’t end up thin.
Storage and Reheating
- Refrigerator: Keeps well for 4 days. It thickens as it sits, which is a good thing for chili.
- Freezer: Freezes well for up to 3 months in airtight containers. Leave a little room at the top for expansion.
- Reheating: Warm it gently on the stove over low heat with a splash of water if needed. High heat can scorch the bottom before the center is hot.
Answers to the Questions Worth Asking

Campfire Chili
Ingredients
Equipment
Method
- Brown ground beef in a Dutch oven over a campfire, stirring occasionally until no longer pink. Add onion and bell pepper and cook for 5 minutes, until the vegetables soften.
- Add kidney beans, diced tomatoes, tomato paste, chili powder, cumin, salt, and pepper to the Dutch oven. Stir to combine and bring to a simmer, with visible bubbling around the edges.
- Cover the Dutch oven and cook for 35-40 minutes, stirring occasionally to prevent sticking. Look for a steady simmer and a chili that thickens as it bubbles.
- Ladle the chili into bowls and serve hot. Top with shredded cheese, sour cream, and crackers.