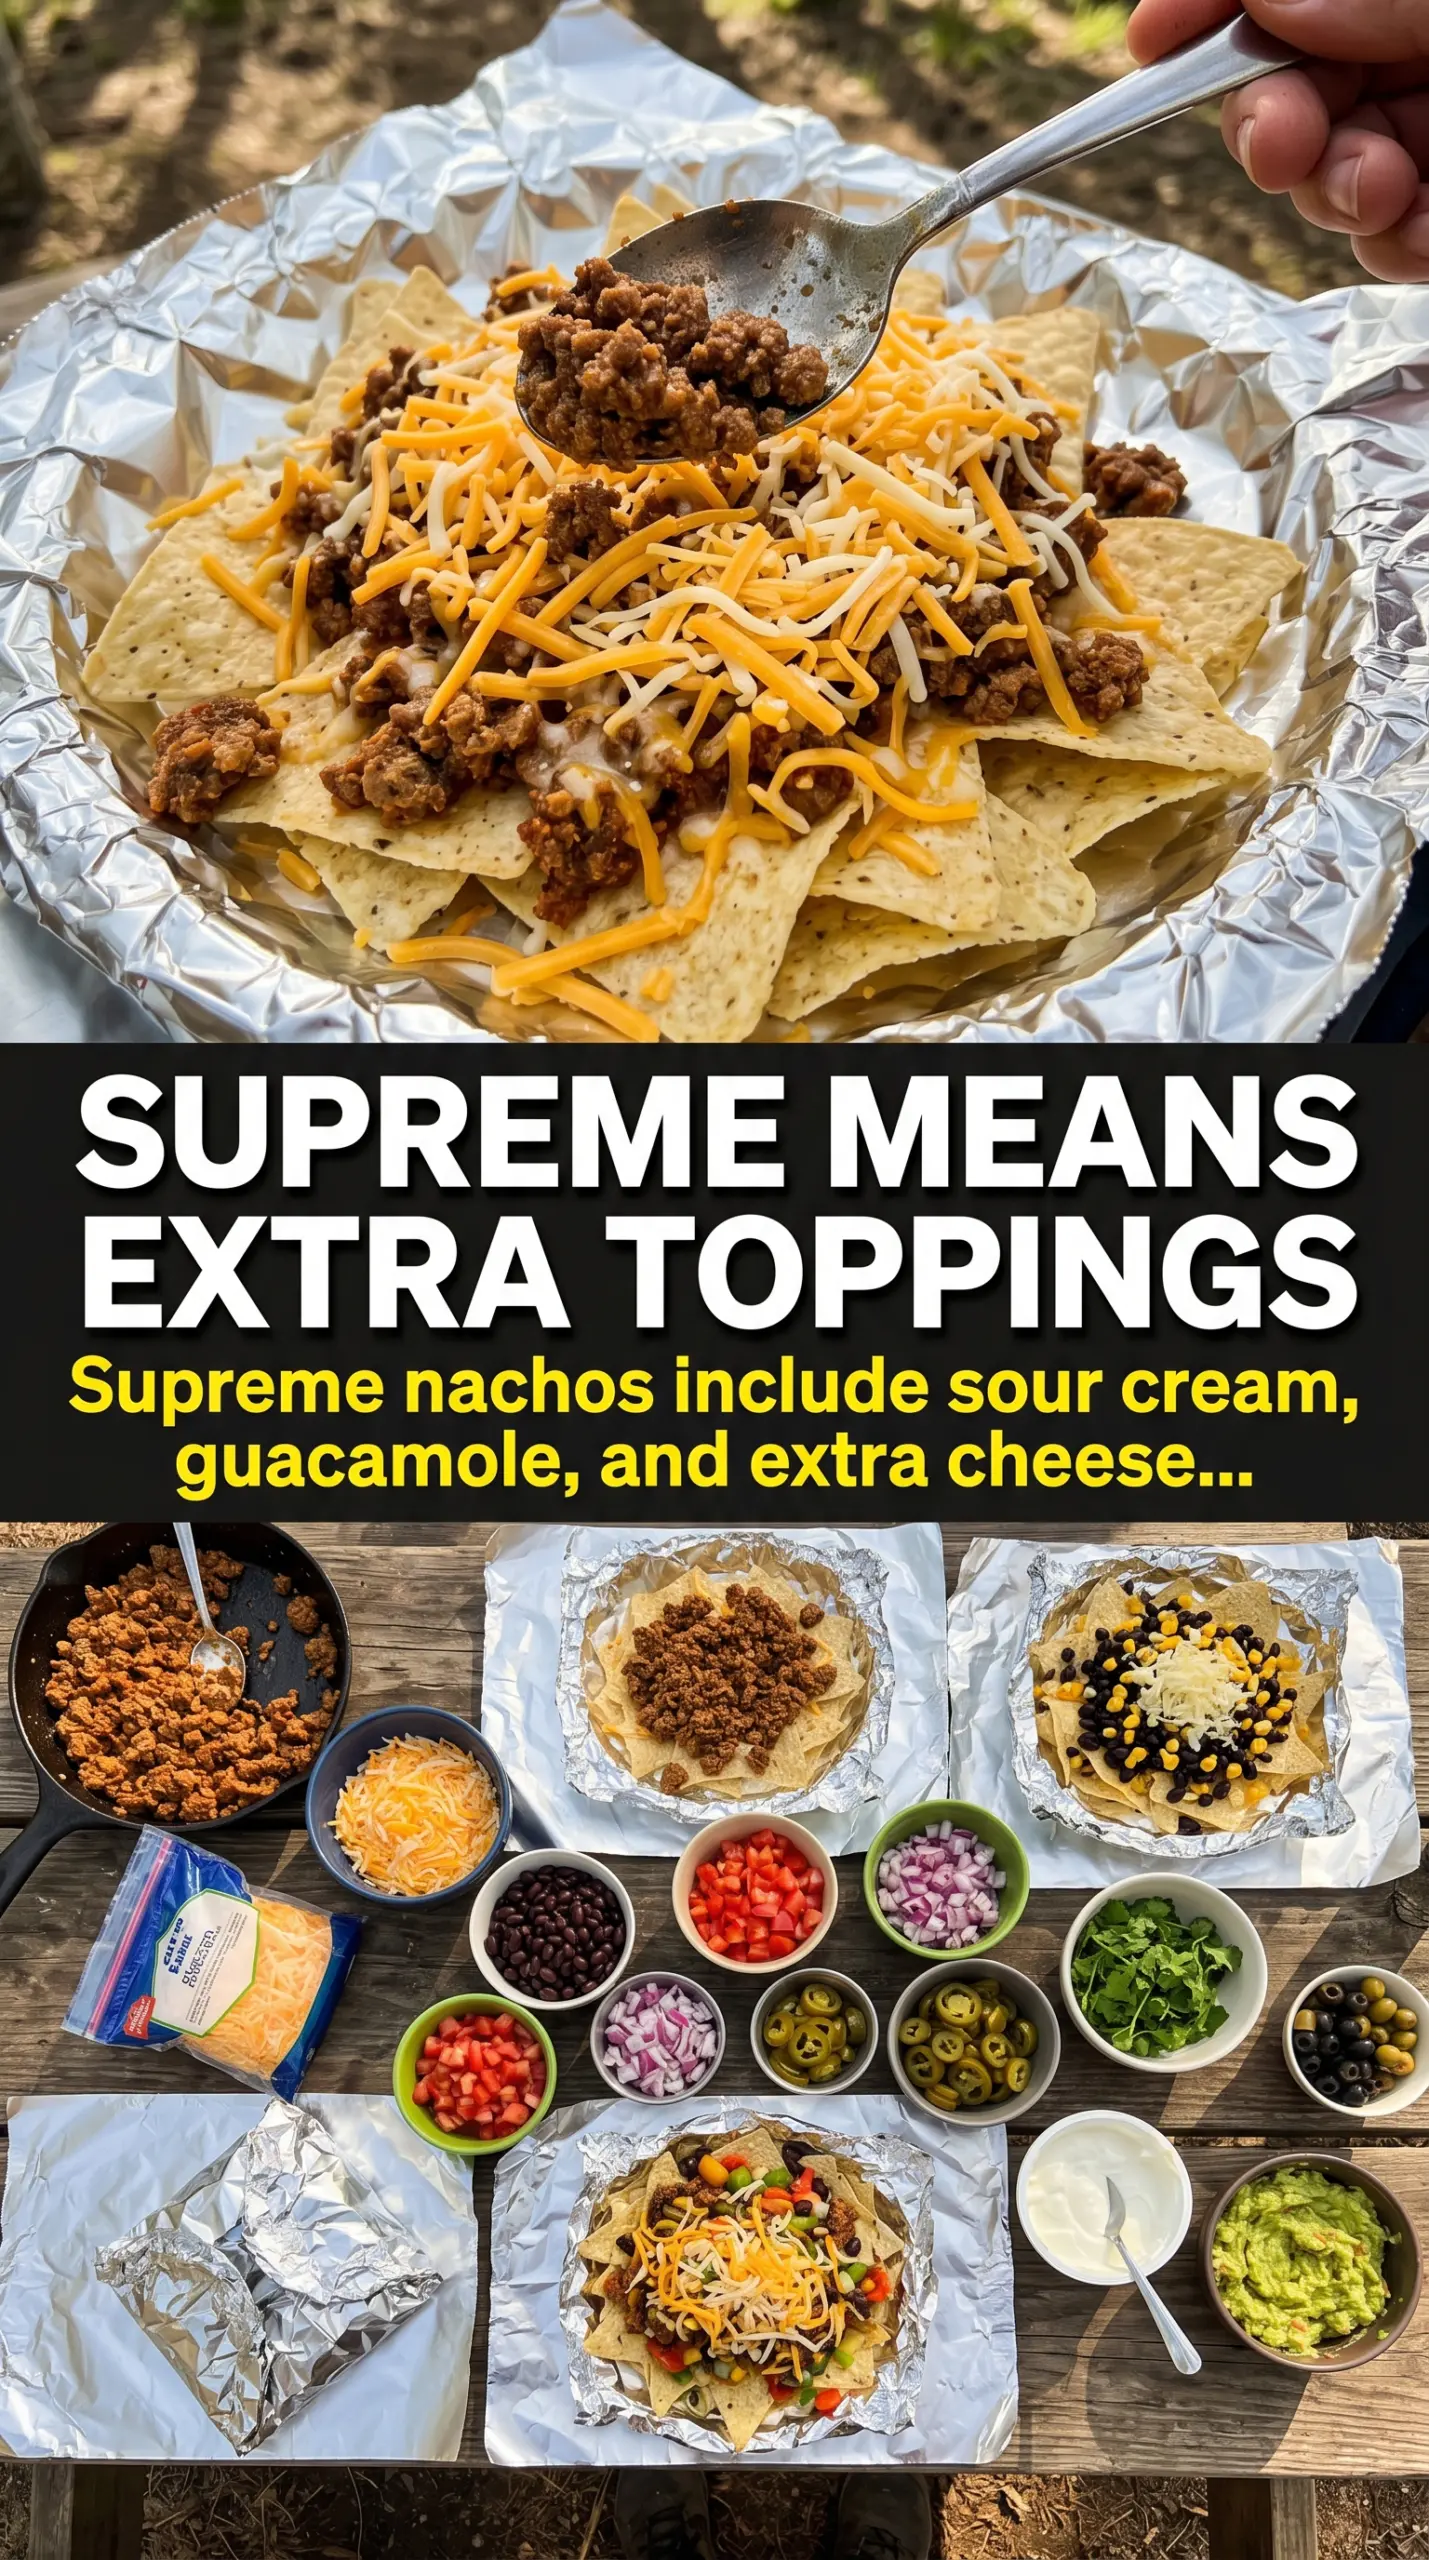
Piled high with melted cheese, seasoned beef, and a tangle of cold toppings, campfire nachos are the kind of skillet dinner that disappears before it even has a chance to cool. The best version doesn’t leave you with a sad layer of burnt chips on the bottom and dry chips on top. It gives you crisp edges, gooey pockets of cheese, and enough topping coverage that every scoop feels loaded.
The trick is building the pan in layers and keeping the heat steady. Tortilla chips on their own can go from crunchy to brittle fast, so half the chips go down first, then the beef, beans, corn, and cheese, and then everything gets repeated. That gives the cheese a chance to melt into the chips instead of sliding off in one heavy sheet, which is what makes the whole skillet hold together when you dig in.
Below, I’ll walk through the little details that keep these nachos from getting soggy or scorched, plus a few smart swaps if you’re cooking for a crowd and need to work with what you’ve got.
The cheese melted right into the chips and the bottom layer stayed crisp instead of turning into mush. I used my cast iron over the fire and it was gone in minutes.
Campfire nachos supreme come together fast and stay crisp where it counts — save this skillet method for your next crowd-size appetizer.
The Real Trick to Campfire Nachos: Keeping the Bottom Layer Crunchy
The mistake most people make is loading every chip at once and then parking the pan over hot coals until the cheese gives up. That sounds efficient, but it turns the bottom layer into a steamy mess before the top layer even softens. Layering the chips and toppings in two rounds spreads the weight out and gives the cheese somewhere to melt into instead of sliding around on top.
Medium heat matters here. If the fire is screaming hot, the chips at the edge scorch before the cheese gets a chance to melt in the center. You want steady heat under the skillet or pan, not direct flame licking up the sides. That slower melt is what gives you those stretchy, cohesive scoops instead of a pile of broken chips.
- Cast iron skillet: The best choice if you want even heat and crisp edges. It holds temperature well, which helps the cheese melt without scorching the chips.
- Aluminum pan: A good backup for camping when weight matters. It works, but it heats faster and can hotspot, so keep an eye on the edges.
- Ground beef: Taco-seasoned beef gives the nachos their backbone. Drain off excess grease before layering or the chips will soften faster than you want.
- Black beans and corn: These add bulk and a little sweetness, but they also bring moisture. Let them drain well so the skillet doesn’t get watery.
What Each Layer Is Doing in This Skillet
- Tortilla chips: Sturdy restaurant-style chips hold up better than thin ones. If the chips are fragile, the weight of the beef and beans will crush them before the cheese finishes melting.
- Shredded Mexican cheese blend: Pre-shredded cheese melts nicely and gives you a mix of stretchy and creamy texture. Freshly grated cheese works too, but it takes a little more prep and may melt a touch smoother.
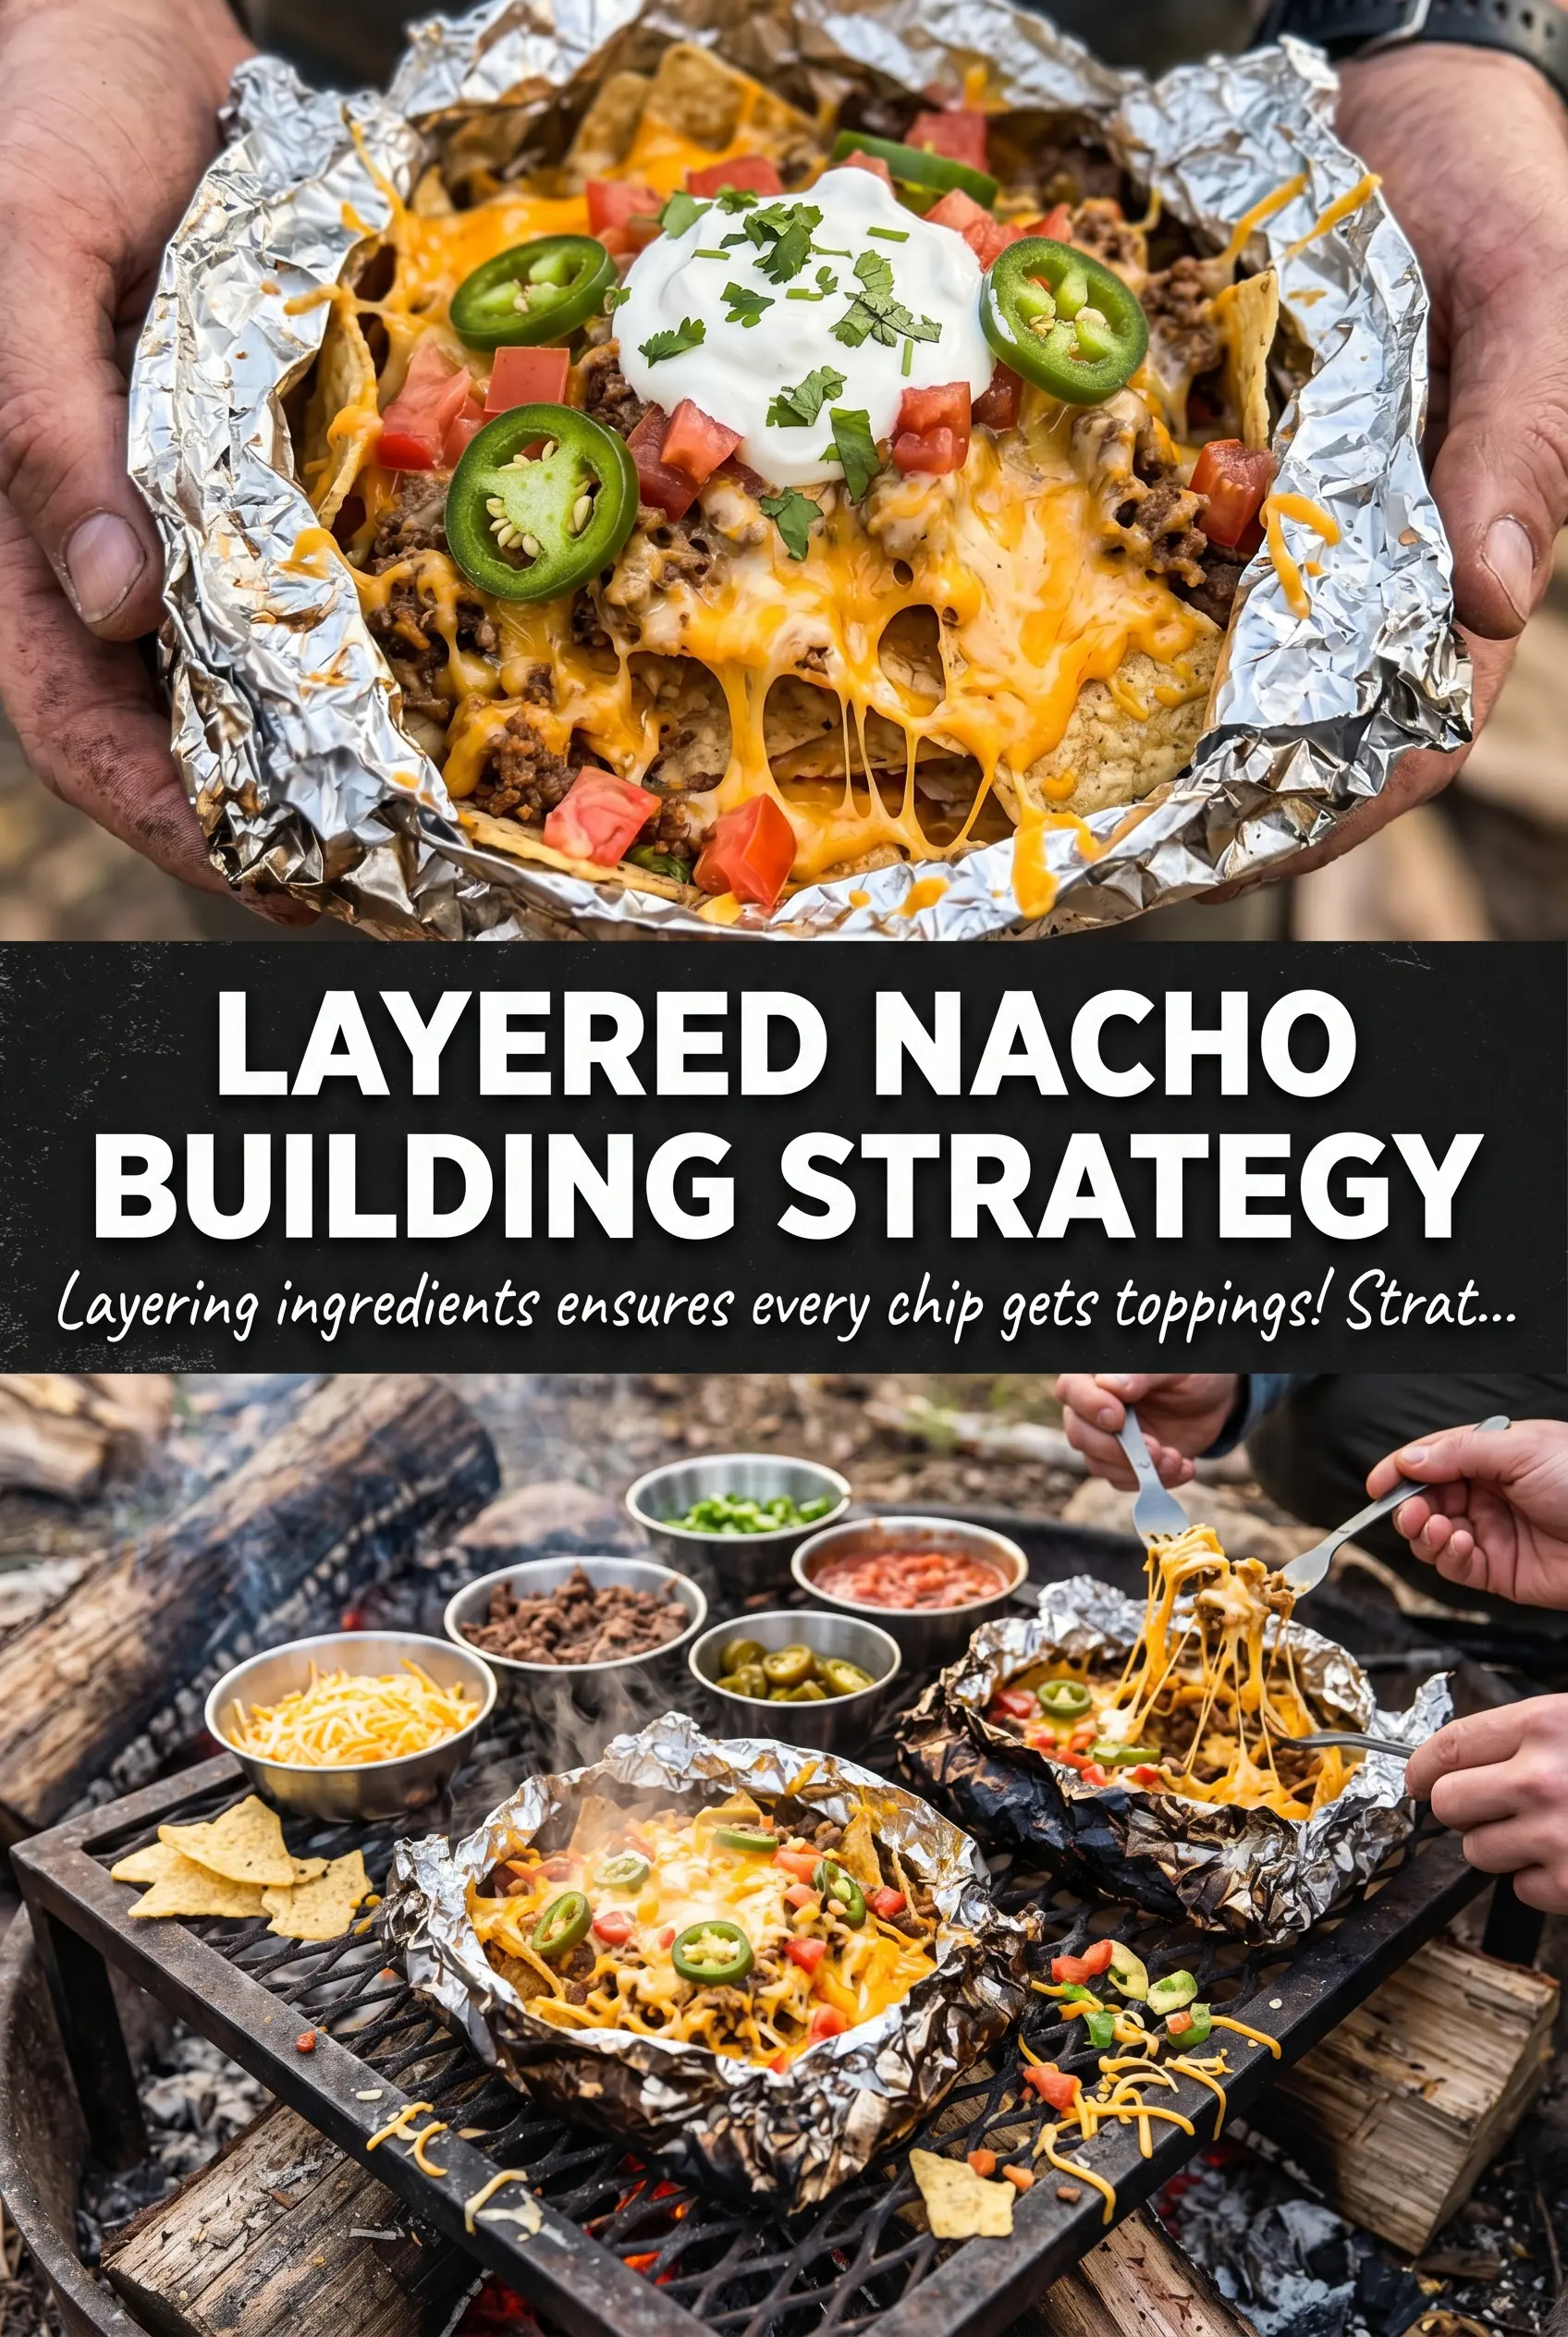
- Tomatoes, jalapeños, sour cream, guacamole, and cilantro: These go on after the skillet comes off the heat. Adding them earlier steals heat from the cheese and can leave you with warm toppings and lukewarm nachos, which is not the point.
- Lime wedges: The squeeze of acid wakes up the beef and cuts through the richness. Don’t skip it if you want the whole pan to taste balanced instead of heavy.
The 15 Minutes That Matter Over the Fire
Build the Base in Two Passes
Start with half the chips in a wide cast iron skillet or aluminum pan. Add half the beef, beans, corn, and cheese, then repeat with the remaining chips and toppings. That second layer gives the top of the pan a little protection while the lower layer heats through, which helps the whole skillet melt evenly instead of drying out on top.
Let the Cheese Melt Slowly
Set the skillet over medium heat on a campfire grate. You want gentle bubbling around the edges and cheese that turns glossy and soft all the way across the pan. If the bottom starts to smoke, the fire is too hot and the chips will taste burned before the center is ready.
Finish With Cold Toppings Right at the End
Pull the pan from the heat as soon as the cheese is melted and the chips at the edge are just starting to brown. Add tomatoes, jalapeños, sour cream, guacamole, cilantro, and lime wedges immediately. If you wait too long, the residual heat keeps cooking the chips and the whole pan loses that crisp-soft contrast.
What to Change When You Need to Feed a Different Crowd
Dairy-Free Nachos
Use your favorite dairy-free shredded cheese and swap the sour cream for a plant-based version. The texture will be a little less stretchy, but the beef, beans, and toppings still carry the skillet.
Vegetarian Campfire Nachos
Skip the beef and double the black beans and corn, or add seasoned crumbled plant-based meat if you want a heartier pan. You’ll lose some of the savory depth from the beef, so a little extra taco seasoning or smoked paprika helps bring it back.
Extra-Crunchy Version
Use a thicker chip and keep the toppings closer to the center of the skillet, leaving the outer edge lighter. That keeps the rim from overcooking while the middle melts, which is the best move if your fire runs hot.
Storage and Reheating
- Refrigerator: Store leftovers in an airtight container for up to 2 days. The chips will soften, but the flavor stays good.
- Freezer: Don’t freeze assembled nachos. The chips turn soggy and the fresh toppings don’t thaw well.
- Reheating: Reheat the beef, beans, and cheese mixture separately if you can, then spoon it over fresh chips. If you reheat the full skillet, use low oven heat so the chips don’t burn before the center warms.
Answers to the Questions Worth Asking
Campfire Nachos Supreme
Ingredients
Equipment
Method
- Layer half the tortilla chips in a large cast iron skillet or aluminum pan so they form an even base, visibly filling the bottom in a single mound. Keep the chips loose for better crispness once heated.
- Top with half the ground beef, black beans, corn, and Mexican cheese blend, spreading each layer to the edges for consistent melt coverage. Aim for cheese on top so it can glue layers together.
- Add remaining tortilla chips and repeat the beef, beans, corn, and remaining cheese. Press lightly only if needed so the stack holds shape.
- Place the skillet on a campfire grate over medium heat for 12-15 minutes until the cheese melts and looks glossy and bubbly. Watch for steady bubbling and a stretchy cheese pull when you gently lift a corner.
- Remove from heat and top immediately with tomatoes, sliced jalapeño, sour cream, guacamole, and chopped cilantro. Add toppings after cooking so the chips stay crisp instead of steaming.
- Serve right away with lime wedges on the side for squeezing over each bite. The lime brightness is best immediately after assembling.