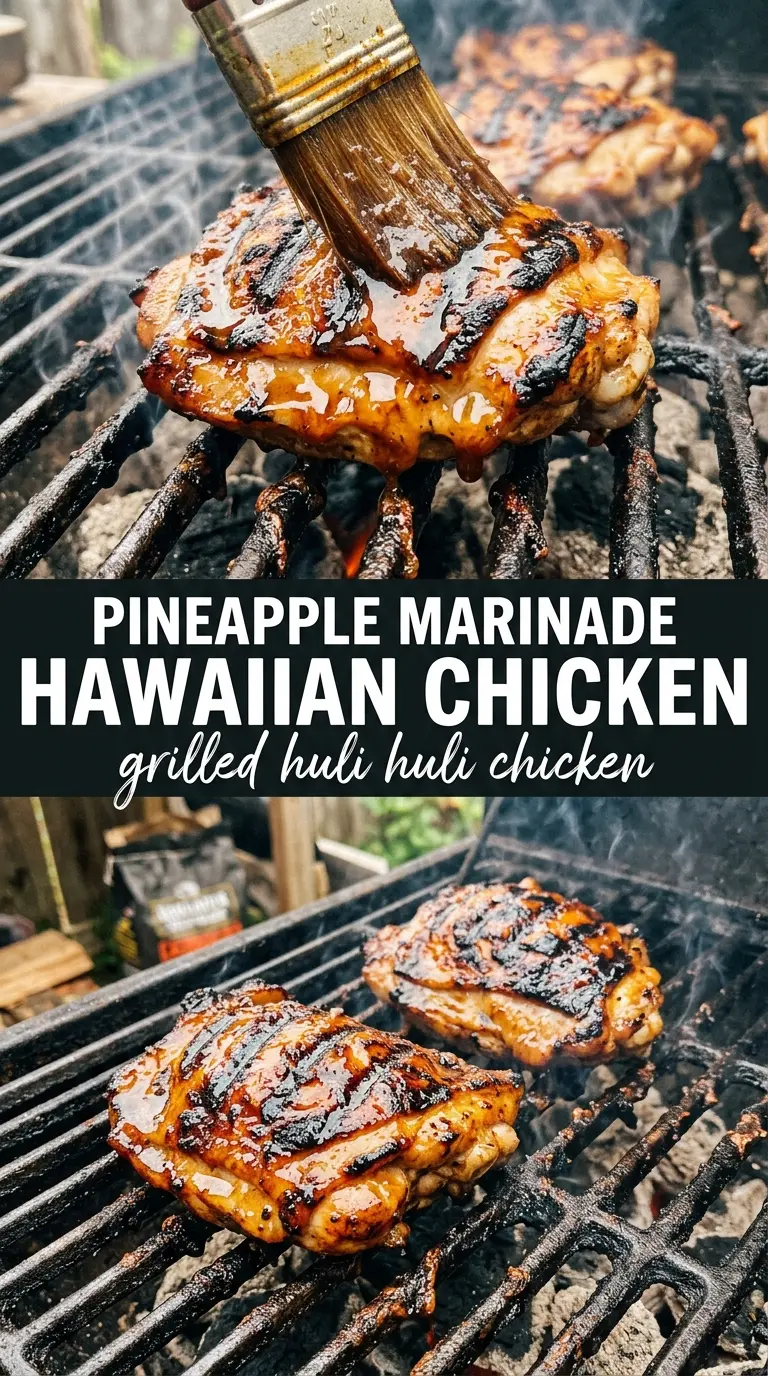
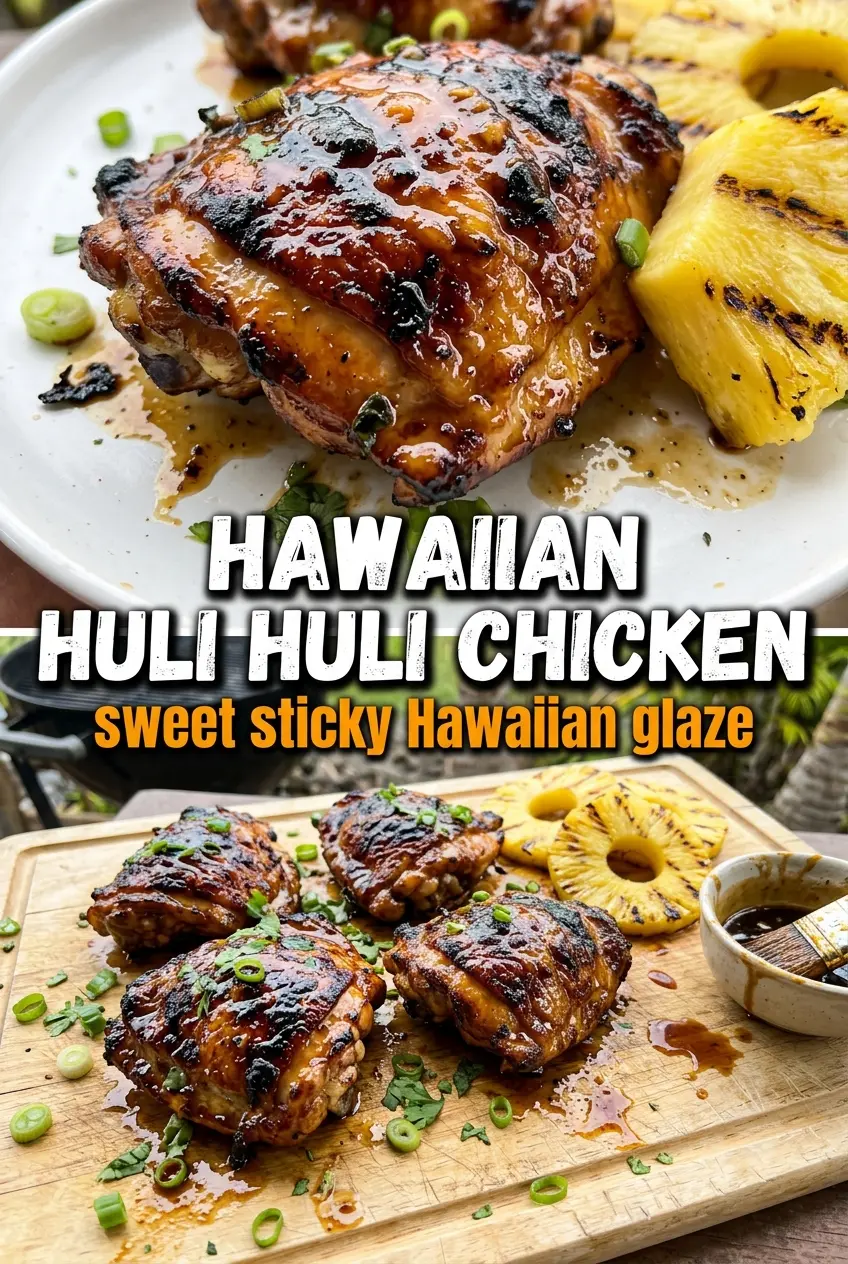
Sticky, charred Grilled Huli Huli Chicken hits that sweet-savory spot that keeps people coming back for one more piece. The glaze clings to the chicken instead of sliding off, and when the edges catch the fire just right, you get a little smoke, a little caramel, and a lot of flavor in every bite.
The trick is balance. Brown sugar and pineapple juice bring the sweetness, but soy sauce, ginger, garlic, and a little sesame oil keep it from tasting flat. I also like reserving part of the marinade for basting, because that’s what builds the shiny, lacquered finish without drowning the chicken on the grill.
Below, I’m walking through the small details that matter: how long to marinate, why frequent turning helps, and what to watch for so the glaze gets sticky instead of burnt.
The chicken stayed juicy even after all that basting, and the glaze got sticky and caramelized without turning bitter. My husband kept sneaking pieces off the platter before dinner was even ready.
Save this sticky, charred Huli Huli chicken for your next grill night.
The Marinade Has to Work Hard Before the Grill Does
Huli Huli chicken lives or dies on the marinade. If it tastes weak in the bowl, it’ll taste weak on the grill, even after basting. The soy sauce brings salt and depth, the brown sugar helps the glaze darken, and the pineapple juice adds a gentle fruit note that fits the Hawaiian-style profile without making the chicken taste like dessert.
The part people usually miss is the balance between time and texture. A short marinade won’t give you much flavor penetration, but a very long soak can start to soften the outside of the chicken too much, especially if you use pineapple juice that’s overly sharp. Two to eight hours is the sweet spot here, and thighs or legs hold up better than lean cuts because they stay juicy over the heat.
What Each Ingredient Is Actually Doing in This Glaze
- Chicken thighs or legs — Dark meat is the right choice here because it stays tender while the sugars in the marinade caramelize. Breasts can work, but they need much tighter attention and usually dry out before the glaze gets where it needs to go.
- Soy sauce — This is the salty backbone of the marinade. Use a regular soy sauce, not low-sodium if you want the glaze to taste bold enough after grilling.
- Brown sugar — This is what gives you that sticky finish and helps the chicken pick up color on the grill. Packed brown sugar matters here; loose measurements make the glaze thin and less clingy.
- Pineapple juice — It adds sweetness and a soft tropical acidity that plays well with ginger and garlic. Fresh juice is fine, but bottled works too as long as it isn’t heavily sweetened.
- Ginger and garlic — These keep the sauce from reading as just sweet barbecue glaze. Freshly grated ginger is worth it because dried ginger won’t give the same sharp, bright finish.
- Sherry or chicken broth — Sherry adds a little roundness and depth; broth gives you a more savory version. Either one loosens the marinade enough to coat well without watering it down.
- Sesame oil — A small amount goes a long way. It’s there for aroma, not as a main flavor, and too much will take over the whole grill vibe.
Turning, Basting, and Waiting for the Glaze to Set
Build the marinade first
Whisk the soy sauce, brown sugar, ketchup, pineapple juice, sherry, ginger, garlic, and sesame oil until the sugar dissolves as much as it can. The marinade should look glossy and a little thick, not grainy at the bottom of the bowl. Reserve half a cup before the chicken goes in so you have a clean basting portion later. If you use the same raw marinade on finished chicken, you’ll carry uncooked juices back onto the grill.
Let the chicken soak long enough
Put the chicken in the marinade and refrigerate it for 2 to 8 hours. Less than two hours leaves the flavor on the surface; much longer than that can make the texture too soft around the edges. Turn the chicken once or twice if you can so every piece gets even contact with the marinade. Pat the pieces lightly before grilling if they’re dripping wet, because excess marinade can flare and burn before the chicken has time to cook through.
Grill over medium heat, not a firestorm
Set the chicken on a medium grill and turn it frequently, just like the word huli suggests. Frequent turning helps the glaze build in layers instead of scorching one side while the center stays undercooked. Baste during the last stretch of cooking, not from the beginning, or the sugar will darken too fast. If the flames jump every time you brush on the glaze, move the chicken to a cooler spot for a minute and let the fire settle.
Stop at caramelized, not burnt
The chicken is done when the internal temperature reaches 165°F and the outside looks deeply browned, sticky, and lacquered. You’re looking for charred edges and a shiny glaze that clings to the meat, not blackened sugar. Pull it a touch early if you’re nervous, then let carryover heat finish the job while it rests. That rest keeps the juices inside the chicken instead of running out the second you cut into it.
How to Adapt Huli Huli Chicken Without Losing the Sticky Finish
Gluten-Free Version
Swap in a gluten-free soy sauce or tamari and keep everything else the same. The glaze still reduces and caramelizes beautifully, but check the label on the broth if you use that instead of sherry, since some brands sneak gluten into the mix.
Lighter Chicken Thighs or Bone-In Breasts
You can use bone-in chicken breasts, but they need more careful timing because the lean meat dries out faster than thighs. Keep the grill at medium, baste later in the cook, and pull the chicken as soon as it hits 165°F so the glaze doesn’t harden before the meat is done.
Extra-Smoky Grill Flavor
If you want a deeper backyard-BBQ edge, grill over charcoal and add a few soaked wood chips if your setup allows it. The smoke plays well with the sweet glaze, but don’t push the heat too high or the sugar will burn before the chicken has time to soak up that char.
Storage and Reheating
- Refrigerator: Store leftovers in an airtight container for up to 4 days. The glaze stays tasty, though the skin or edges will soften once chilled.
- Freezer: It freezes well for about 2 months if you wrap the pieces tightly and use a freezer-safe container. Thaw overnight in the fridge before reheating so the sauce doesn’t separate.
- Reheating: Reheat gently in a covered skillet over low heat or in a 325°F oven until warmed through. High heat is the mistake that dries out the chicken and burns the sugary glaze before the center is hot.
Answers to the Questions Worth Asking
Grilled Huli Huli Chicken
Ingredients
Equipment
Method
- Whisk together soy sauce, brown sugar, ketchup, pineapple juice, sherry, ginger, garlic, and sesame oil until the sugar dissolves and the glaze looks glossy.
- Reserve 1/2 cup of the marinade for basting, then set it aside separately from the chicken marinade.
- Marinate the chicken for 2-8 hours so the flavor penetrates and the surface becomes sticky.
- Preheat your grill and cook the chicken over medium heat, turning (huli) frequently so both sides char evenly.
- Baste the chicken with the reserved marinade during grilling to build caramelized, sticky glaze without drying it out.
- Continue cooking for 25-30 minutes until the internal temperature reaches 165°F and the chicken is caramelized, with charred edges and a tacky finish.