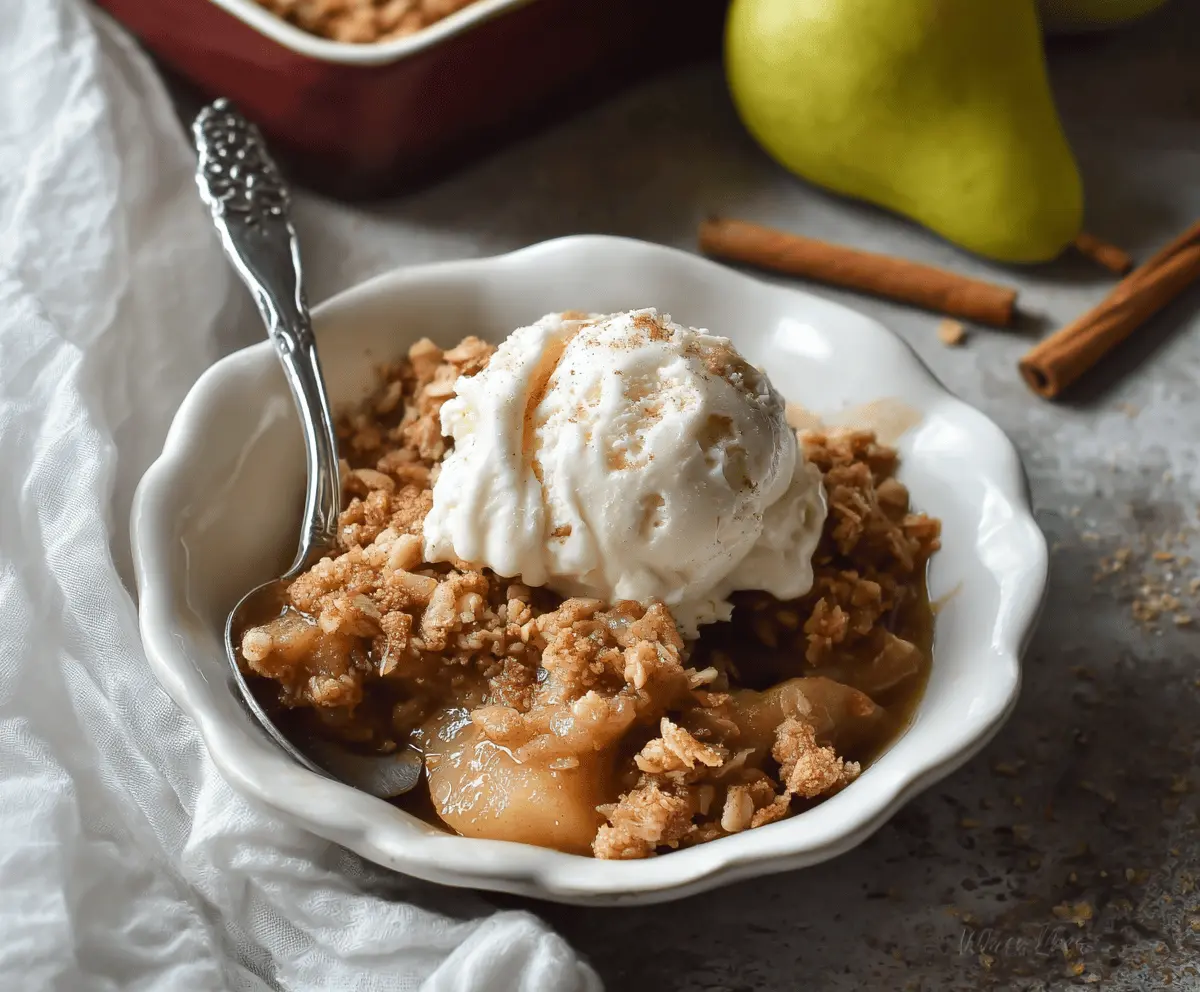
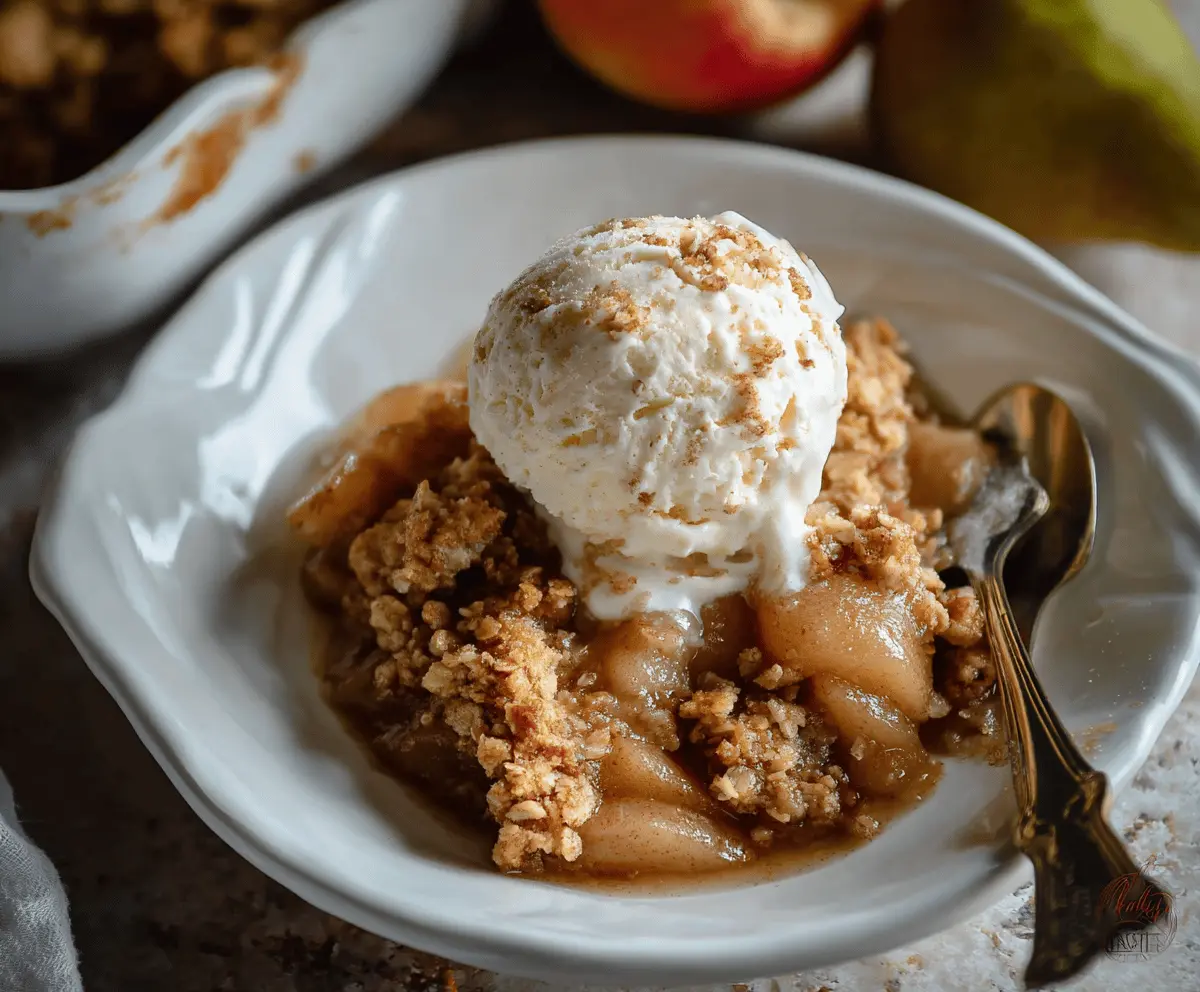
This warm Apple Pear Crisp brings together sweet apples and juicy pears, all topped with a crunchy oat mixture. It’s perfect for cozy evenings, served with a scoop of ice cream on top!
I can’t resist the yummy smell that fills the house while it’s baking. Plus, it’s a great way to use up those fruits sitting on the counter. Who can say no to that? 🍏🍐
Key Ingredients & Substitutions
Apples: Granny Smith apples are great for tartness, while Honeycrisp adds a sweet crunch. If you want a mix, try using a combination of any apples you have on hand!
Pears: Look for ripe pears like Bartlett or Bosc for the best sweetness. If pears aren’t available, you can double the amount of apples or use any other soft fruit like ripe peaches.
Sugars: Granulated sugar and brown sugar both add sweetness, but you can replace brown sugar with coconut sugar for a lighter flavor. Adjust the amount of sugar based on how sweet your fruit is.
Oats: Old-fashioned rolled oats are ideal. If gluten-free is your goal, simply choose certified gluten-free oats. Instant oats work, but they might not give the same crunch!
Butter: For a dairy-free option, swap the butter for coconut oil or vegan butter. It will still provide that rich flavor and help achieve that crumbly topping.
How Do I Achieve a Perfectly Crunchy Topping?
The key to a great topping is mixing the butter properly into the dry ingredients. Here’s how to do it right:
- Keep your butter cold. It helps achieve a nice, crumbly texture.
- Use your fingertips to work the butter into the oats and flour mixture. Aim for a mix that resembles coarse crumbs with some small pieces in it.
- Don’t over-mix! Leaving some larger butter bits means they’ll create delightful little pockets of crispiness when baked.
- Spread the topping evenly over the fruit, ensuring every bite has that delicious crunch.
With these tips, your Apple Pear Crisp will be a comforting dessert that’s hard to resist!
How to Make Apple Pear Crisp
Ingredients You’ll Need:
For the Fruit Filling:
- 3 large apples (such as Granny Smith or Honeycrisp), peeled, cored, and sliced
- 3 large pears, peeled, cored, and sliced
- 1/4 cup granulated sugar
- 1/4 cup brown sugar, packed
- 2 tsp ground cinnamon
- 1/4 tsp ground nutmeg
- 1 tbsp lemon juice
- 1 tbsp cornstarch (optional, for thickening fruit juices)
For the Topping:
- 1 cup old-fashioned rolled oats
- 1/2 cup all-purpose flour
- 1/2 cup brown sugar, packed
- 1/2 tsp ground cinnamon
- 1/4 tsp salt
- 6 tbsp unsalted butter, cold and cut into small cubes
How Much Time Will You Need?
This delightful dessert takes about 15 minutes to prep and around 40-45 minutes to bake. In total, you’ll need about 1 hour to have a warm, comforting Apple Pear Crisp ready to enjoy!
Step-by-Step Instructions:
1. Preheat the Oven:
First things first, preheat your oven to 350°F (175°C) and lightly grease a 9×9-inch baking dish with a bit of butter or cooking spray. This will help everything not stick together.
2. Prepare the Fruit Filling:
In a large mixing bowl, combine the sliced apples and pears. Sprinkle in the granulated sugar, brown sugar, cinnamon, nutmeg, and lemon juice. Toss everything gently with your hands or a spoon to make sure the fruits are well coated and flavorful.
3. Thicken the Juices (Optional):
If it looks like the fruit is very juicy, you can sprinkle the cornstarch on top and give it another gentle toss. This step is optional but will help absorb some of the juices while baking, making a delightful filling!
4. Arrange the Fruit:
Pour the fruit mixture into the greased baking dish in an even layer. Spread it out so it looks nice and even. This way, every bite will have a mix of those sweet apples and pears.
5. Make the Topping:
In a separate bowl, combine the rolled oats, flour, brown sugar, cinnamon, and salt. Add the cold cubed butter and mix it in. You can use your fingertips or a pastry cutter to do this until it looks like coarse crumbs with some pea-sized butter pieces. This will make your topping nice and crunchy!
6. Assemble the Crisp:
Sprinkle the oat topping evenly over the fruit mixture in the baking dish. Make sure it covers all the fruit so you get that crunchy goodness in every bite.
7. Bake:
Put the dish in your preheated oven and bake for about 40-45 minutes. Keep an eye on it until the topping turns golden brown and the fruit is bubbling nicely. The smell will be incredible!
8. Cool & Serve:
Once baked, remove the Apple Pear Crisp from the oven and let it cool for a few minutes. This will help everything set nicely. Serve it warm, and for a special treat, top it with a scoop of vanilla ice cream or a dollop of whipped cream!
Enjoy your delicious and comforting Apple Pear Crisp, perfect for sharing and savoring with loved ones! 🍏🍐
Can I Use Different Fruits in This Crisp?
Absolutely! While apples and pears are a classic combo, you can easily substitute with other fruits like peaches, cherries, or berries. Just be mindful of the sweetness and adjust the sugar accordingly.
How Do I Store Leftovers?
Store any leftovers in an airtight container in the fridge for up to 3 days. You can reheat portions in the microwave or in the oven at 350°F (175°C) until warmed through. This is great as a quick dessert or breakfast!
Can I Make This Recipe Gluten-Free?
Yes! To make a gluten-free version, simply use certified gluten-free oats and substitute the all-purpose flour with gluten-free flour or almond flour. It will still turn out delicious!
What Can I Serve with Apple Pear Crisp?
This crisp is delightful on its own, but you can elevate it by serving it with a scoop of vanilla ice cream, a drizzle of caramel sauce, or a dollop of whipped cream for added richness!