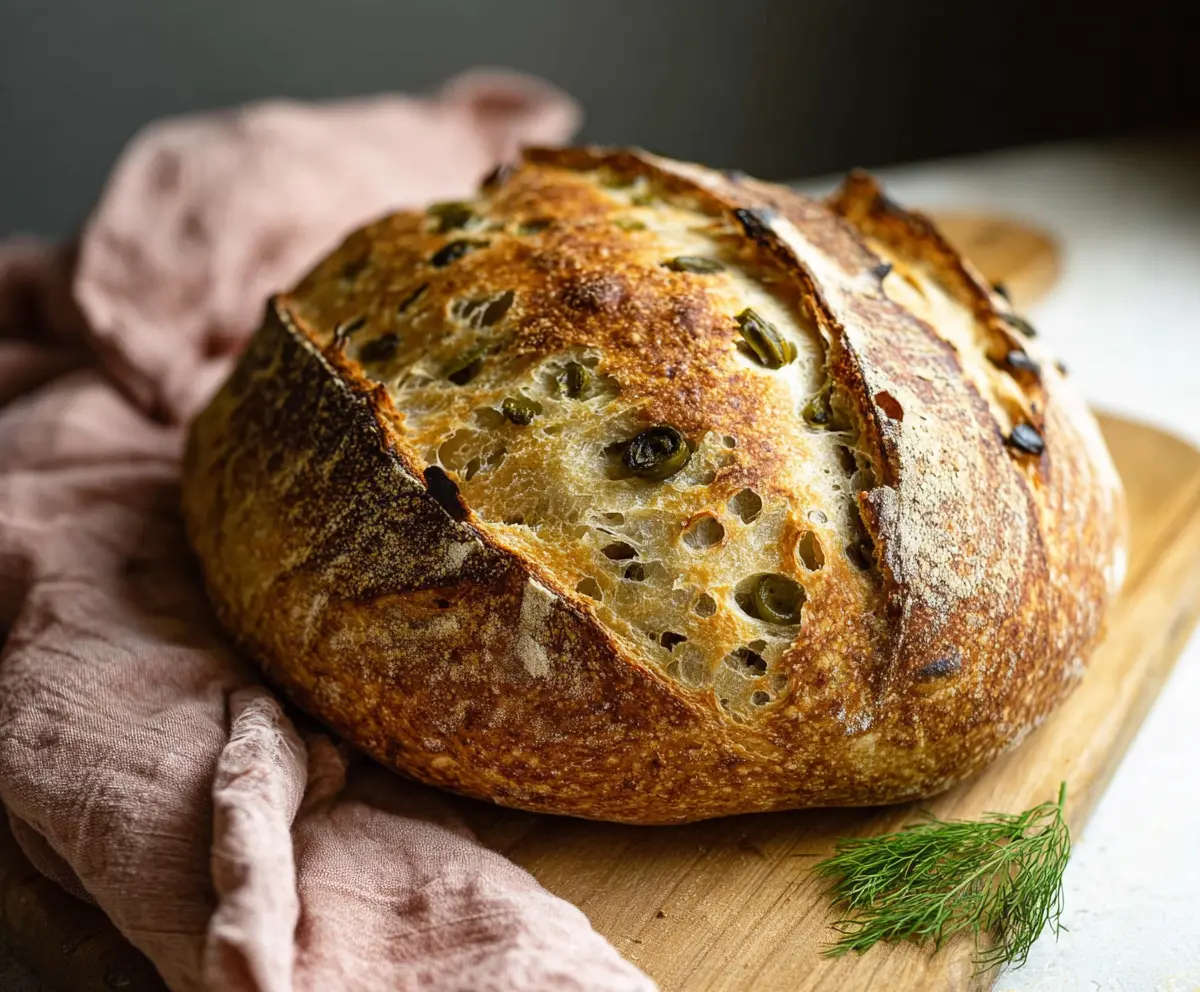
This dill pickle sourdough bread is a fun twist on a classic! It’s soft, slightly tangy, and filled with tasty bits of dill and pickles. Perfect for sandwiches or just plain snacking!
Baking this bread makes my kitchen smell amazing, and I can hardly wait for it to cool before I slice into it. It pairs great with a fun dip or just butter—yum! 😋
Key Ingredients & Substitutions
Sourdough Starter: Use an active and bubbly starter for the best rise. If you don’t have one, you can buy it or use a store-bought sourdough yeast and follow a quick fermentation process.
Flour: All-purpose or bread flour both work well. If you’re looking for a healthier option, whole wheat flour is a great substitute, but it may alter the texture slightly.
Dill Pickles: Using dill pickles brings a punch of flavor. You can swap in sweet pickles if you prefer less tang, or use chopped green olives for a different taste.
Caraway Seeds: Optional, but they add a nice touch! If you don’t like them, feel free to leave them out or substitute with fennel seeds for a different flavor twist.
Olive Oil: This adds moisture, but you can skip it if you’re aiming for a lower fat option. Yogurt can also work for adding moisture while keeping it creamy.
How Do You Get the Perfect Texture with Stretch and Folds?
Stretch and folds help develop the gluten structure in your sourdough. This step is crucial for the bread’s airiness. Here’s how to do it:
- After the autolyse, wet your hands to prevent sticking.
- Grab the dough from one side and stretch it up and over itself. Do this from each side, rotating the bowl as you go.
- Repeat this every 30 minutes throughout the 3 hours of bulk fermentation.
- The dough should become smoother and more elastic with each fold.
Don’t rush this part! It helps build strength and gives your bread that airy, perfect crumb.
Flavorful Dill Pickle Sourdough Bread
Ingredients You’ll Need:
- 500g sourdough starter (active and bubbly)
- 600g all-purpose flour or bread flour
- 350g water (room temperature)
- 12g salt
- 1 cup chopped dill pickles (drained well)
- 2 tablespoons pickle juice (from the jar)
- 1 tablespoon dried or fresh dill (chopped)
- 1 teaspoon caraway seeds (optional, for extra flavor)
- 1 tablespoon olive oil (optional, for moist crumb)
How Much Time Will You Need?
This delicious dill pickle sourdough bread takes approximately 20 minutes of active preparation time. You’ll need about 3 hours for bulk fermentation, plus an overnight chill (8-12 hours) to develop its rich flavor. Finally, time for baking will take around 40-50 minutes. In total, plan for about 12-14 hours, mostly for fermentation and chilling, but the active cooking time is quick and easy!
Step-by-Step Instructions:
1. Combine the Base:
In a large mixing bowl, combine the sourdough starter, room temperature water, and pickle juice. Use a wooden spoon or spatula to stir everything together until well mixed. This is your base for the dough.
2. Mix the Dough:
Add the flour and salt to the liquid mixture and stir it until everything is just combined. Don’t over-mix it! Cover the bowl with a damp towel and allow it to rest for 30 minutes. This resting period is known as “autolyse” and helps with gluten development.
3. Incorporate Flavor:
After the resting time, gently fold in the chopped dill pickles, chopped dill, and caraway seeds (if you’re using them) until they’re evenly mixed throughout the dough. Be careful not to overwork the dough.
4. Ferment the Dough:
Now it’s time for the bulk fermentation! Cover the bowl and let it sit at room temperature for about 3 hours. During this time, perform stretch and folds every 30 minutes (about 6 times total) to strengthen the dough. To do this, wet your hands, grab a side of the dough, stretch it, and fold it over itself. Rotate the bowl and repeat!
5. Shape the Dough:
Once bulk fermentation is done, turn the dough out onto a lightly floured surface. Lightly shape it into a round loaf by folding the edges into the center. Then flip it seam-side down and gently tighten the shape by rolling it in a circular motion.
6. Chill Overnight:
Place the shaped dough into a floured banneton basket or bowl, cover it with plastic wrap or a damp towel, and refrigerate overnight for 8-12 hours. This helps develop the flavor and texture of the bread.
7. Preheat the Oven:
On the day of baking, preheat your oven to 475°F (245°C) with a Dutch oven inside for at least 30 minutes. This ensures a hot environment for the bread to bake properly.
8. Bake the Bread:
Carefully transfer the chilled dough onto a piece of parchment paper. Score the top of the dough with a sharp knife or lame to allow for expansion. Using oven mitts, carefully place the dough into the preheated Dutch oven, cover with the lid, and bake for 20 minutes.
9. Golden Brown Finish:
After 20 minutes, remove the lid and allow the bread to bake for another 20-25 minutes, or until the crust is a beautiful golden brown and crisp to the touch.
10. Cool and Slice:
Once done, remove the Dutch oven from the oven and let the bread cool completely on a wire rack before slicing. This cooling period is important to set the texture of the bread.
Enjoy your wonderfully tangy and savory dill pickle sourdough bread—perfect for sandwiches, grilled cheese, or simply enjoying fresh with butter!
Can I Use Store-Bought Sourdough Starter?
Absolutely! Store-bought sourdough starter can work just as well as homemade. Just make sure it’s active and bubbly for the best results in your bread.
What Can I Substitute for Dill Pickles?
If you’re not a fan of dill pickles, you can use chopped green olives for a different flavor profile or even sweet pickles if you prefer something less tangy.
How Should I Store Leftover Bread?
To store leftover bread, wrap it in a clean kitchen towel and place it in a bread bag. This keeps it fresh for up to 3 days at room temperature. For longer storage, slice the bread and freeze it in an airtight bag, where it can last for up to 3 months.
What If My Dough Is Too Sticky?
If your dough feels very sticky after mixing, don’t worry! This is common with high hydration doughs. Wet your hands when shaping or folding, and use flour sparingly on your work surface to help manage the stickiness without adding too much extra flour.