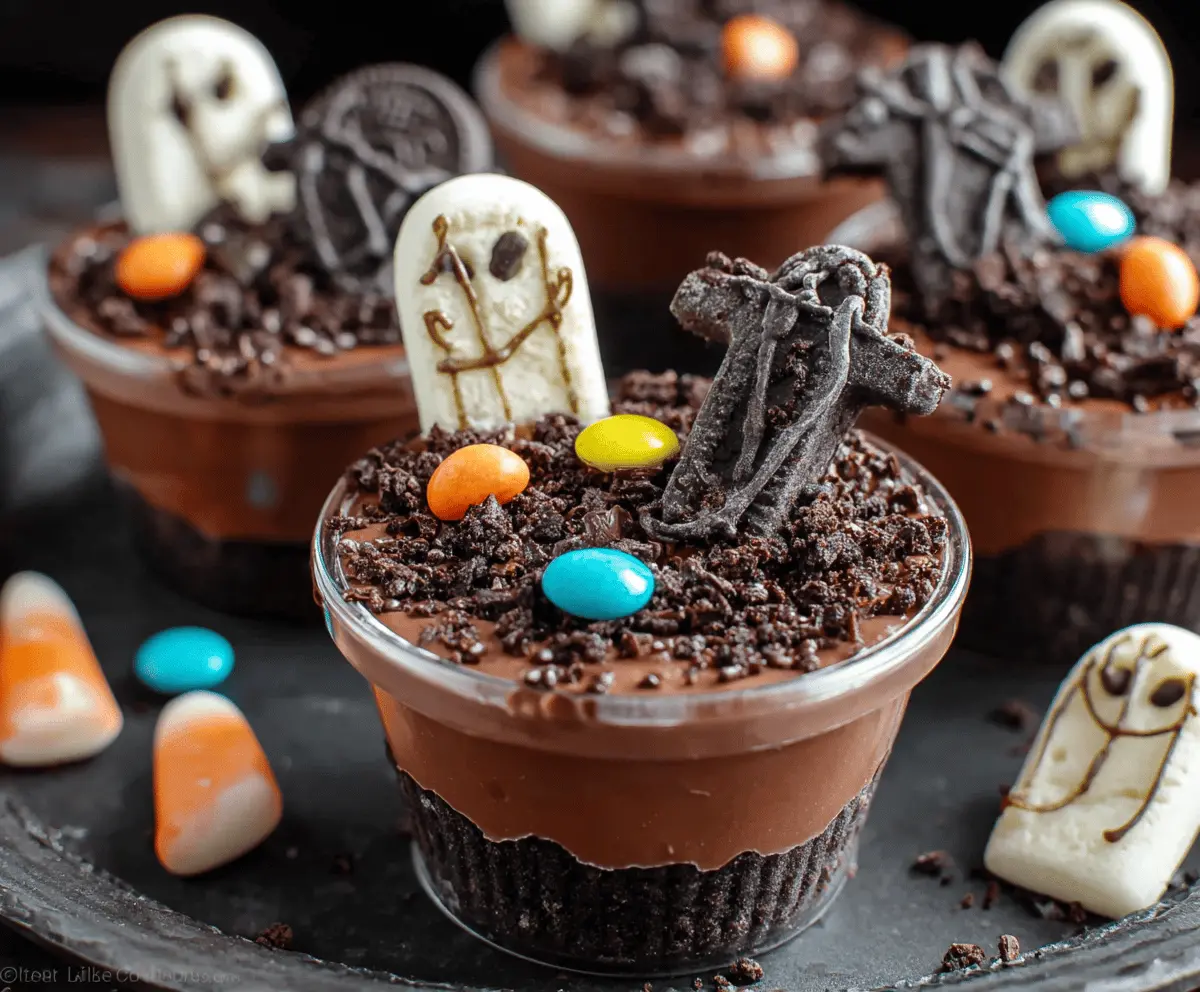
These spooky Graveyard Chocolate Pudding Cups are perfect for Halloween! They look like mini graveyards filled with creamy chocolate pudding, crushed cookies, and fun cookie tombstones.
Making these is a blast! I usually let the kids help with the cookie crushing. They giggle as they pretend to dig up graves! 🎃 Just layer the pudding and cookies for a tasty treat.
Key Ingredients & Substitutions
Chocolate Pudding Mix: Instant chocolate pudding gives a creamy base. If you prefer, you can make homemade pudding instead using cocoa powder, sugar, and cornstarch, but it requires more time and effort.
Milk: Whole milk is best for a rich flavor. However, you can use almond milk or any non-dairy milk if you want a dairy-free version. Just check the brand for flavor compatibility.
Sandwich Cookies: These create the “dirt” for the graveyard look. If you’re avoiding gluten, find gluten-free chocolate cookies or use crushed graham crackers instead. They won’t match the flavor exactly, but they can still be tasty!
Colored Candy-Coated Chocolates: I love using M&Ms for their color and crunch. You could swap these for chocolate chips, gummy candies, or any small colorful treat that adds a fun touch!
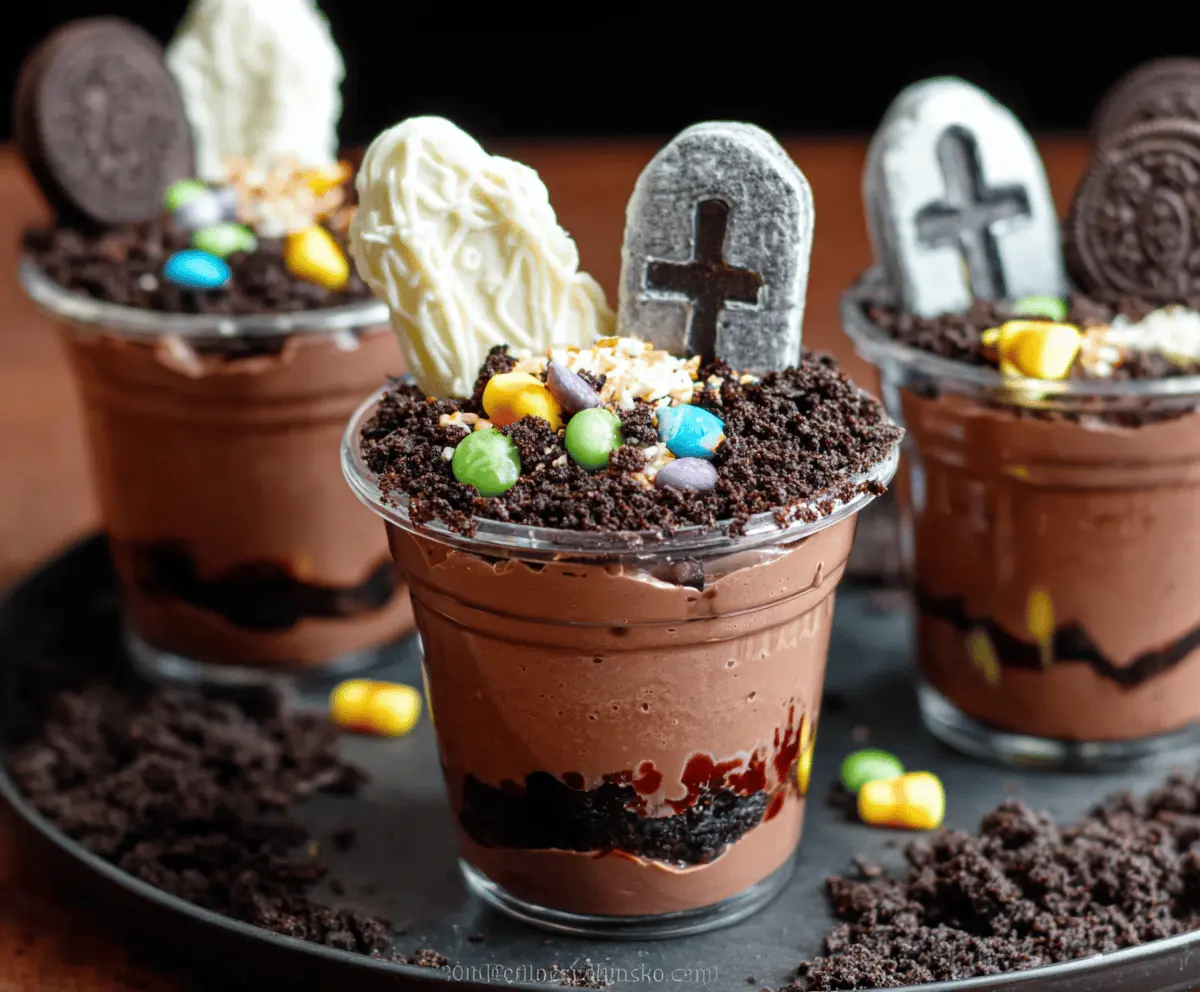
How Do You Create the Perfect Layering in Pudding Cups?
Layering is key to making beautiful pudding cups! To succeed, start with a solid base of crushed cookies. This will help keep the layers separated and create visual appeal.
- Make sure to pack the crushed cookies down lightly in the bottom.
- Add a generous layer of pudding on top, but don’t overfill. Leave some room for cookies and decorations on top.
- Repeat the layers, ensuring the final layer ends with pudding, topped with crushed cookies for that “dirt” effect.
- Let your assembled cups chill briefly to help set the layers together before adding decorations.
How to Make Graveyard Chocolate Pudding Cups
Ingredients You’ll Need:
For the Pudding:
- 2 packages (3.9 oz each) instant chocolate pudding mix
- 3 cups cold milk
For the “Dirt”:
- 1 cup crushed chocolate sandwich cookies (like Oreos)
- 12 chocolate sandwich cookies or Halloween-themed cookies (for tombstones)
For Decorating:
- White chocolate or candy melts (for decorating tombstones)
- 1 cup colored candy-coated chocolates (like M&Ms)
- Optional: chocolate syrup for drizzling
How Much Time Will You Need?
This spooky dessert can be made in about 20-30 minutes, plus a little chill time in the fridge. It’s perfect for Halloween celebrations and gatherings with friends and family!
Step-by-Step Instructions:
1. Prepare the Chocolate Pudding:
Start by whisking together the instant chocolate pudding mix and cold milk in a large bowl, following the package instructions. Once blended, pop it in the refrigerator for about 5 minutes to help it set.
2. Create the “Dirt”:
While the pudding is setting, take your chocolate sandwich cookies and crush them into fine crumbs. This will give you the “dirt” for your graveyard!
3. Layer the Cups:
It’s time to assemble! Grab your serving cups or bowls. Begin by placing a layer of crushed cookies at the bottom of each cup to form the base. Then, spoon a layer of chocolate pudding over the cookie crumbs.
4. Repeat the Layers:
For a fun effect, repeat the layering process once more, adding another layer of crushed cookies and a layer of pudding. Leave a bit of space at the top for your decorations.
5. Decorate the Tombstones:
Now for the fun part! Take whole chocolate sandwich cookies or Halloween-themed cookies to use as tombstones. If desired, melt some white chocolate or candy melts and use it to decorate the cookies with crosses, “RIP,” or spider webs. Let the chocolate harden before placing them in the cups.
6. Final Touches:
Top each pudding cup with a generous layer of crushed cookie “dirt.” Now, carefully insert the decorated cookie tombstones into the top of the pudding.
7. Add the Graveyard Candies:
Lastly, scatter some colorful candy-coated chocolates around the tombstones to give your graveyard a fun and festive look! You can even drizzle some chocolate syrup inside the cup before serving for an extra treat.
8. Chill and Serve:
Once everything is assembled, chill the cups in the refrigerator until you’re ready to serve them. These delightful Graveyard Chocolate Pudding Cups are sure to impress your guests!
Enjoy the spooky season with this fun and delicious dessert!
Can I Use Different Flavors of Pudding?
Absolutely! While chocolate pudding is traditional, you can experiment with other flavors like vanilla or butterscotch. Just keep in mind that the overall look will change, but it can still be delicious!
How Should I Store Leftover Pudding Cups?
Store any leftover pudding cups in an airtight container in the refrigerator. They should be good for up to 3 days. If you’re worried about the cookies getting soggy, consider adding them just before serving instead of layering them in.
Can I Prepare These Pudding Cups Ahead of Time?
Yes! You can make the pudding and layer the cups a day in advance. Just keep them covered in the fridge until you’re ready to serve. Add the cookie tombstones and candies right before serving to keep everything fresh!
What Can I Use Instead of White Chocolate for the Tombstones?
If you prefer not to use white chocolate, you can use regular chocolate or even icing to decorate the tombstones. Just be sure it’s thick enough to hold its shape once set!