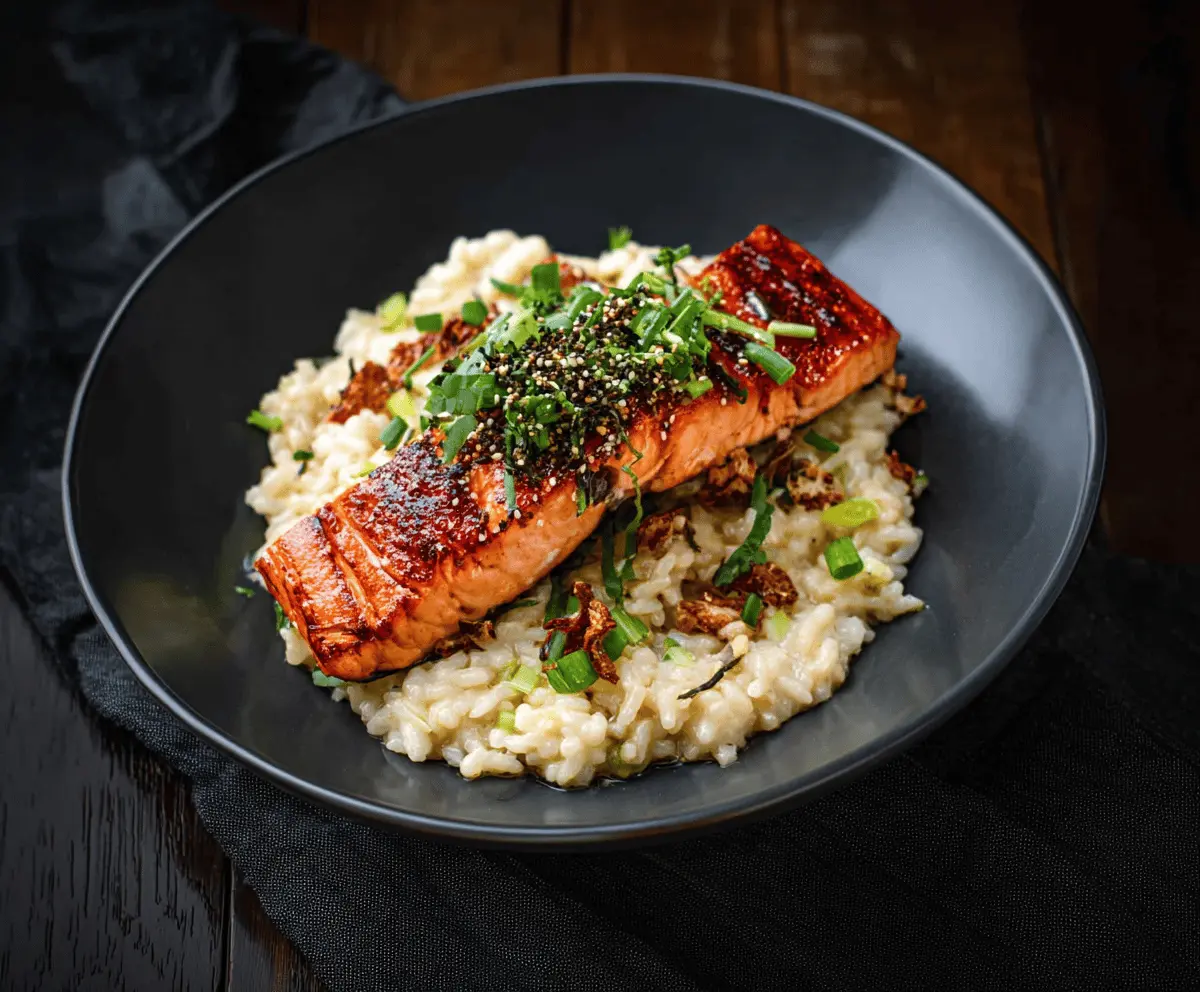
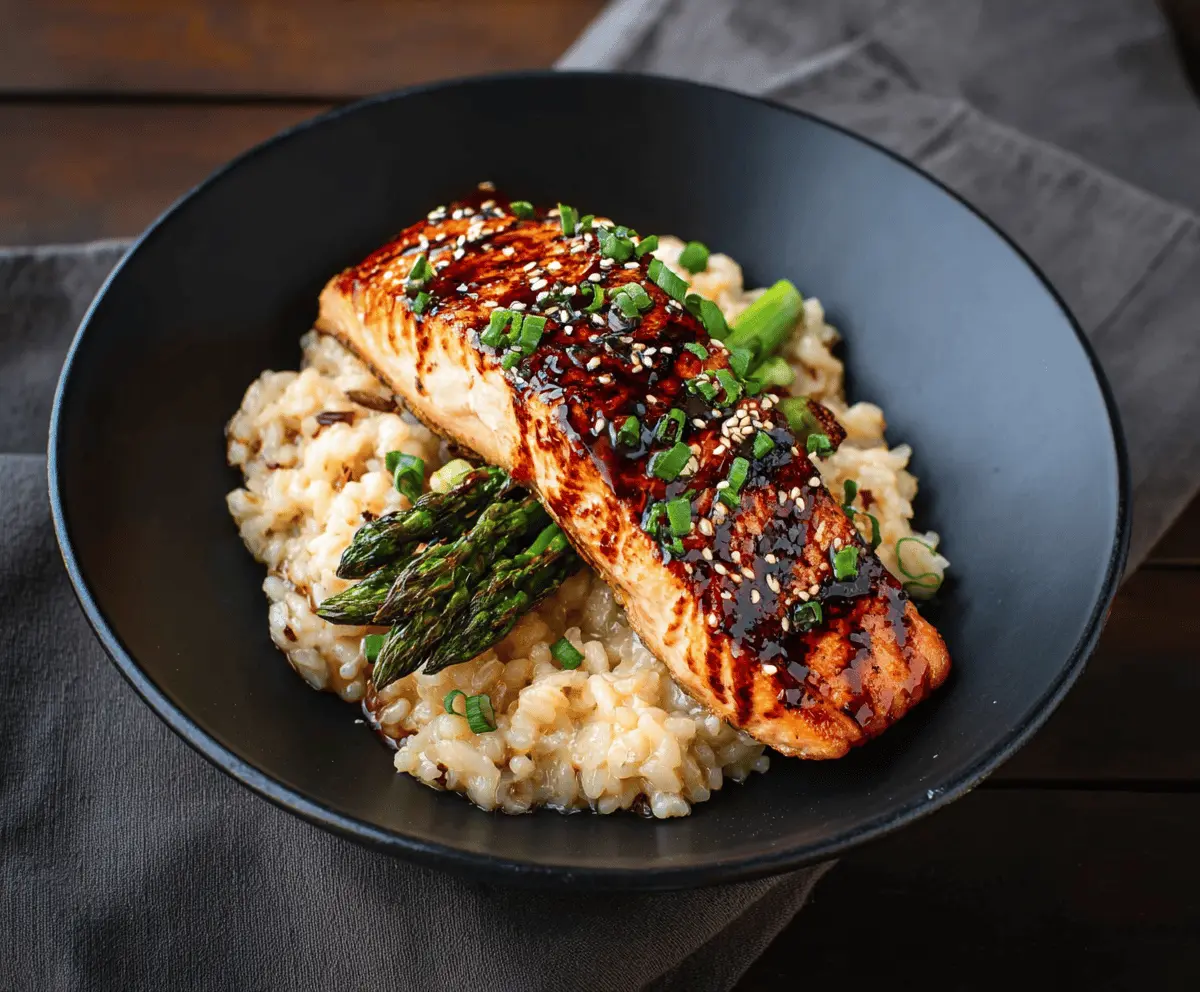
This creamy Japanese-style risotto is a delight! Made with rice, broth, and topped with perfectly seared salmon, it’s both comforting and fancy.
Who doesn’t love a meal that feels like a warm hug? The salmon adds a tasty touch, and I can’t resist a forkful of that rich risotto. It’s a winner at my dinner table! 🍣
Cooking this dish is easy, too! Just stir the rice and broth together, then add that gorgeous salmon on top. It’s impressive, but super simple—perfect for any night!
Key Ingredients & Substitutions
Short-grain rice: This recipe works best with Japanese sushi rice or arborio. If you’re short on time, you can even use regular rice; just keep in mind the texture will differ. I love how short-grain varieties become perfectly creamy!
Dashi stock: Dashi is key to this dish’s authentic flavor. If you don’t have it, chicken or vegetable broth works as a great substitute. I usually keep some dashi powder at home for convenience, but homemade dashi is always a treat!
Sake and mirin: These add depth to the risotto. If you don’t have them, white wine can replace sake. For mirin, a mix of honey and water (2:1) can be a quick alternative. It’s fun experimenting with flavors!
Parmesan cheese: This adds creaminess, but you can skip it for a lighter version. It’s still delicious without it, plus you keep it dairy-free. I sometimes use nutritional yeast for a cheesy flavor without the cheese!
How Do I Achieve the Creamiest Risotto?
To make a creamy risotto, keep stirring and adding the stock gradually. Here’s the secret:
- Start with heated oil and onion, then toast the rice to enhance its nutty flavor.
- Add the sake and mirin, letting them absorb before adding stock.
- Use warm stock, adding about 1/2 cup at a time, stirring until absorbed, and repeat.
- Don’t rush this process; the magic happens when you patiently stir and let the rice release its starch.
With these tips, your risotto will be perfectly creamy and oh-so-delicious! Happy cooking!
Japanese Style Risotto With Seared Salmon
Ingredients You’ll Need:
For the Risotto:
- 1 cup short-grain rice (such as Japanese sushi rice or arborio)
- 3 cups dashi stock (or chicken/vegetable broth as substitute)
- 1 tbsp butter
- 1 tbsp vegetable oil
- 1 small onion, finely chopped
- 2 cloves garlic, minced
- 1/4 cup sake
- 1/4 cup mirin (sweet rice wine)
- 1 tbsp soy sauce
- 1/4 cup grated Parmesan cheese (optional for creaminess)
- Salt and pepper to taste
For the Salmon:
- 2 salmon fillets (about 6 oz each), skin removed and patted dry
- 1 tbsp sesame oil (for searing salmon)
For Garnishing:
- 2 green onions, sliced
- Furikake seasoning (Japanese rice seasoning) or toasted sesame seeds for garnish
- Optional: crispy fried garlic or shallots for garnish
How Much Time Will You Need?
This delicious dish takes about 30 minutes to prepare and cook. It’s quick enough for a weeknight dinner yet fancy enough for impressing guests. In just half an hour, you can enjoy a delightful meal of Japanese-style risotto topped with elegant seared salmon!
Step-by-Step Instructions:
1. Prepare the Risotto Base:
In a medium saucepan over medium heat, heat the vegetable oil and butter together. Once melted, add the finely chopped onion and sauté until it turns translucent, about 3-4 minutes. This is your flavorful base!
2. Toast the Rice:
Add the minced garlic and short-grain rice to the pan. Stir well to coat the grains with the oil and butter, then lightly toast the rice for about 1-2 minutes. This step enhances the nutty flavor of the rice!
3. Add Sake and Mirin:
Pour in the sake and mirin, stirring continuously until the liquid is mostly absorbed by the rice. This adds a lovely depth and sweetness to the dish!
4. Cook the Risotto:
Now, start adding the warm dashi stock gradually, about 1/2 cup at a time. Remember to stir frequently and wait until the liquid is mostly absorbed before adding more. Continue this stirring and adding for about 18-20 minutes until the rice is cooked yet still creamy.
5. Final Touches:
Stir in the soy sauce and the optional Parmesan cheese for extra creaminess. Season to taste with salt and pepper. Keep the risotto warm on a low heat while you cook the salmon.
6. Sear the Salmon:
In a non-stick skillet, heat the sesame oil over medium-high heat. Season both sides of the salmon fillets with a pinch of salt and pepper. Carefully place the salmon into the hot skillet and sear until golden brown and cooked through, about 3-4 minutes per side—adjust the cooking time based on thickness.
7. Assemble and Garnish:
To serve, spoon the risotto onto plates or bowls and place a seared salmon fillet on top. Garnish with sliced green onions, a sprinkle of furikake seasoning or toasted sesame seeds, and crispy fried garlic or shallots if you’re using them!
8. Enjoy!
Dig in and relish this unique blend of flavors and textures in your comforting Japanese-style risotto topped with luscious seared salmon. Enjoy every bite!
Can I Use Frozen Salmon for This Recipe?
Absolutely! Just make sure to thaw the salmon completely before cooking. You can thaw it in the refrigerator overnight or place it in a sealed plastic bag and submerge it in cold water for quicker thawing. Pat it dry before searing for best results!
Can I Make This Risotto Vegetarian?
Yes, you can easily make this risotto vegetarian by substituting the dashi stock with vegetable broth and omitting the salmon. You might consider adding sautéed mushrooms or seasonal vegetables for extra flavor and nutrition!
What’s the Best Way to Store Leftover Risotto?
Store any leftover risotto in an airtight container in the fridge for up to 3 days. To reheat, add a splash of broth or water while warming on the stove, stirring to return its creamy texture. Avoid reheating in the microwave if you want to maintain that creaminess.
Can I Prepare the Risotto in Advance?
While risotto is best served fresh, you can prepare it a few hours in advance and keep it warm on the stove. If you need to make it further in advance, consider cooking it and refrigerating it, then reheat gently with added broth as mentioned above.