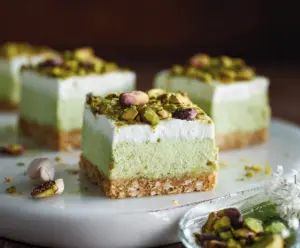
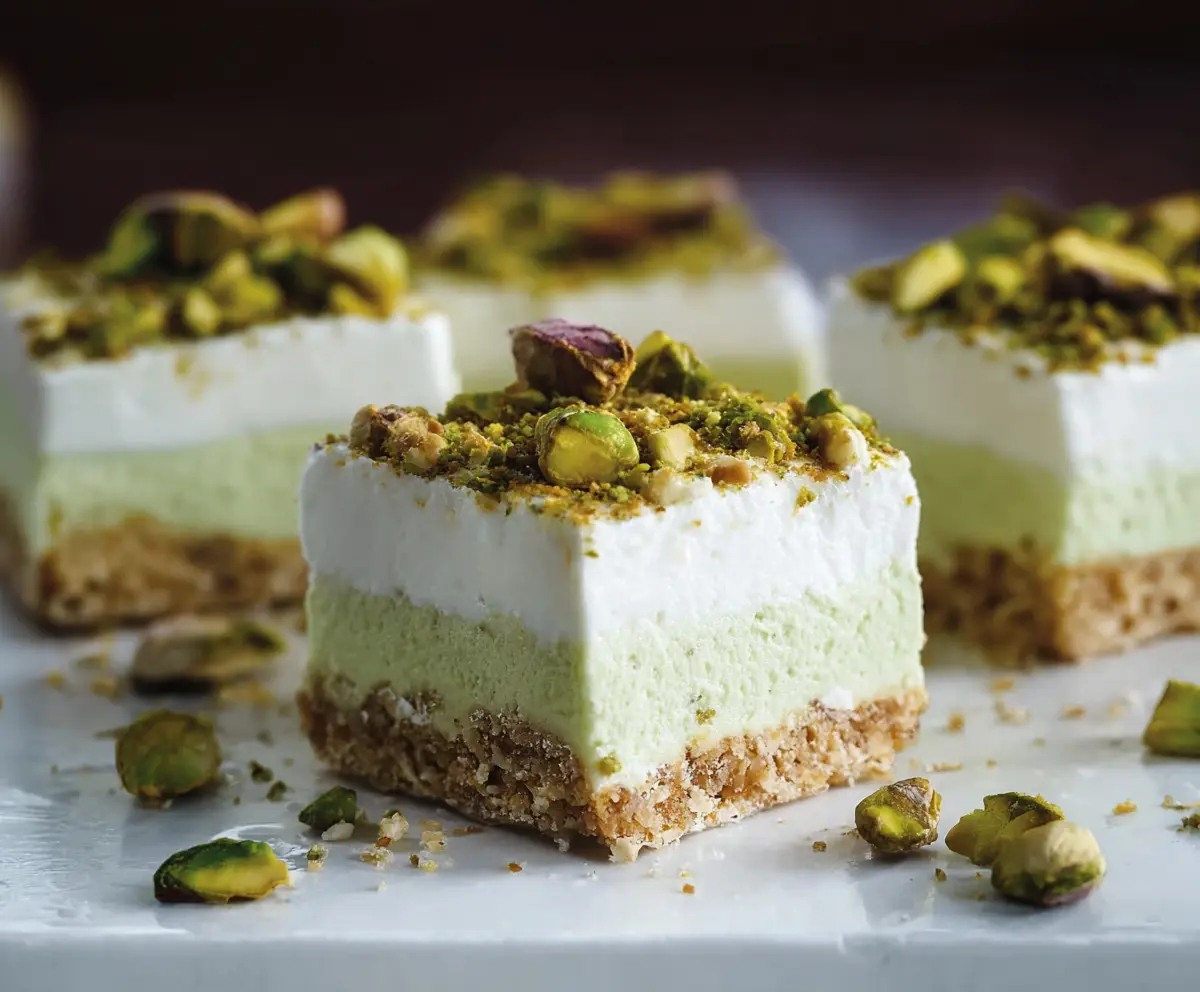
These Pistachio Cream Bars are a tasty treat with a nutty twist! Made with smooth pistachio flavor and a buttery crust, they’re simply delightful and perfect for sharing.
Let’s be real—I sometimes eat these bars for breakfast, and honestly, who can blame me? They’re so creamy and delicious, it’s hard to resist having just one! 😋
Key Ingredients & Substitutions
Graham cracker crumbs: These form the base of the crust. Digestive biscuits make a great substitute if you can’t find graham crackers. They’re a bit more buttery and less sweet, which can give the crust an extra flavor boost.
Pistachios: You’ll need both chopped pistachios for the crust and whole ones for the cream. If you’re looking for a cheaper option, almonds or cashews can work, but the flavor will change a bit.
Cream cheese: This provides richness. If you’re looking for a lighter option, you can swap it for mascarpone cheese. For a dairy-free alternative, try using cashew cream instead.
Gelatin: This helps the bars set. If you’re vegetarian, use agar-agar. Remember that agar sets more firmly, so you might need to adjust the amount slightly.
Green food coloring: This is optional, but it enhances the color. If you want a natural option, consider using matcha powder, but it will change the flavor a bit.
How Do I Achieve a Smooth Pistachio Cream Layer?
A smooth and creamy texture is key to these bars. Start by finely grinding the shelled pistachios in a food processor. This helps them blend better with other ingredients. Then, when adding cream to the pistachios, blend until it’s really creamy.
- Make sure the cream cheese is at room temperature to mix smoothly—cold cream cheese can cause lumps!
- When folding in the whipped cream, do it gently; this keeps the mixture light and airy.
- Don’t forget to bloom the gelatin properly before adding it; this step is crucial for achieving the right consistency.
How to Make Delicious Pistachio Cream Bars
Ingredients You’ll Need:
For The Crust:
- 1 1/2 cups graham cracker crumbs (or digestive biscuits, crushed)
- 1/2 cup chopped pistachios
- 1/4 cup granulated sugar
- 1/2 cup unsalted butter, melted
For The Pistachio Cream Layer:
- 1 cup shelled pistachios (unsalted)
- 1 1/2 cups heavy cream (divided)
- 8 oz cream cheese, softened
- 1 cup powdered sugar
- 1 tsp vanilla extract
- 1 tbsp gelatin powder (or agar-agar as a vegetarian alternative)
- 1/4 cup hot water (for blooming gelatin)
- A few drops green food coloring (optional, to enhance pistachio color)
For The Topping:
- 1 cup heavy whipping cream
- 2 tbsp powdered sugar
- 1/2 tsp vanilla extract
- Chopped pistachios for garnish
How Much Time Will You Need?
This recipe will take about 20 minutes to prepare and then you’ll need to chill it for at least 4 hours. So set aside about 4 hours and 20 minutes for this delicious treat, mostly for the chilling time!
Step-by-Step Instructions:
1. Prepare the Crust:
Start by preheating your oven to 350°F (175°C). In a mixing bowl, mix together the graham cracker crumbs, chopped pistachios, granulated sugar, and melted butter until combined. Press this mixture firmly into the bottom of an 8×8 inch square baking pan lined with parchment paper. Once pressed in nicely, bake the crust for 10 minutes. Then, take it out and let it cool completely. This gives a nice crunchy base!
2. Make the Pistachio Paste:
In a food processor, pulse the shelled pistachios until they are finely ground. Then, add about 1/2 cup of heavy cream and blend until you have a smooth and creamy paste. Don’t worry if it takes a minute, just keep blending until it’s nice and smooth. Set this aside for the next step!
3. Prepare the Pistachio Cream Layer:
To bloom the gelatin, sprinkle it over 1/4 cup of hot water and let it sit for about 5 minutes. In a large bowl, beat the softened cream cheese until it’s smooth. Add in the powdered sugar and vanilla extract and mix well. Now, stir in that lovely pistachio paste and blend it all together. Gently heat the bloomed gelatin until melted—this can be done in a microwave or double boiler. Quickly stir this into your cream cheese mixture. In a separate bowl, whip 1 cup of heavy cream to stiff peaks. Now, gently fold the whipped cream into the pistachio mixture, and if you’d like, add a few drops of green food coloring for extra color!
4. Assemble the Bars:
Pour the pistachio cream mixture evenly over your cooled crust in the baking pan. Use a spatula to smooth the top so it’s nice and even. Then, place the pan in the refrigerator for at least 4 hours or until the cream layer is firm.
5. Prepare the Topping:
When you’re ready to serve, whip the last cup of heavy whipping cream with powdered sugar and vanilla extract until stiff peaks form. Spread or pipe this whipped cream topping over the set pistachio cream layer for a light and fluffy finish!
6. Garnish and Serve:
Finally, sprinkle some chopped pistachios over the whipped cream topping for that extra crunch and decoration. Cut the bars into squares and serve them chilled. Enjoy these deliciously creamy pistachio bars with family and friends!
Can I Use Different Nuts Instead of Pistachios?
Absolutely! While pistachios give a unique flavor, you can substitute them with other nuts like almonds or cashews for the crust and paste. Just keep in mind that the flavor profile will be different!
How Long Can I Store the Pistachio Cream Bars?
You can store the bars in an airtight container in the refrigerator for up to 5 days. Just make sure they are covered well to maintain freshness!
Can I Make This Recipe Gluten-Free?
Yes! To make the crust gluten-free, simply use gluten-free graham cracker crumbs or crushed gluten-free cookies instead of regular ones. The rest of the ingredients should be gluten-free too, but always check labels to be sure!
What’s the Best Way to Cut the Bars?
For neat squares, use a sharp knife and warm it slightly by soaking in hot water, then drying it off before cutting. This helps make cleaner cuts through the creamy layers, so you get those perfect squares!