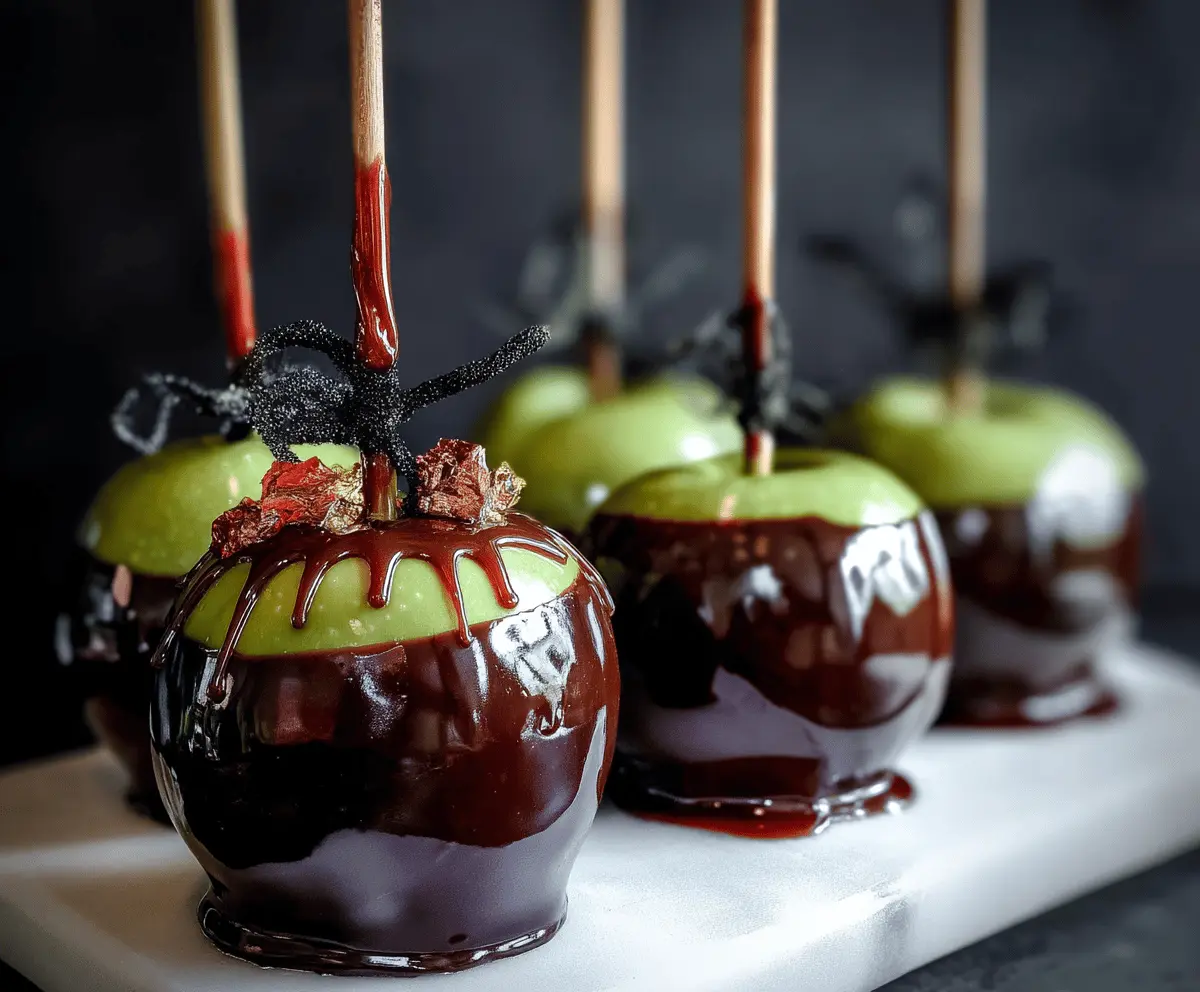
These Poison Apple Caramel Apples are a spooky twist on a classic treat! Imagine crisp apples coated in sticky caramel and topped with a fun green glaze to resemble poison. 🎃
Making these is a blast! I love letting the kids decorate them with sprinkles or chocolate drizzle. Perfect for Halloween or any fun fall gathering. Plus, who doesn’t love caramel? 🍏
Key Ingredients & Substitutions
Apples: I recommend using Granny Smith apples for their tartness and firmness. They create a fantastic contrast with the sweet caramel. If you prefer a different flavor, feel free to use Honeycrisp or Fuji apples for a sweeter bite.
Caramel: Soft caramel candies work best, but you can also use homemade caramel if you’re feeling adventurous! If you need a dairy-free option, there are vegan caramel sauces available at most grocery stores.
Chocolate: Dark chocolate brings a nice richness, but you can easily substitute with milk chocolate for a sweeter taste. If you’re looking for an easy option, candy melts are great and come in various colors!
Gold Flakes or Sprinkles: For a playful touch, you can use regular sprinkles or edible glitter instead of gold flakes. It’s all about how spooky and festive you want these to look!
How Do You Make Sure the Caramel Stays on the Apples?
One common challenge is getting that beautiful caramel to stick! Here’s how to do it:
- Wash the apples well to remove any wax coating, which helps the caramel stick better.
- Thoroughly dry the apples since any moisture can cause the caramel to slide off.
- Let the caramel rest a bit when coating the apples; sometimes, letting it sit a few seconds on the apple helps it cling more effectively.
Taking your time and following these simple steps ensures you get that perfect caramel coating!
Tips for Melting Chocolate Smoothly
Melting chocolate can be tricky, but it’s essential for a nice finish. Use these tips:
- Always melt chocolate in short intervals (30 seconds), stirring in between to prevent burning.
- Adding a teaspoon of coconut oil or vegetable oil helps the chocolate become smooth and easy to work with.
- If your chocolate seizes up, adding a little warm water can sometimes help rescue it!
With these techniques in mind, you’ll have a beautiful chocolate layer over your caramel apples!
Poison Apple Caramel Apples
Ingredients You’ll Need:
For the Apples:
- 6 medium-sized firm apples (Granny Smith or any green variety for the “poison” look)
- 12 wooden sticks or skewers
For the Caramel:
- 14 oz (about 400g) soft caramel candies or caramel squares
- 2 tablespoons water
- 1 tablespoon unsalted butter
For the Chocolate Coating:
- 4 oz (about 115g) dark chocolate or black candy melts
- 1 teaspoon coconut oil or vegetable oil (to thin the chocolate)
For Decoration:
- Edible gold leaf flakes or gold sprinkles (for the “poisoned” effect)
How Much Time Will You Need?
This delightful treat takes about 30 minutes of prep time, plus an additional 20-30 minutes to chill in the refrigerator. Get ready to impress your friends and family with these spooky caramel apples!
Step-by-Step Instructions:
1. Prepare the Apples:
Start by washing and thoroughly drying the apples. This will help the caramel adhere better. If you like, remove the stems from the apples and insert wooden sticks firmly into the top of each apple for easy dipping.
2. Set Up the Baking Sheet:
Line a baking sheet with parchment paper or a silicone mat to prepare for your dipped apples. This will keep them from sticking as they cool.
3. Make the Caramel:
In a heavy saucepan, mix the caramel candies, water, and butter. Heat over low, stirring constantly until the caramel is melted and smooth. Be patient; this step is key for a luscious coating!
4. Dip the Apples in Caramel:
Remove the saucepan from heat. Take each apple and dip it into the warm caramel, turning to coat all sides. Allow any excess caramel to drip off before placing the apple on the prepared baking sheet. Let them cool and set for about 10-15 minutes.
5. Melt the Chocolate:
While the caramel is setting, melt the dark chocolate or black candy melts along with the coconut oil in a microwave-safe bowl. Heat in 30-second intervals, stirring well until smooth and slightly runny.
6. Coat the Caramel Apples in Chocolate:
Once the caramel has set, dip each caramel-coated apple into the melted chocolate, letting the excess chocolate drip back into the bowl. You can drizzle more chocolate on top for an extra spooky effect!
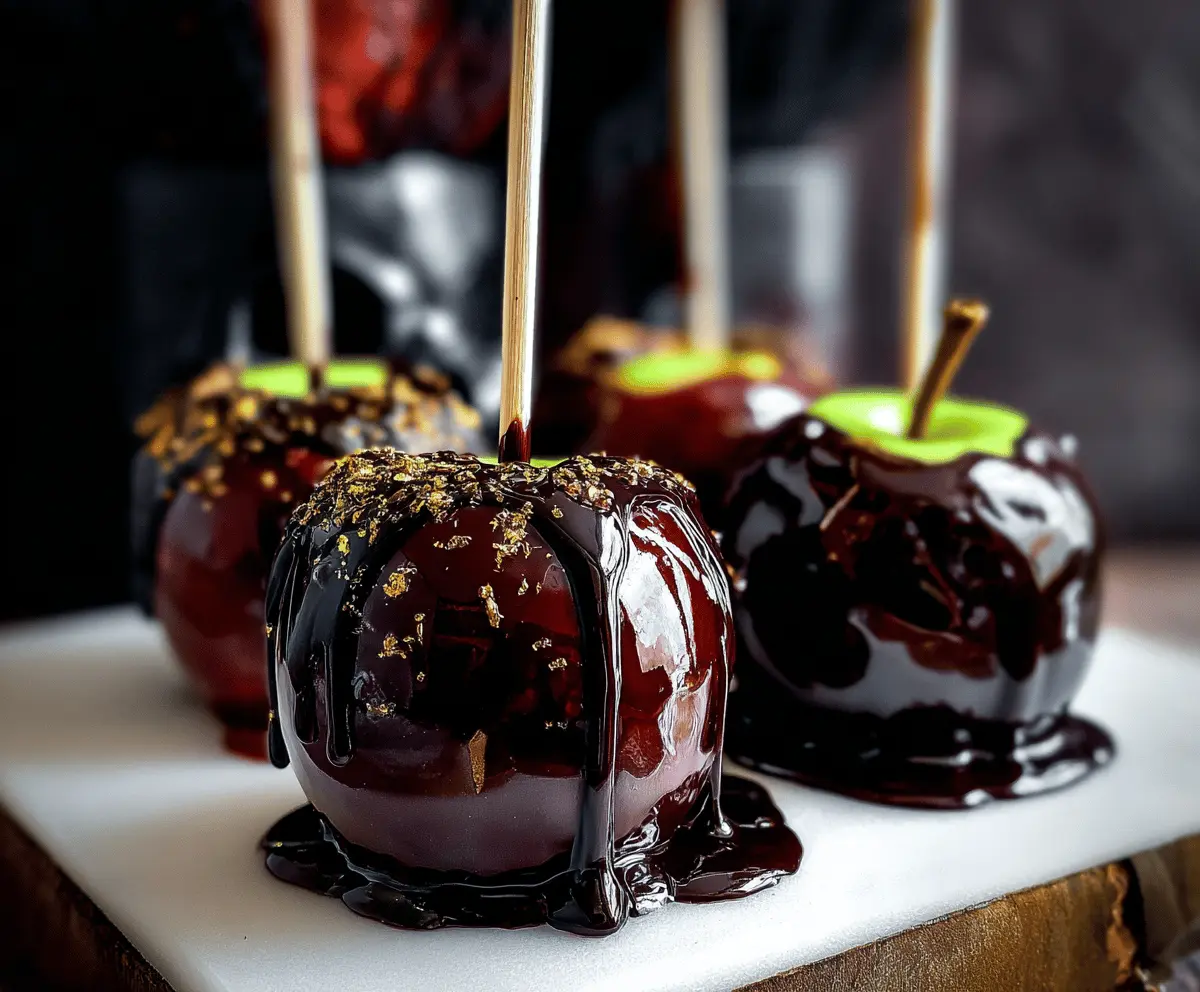
7. Add the Gold Decoration:
Before the chocolate hardens, sprinkle edible gold leaf flakes or gold sprinkles over the chocolate coating to create the eerie “poisoned” look. This adds a touch of magic to your apples!
8. Chill for a Perfect Finish:
Place the decorated apples back on the parchment-lined tray and refrigerate for about 20-30 minutes, or until the chocolate is completely set.
9. Serve and Enjoy:
Once the chocolate is hardened, your Poison Apple Caramel Apples are ready to be served! Enjoy this spooky treat with friends and family, and watch their eyes light up with delight!
These apples bring together the perfect combination of sweet caramel, tart apple, and rich chocolate, all topped with glamorous gold accents for an enchanting Halloween treat!
Can I Use Other Types of Apples?
Absolutely! While Granny Smith apples are ideal for their tartness and firmness, you can use any firm apple variety like Fuji or Honeycrisp. Just keep in mind that sweeter apples will change the overall flavor profile of the caramel apples!
How Do I Store Leftover Poison Apple Caramel Apples?
Store any leftover apples in an airtight container in the refrigerator for up to 3 days. Just be aware that the coating may become slightly less crispy over time, but they’ll still taste delicious!
Can I Make These Ahead of Time?
Yes! You can prepare these caramel apples a day in advance. Just make sure to keep them refrigerated in an airtight container until you’re ready to serve them. They make a fantastic treat for parties or gatherings!
What If the Caramel Is Too Thick?
If the caramel gets too thick while cooking, add a little more water (a teaspoon at a time) and heat gently until it reaches your desired consistency. It should be smooth enough to coat the apples easily.