Bright, tidy rows of fruit, cheese, crackers, and pepperoni turn an ordinary snack board into something people hover around before the party even starts. The appeal here is the contrast: juicy strawberries against sharp white cheddar, salty pepperoni beside buttery crackers, and that deep blue corner of blueberries that makes the whole tray read like a flag at a glance.
The trick is treating the tray like a layout, not a pile. Dense packing keeps the lines crisp, which matters more than perfection in the individual pieces. Blueberries need to be packed tightly in the upper left so the canton looks solid, and the stripes work best when you alternate textures instead of repeating the same ingredient over and over. That keeps the board from feeling heavy or one-note.
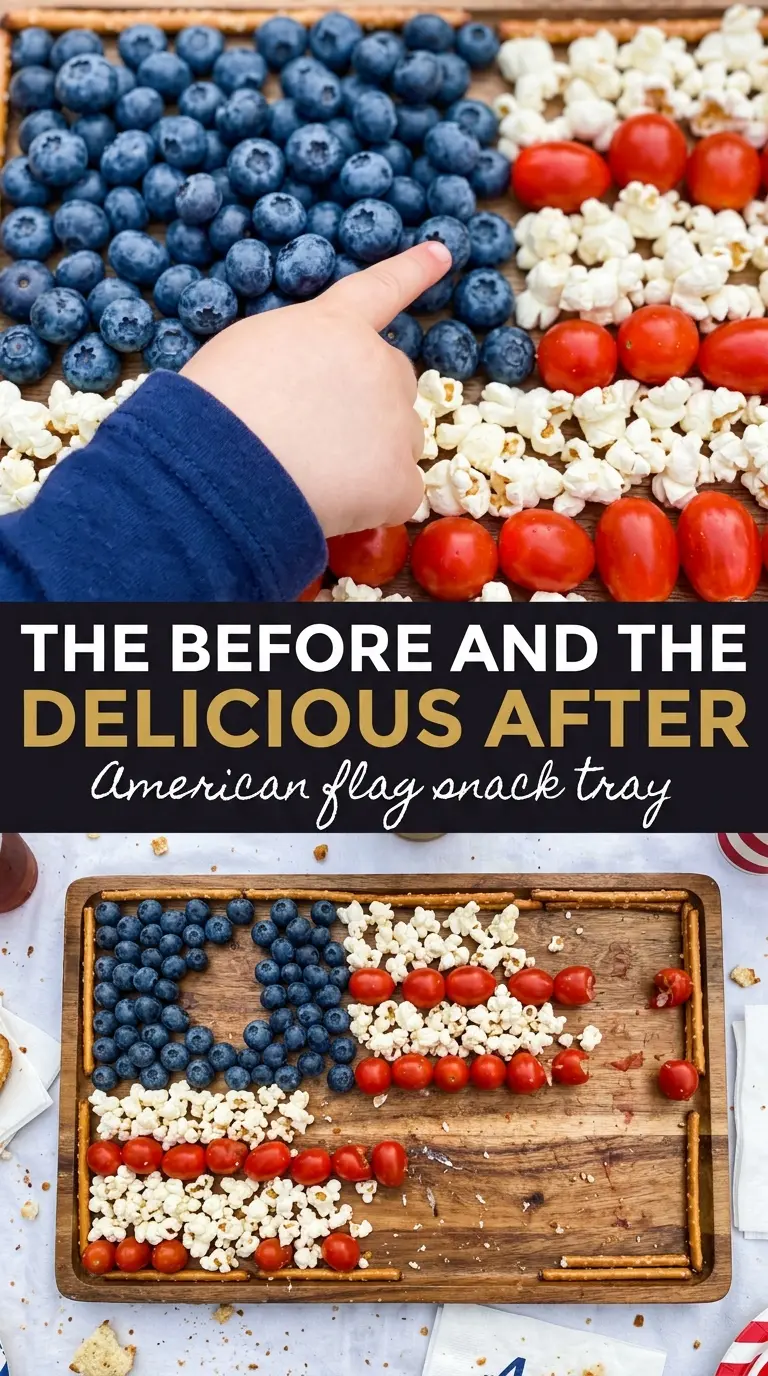
Below you’ll find a simple way to build the flag cleanly, plus the swaps I use when I need to work with a different tray size or make it a little more kid-friendly.
I loved how the blueberries stayed in neat rows and the strawberries didn’t bleed all over the cheese. It looked polished on the table and took maybe 20 minutes to put together.
Like this red, white, and blue snack tray? Save it to Pinterest for your next patriotic party board.
Why the Flag Shape Works Better Than Random Rows
The flag layout does more than look cute. It gives the board structure, which is what keeps a snack tray from turning into a jumble the second people start reaching in. The blueberries in the corner act like a visual anchor, and the long stripes make it easy to refill sections without rebuilding the whole tray.
The other reason this works is balance. Every stripe should mix color and texture so one section doesn’t disappear into another. If you stack all the soft fruit together or all the crunchy items together, the board loses its clean lines. Keep each stripe distinct and pack the ingredients close enough that the tray reads as one design, not separate piles.
The Ingredients That Carry the Color and the Crunch
- Blueberries — These build the canton in the upper left corner, and they need to be dry so they stay packed tightly instead of rolling around. Small berries work best because they create a more even block of color. If yours are very large, the blue section looks looser and less flag-like.
- Strawberries — Halved strawberries give you the clean red stripes and enough flat surface to sit neatly in rows. Slice them right before assembling so the cut sides stay bright. If berries are extra juicy, pat them dry or the moisture will soften crackers nearby.
- White cheddar or mozzarella cubes — These keep the white stripes crisp and give the tray some substance. Cheddar brings more flavor, while mozzarella is milder and softer. Cube them evenly so the stripes look intentional instead of scattered.
- Pepperoni slices — Folded pepperoni adds salt and structure without overpowering the fruit and cheese. The slight curl makes the rows look fuller, which helps the red stripes stand out. If you want a lighter board, salami works the same way.
- Crackers and pretzel sticks — These are the edges and fillers that keep the design sharp. Use crackers in the white stripes when you want a more snack-board feel, and use pretzel sticks to clean up borders or close small gaps. Thin, sturdy crackers work better than delicate ones that crumble when you move the tray.
- Cream cheese or ranch dip — The dip isn’t just extra; it gives people a creamy anchor for the salty pieces and helps the board feel complete. Keep it in a small bowl so it doesn’t run into the fruit. Cream cheese holds its shape longer, while ranch gives you a looser, more classic party board feel.
Building the Rows So the Tray Stays Sharp
Lay Out the Flag Before You Fill It
Start with the empty tray and picture the flag before a single berry goes on. The blue section belongs in the upper left and should take up a neat rectangle, not a loose corner. Once that block is down, map out the stripes so you know where the red and white sections will alternate. If you start filling without a layout, the tray gets lopsided fast and the clean lines disappear.
Pack the Blueberries First
Press the blueberries together tightly enough that the tray surface barely shows through. That density is what makes the canton read clearly from across the room. If you leave gaps, the section looks patchy and the whole board feels unfinished. Dry berries help here; wet berries slide and make the block collapse when the tray moves.
Build the Stripes With Contrasting Textures
Alternate the red and white rows across the length of the tray, switching between strawberries, cheese cubes, pepperoni, crackers, and pretzel sticks. Keep each row level and compact so the edges stay straight. The biggest mistake is overfilling one stripe and starving the next; that makes the flag look crooked even if the colors are right. Use pretzel sticks along the borders if you need a clean visual line.
Finish With the Bowl and Garnish
Set the dip bowl in one corner where it doesn’t break the flag pattern, then tuck rosemary around the edges if you want a little fresh color. The herbs are optional, but they soften the hard edges of the tray and make the finished board look complete. Serve it right away so the crackers stay crisp and the fruit stays fresh. If it sits too long, the strawberries start releasing juice and the neat stripes blur.
Three Ways to Adapt the Tray Without Losing the Flag Look
Make It Vegetarian-Friendly
Skip the pepperoni and replace those red stripes with extra strawberries, cherry tomatoes, or red grapes. You keep the color pattern and lose the salty meat element, which makes the tray lighter and a little fresher. If you want more savory balance, add a bowl of hummus or a sharp cheese spread alongside the tray.
Go Gluten-Free
Use gluten-free crackers and check the pepperoni label if cross-contact matters for your crowd. The visual layout stays the same, but the board feels a little lighter if you lean more on fruit, cheese, and meat instead of the cracker rows. Gluten-free crackers vary a lot in texture, so choose one that holds its shape and doesn’t shatter when moved.
Build a Kid-Friendly Version
Swap in string cheese sticks, mini pretzels, and small crackers if cubes and folded slices feel too fussy for little hands. Kids usually do better with pieces they can grab fast, and the tray still keeps its patriotic look. If the board will sit out for a long time, keep the fruit sections slightly more packed than the snack sections so the layout stays tidy after a few hands dig in.
Storage and Reheating
- Refrigerator: Assemble up to 2 hours ahead, then cover loosely and chill. The strawberries may soften a bit, but the tray will still look sharp if it hasn’t sat too long.
- Freezer: This doesn’t freeze well. The fruit turns mushy and the crackers lose their texture, so it’s best made fresh.
- Reheating: Not needed. If you made it ahead, just let the tray sit at room temperature for 10 to 15 minutes before serving so the cheese isn’t too cold and the flavors come through.
Questions I Get Asked About This Recipe

American Flag Snack Tray
Ingredients
Equipment
Method
- Set a large rectangular wooden board, sheet pan, or serving tray on a flat surface for easy arranging.
- In the upper left corner, fill a rectangle densely with fresh blueberries to form the canton, pressing lightly so the area looks solid.
- Arrange halved strawberries in rows across the length of the board to create the red stripe pattern.
- Fold pepperoni slices and place them in folded rows across the length of the board so the red areas form consistent, vivid stripes.
- Fill the white stripes with rows of white cheddar cubes and crackers alternating between the red rows.
- Use pretzel sticks to define the stripe borders if needed for clean lines.
- Place a small bowl of cream cheese or ranch dip in one corner, tuck rosemary sprigs at the edges, and serve immediately.