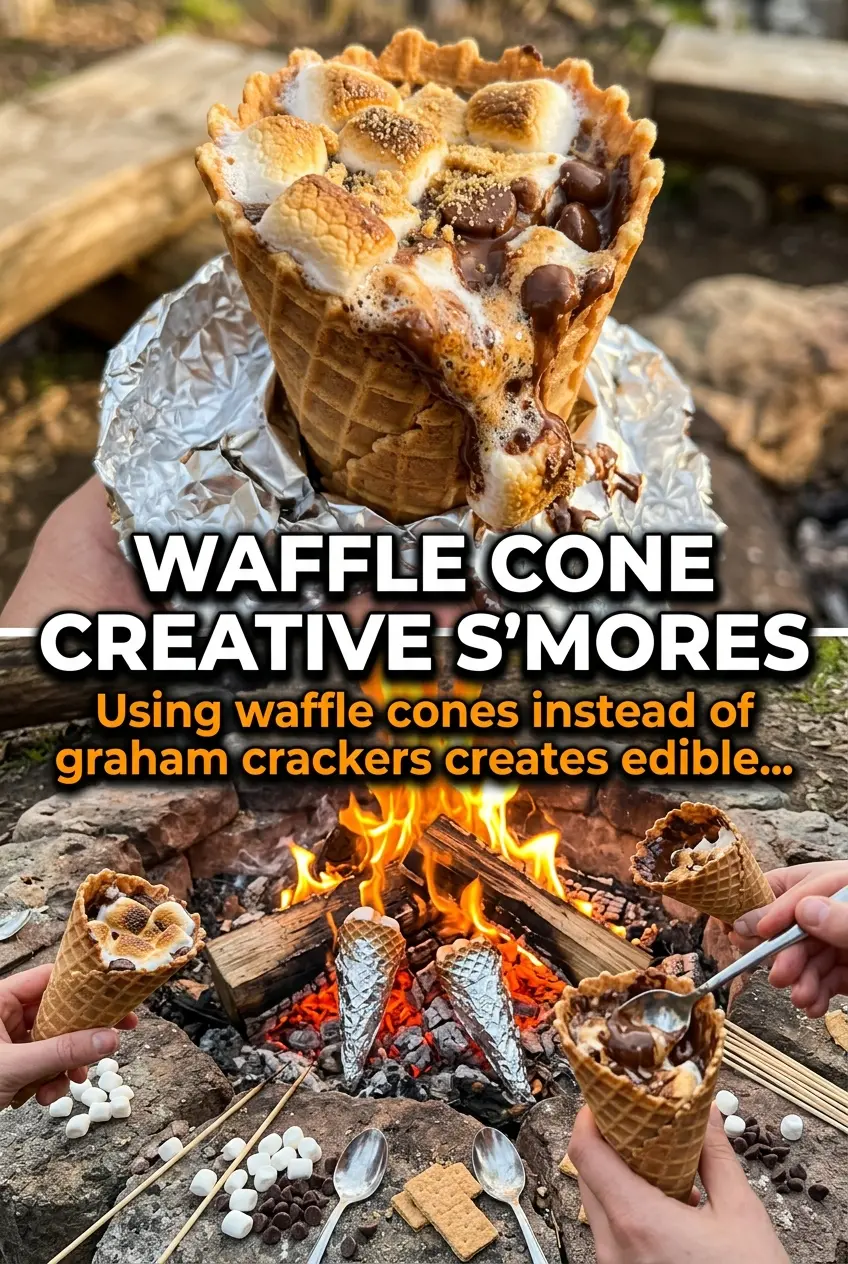
Waffle cones turn into the perfect little campfire dessert when they’re packed with marshmallows, chocolate, fruit, and graham cracker pieces. The foil traps the heat just long enough to melt everything into a spoonable filling, while the cone stays crisp on the outside and toasted at the edges. It’s part s’mores, part sundae, and exactly the kind of treat that disappears fast around a fire.
The trick is layering the filling so the chocolate and marshmallows melt into the fruit instead of sliding to the bottom. I like using mini marshmallows because they soften quickly, and the banana slices add a creamy texture that keeps the filling from tasting one-note. Diced strawberries bring brightness, and the graham crackers give you that familiar s’mores crunch without needing a separate cracker and chocolate setup.
Below you’ll find the timing that keeps the cones from burning, plus a few easy swaps if you need to work with what’s already in the cooler.
The marshmallows melted into the chocolate without making the cone soggy, and the banana added just enough sweetness. My kids opened theirs with spoons and scraped the foil clean.
Campfire Cones are the easiest way to get that melty s’mores-style filling without the mess of a full dessert spread.
The Part That Keeps Campfire Cones from Turning to Goo
The mistake with campfire cones is loading them too loosely or too heavily, then giving them too much heat. Once the marshmallows collapse and the chocolate starts to melt, the filling settles fast, so the cone needs to be packed enough to hold the mix but not stuffed so full that it splits open under foil. Medium heat matters here. High heat scorches the cone before the center gets soft, and once the sugar on the cone darkens too much, the texture goes from crisp to bitter in a hurry.
Foil is doing more than keeping things tidy. It creates an even little oven around each cone, which helps the marshmallows melt before the chocolate burns. Rotate the cones while they’re over the fire so one side doesn’t get the full blast of heat the whole time. If you see the foil turning excessively dark in one spot, move the cones farther from the flame and let the residual heat finish the job.
What Each Filling Is Doing Inside the Cone

- Waffle ice cream cones — These hold up better than sugar cones because they’re sturdier and a little thicker. That matters once the filling starts melting. If you only have sugar cones, wrap them carefully and use a gentler heat source, since they’ll soften and crack faster.
- Mini marshmallows — Mini marshmallows melt evenly and give you that gooey center in just a few minutes. Larger marshmallows work, but you’ll need to tear them into pieces so they soften at the same rate as the chocolate.
- Chocolate chips — Chips are the easiest option because they hold their shape long enough to stay in the cone, then melt into little pockets of chocolate. Semi-sweet is the safest middle ground; milk chocolate will taste sweeter and melt a little softer, while dark chocolate gives you a deeper finish.
- Banana slices and strawberries — These add moisture, so keep the slices small and the berries diced. Big pieces release too much juice and can make the cone collapse faster. If you want a cleaner result, pat the fruit dry before layering it in.
- Graham cracker pieces — This is the s’mores note. They soften just enough to taste toasted without disappearing completely. Crush them into medium pieces, not dust, so you still get some texture after the filling melts.
- Aluminum foil — This isn’t optional. It protects the cone and traps the heat that melts the filling. Wrap each cone tightly, but don’t crush it, or the filling will spill into the foil and never settle back into the cone.
How to Build and Heat the Cones Without Burning Them
Layer the Filling in the Right Order
Start with a few marshmallows and chocolate chips near the bottom so the heat has something to melt immediately, then tuck in the fruit and graham pieces between layers. That helps the cone hold together once everything softens. If you pile all the fruit in one section, the juices can collect in one spot and make the cone collapse on that side.
Wrap Them Tight, but Don’t Smash Them
Cover each filled cone completely with aluminum foil, sealing the edges so the steam stays inside. The goal is to create a little packet, not a compressed brick. If the foil is wrapped too loosely, the heat escapes and the filling stays dry; if it’s pressed too hard, the cone breaks before it reaches the fire.
Heat Over Medium and Keep Them Moving
Set the wrapped cones on a campfire grate over medium heat and rotate them every minute or so. You’re watching for the filling to soften and the chocolate to start giving when you gently press the foil. If you smell burning sugar before the center has melted, pull them back from the hottest part of the fire right away.
Let Them Rest Before You Open the Foil
Give the cones about 2 minutes to cool after they come off the fire. That short rest lets the filling settle so it doesn’t run out the second you unwrap it. The foil and chocolate stay hot longer than you’d expect, so open them slowly and use a spoon to eat the filling straight from the cone.
Three Ways to Work with What You’ve Got at Camp
Dairy-Free Campfire Cones
Use dairy-free chocolate chips and keep the fruit-heavy layers in place. The texture stays just as gooey, but the flavor gets a little cleaner and less rich. Check the marshmallows too, since some brands contain gelatin from different sources.
Extra-Chocolate Version
Add a few extra chocolate chips and skip some of the fruit if you want a more classic s’mores center. The result is richer and less juicy, which also makes the cones a little easier to handle. This is the version that tastes closest to a campfire sundae.
Berry-Forward Swap
Use all strawberries or swap in raspberries if that’s what you brought. Berries melt down into a brighter, tangier filling, but they release more juice than banana, so keep the pieces small and don’t overfill the cones.
Storage and Reheating
- Refrigerator: Best eaten right away. The cones soften quickly once filled, and the fruit makes them even more delicate after a few hours.
- Freezer: Not a good freezer recipe. The cone turns soggy once thawed, and the fruit changes texture in a way that doesn’t work here.
- Reheating: Reheating isn’t ideal. If a cone cools before serving, set it back over very gentle heat for just a minute or two, wrapped in foil, until the filling loosens again. Direct flame will burn the cone before the center warms.
Answers to the Questions Worth Asking
Campfire Cones
Ingredients
Equipment
Method
- Fill each waffle cone with a layer of mini marshmallows, then add a layer of chocolate chips.
- Add banana slices, then spoon in diced strawberries.
- Top each cone with graham cracker pieces so the filling is stacked in visible layers.
- Wrap each filled cone completely in aluminum foil, sealing around the edges so the filling stays contained.
- Place the wrapped cones on a campfire grate over medium heat for 4-5 minutes, rotating occasionally to warm evenly.
- Remove the cones from the fire and let cool for 2 minutes so the marshmallows thicken slightly.
- Carefully unwrap the foil and eat with a spoon while the chocolate and marshmallows are still melted.