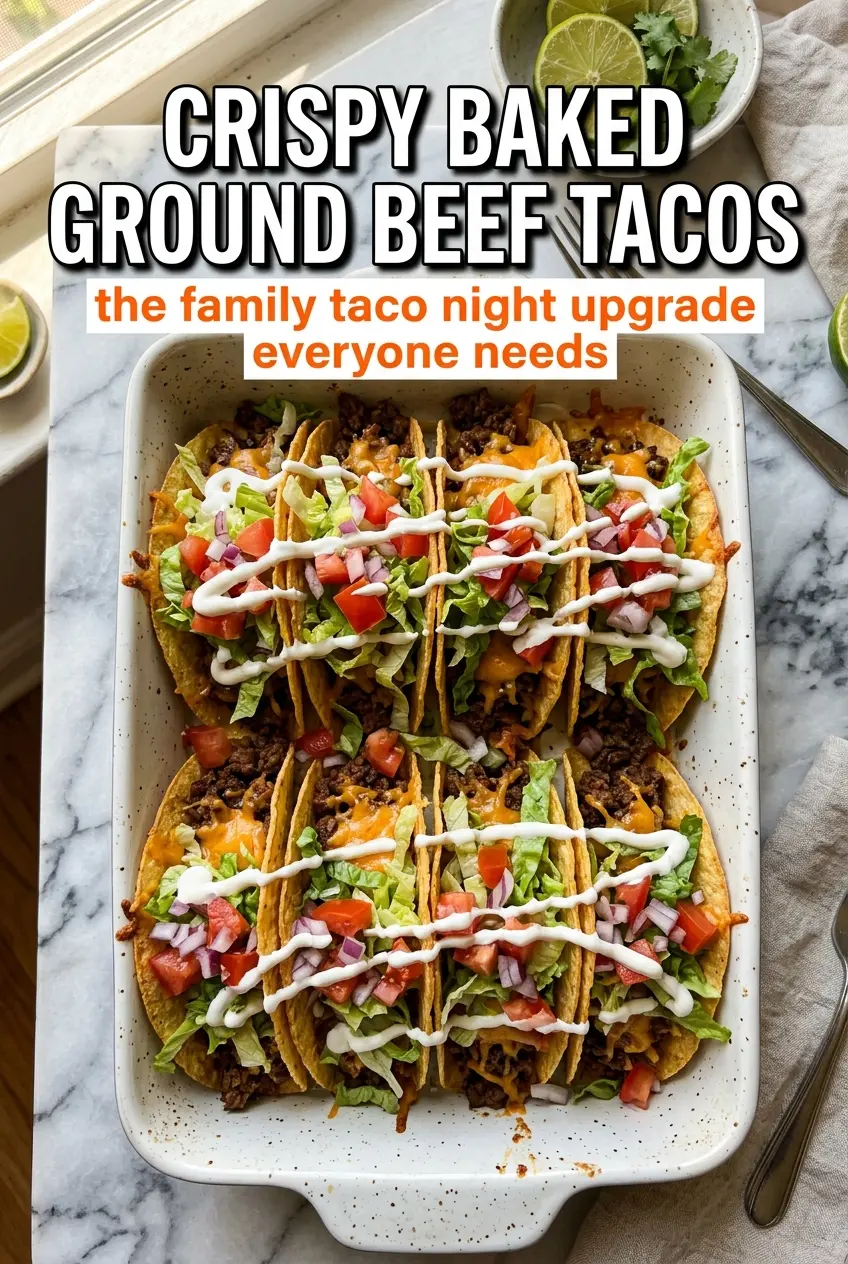
Golden, crunchy taco shells and juicy seasoned beef are a hard combination to beat, and baking the tortillas instead of frying them keeps the whole thing simple enough for a weeknight. The shells turn crisp at the edges while staying sturdy enough to hold the filling, and the contrast with cool lettuce, tomatoes, and sour cream makes every bite hit a little differently.
The trick is treating the tortillas like the main event, not just the wrapper. A light coat of olive oil helps them blister and brown in the oven, and folding them while they bake gives you that crisp shell shape without the mess of deep frying. On the beef side, a quick simmer with the seasoning and water is enough to thicken the mixture so it stays put instead of running straight out of the taco.
Below you’ll find the timing that keeps the shells crisp, the filling savory without turning dry, and a few useful ways to adapt these tacos for different diets or toppings you’ve got on hand.
The shells came out crisp and golden without getting greasy, and the beef filling thickened up just enough to stay inside the tacos. My husband kept adding salsa and went back for seconds.
Crispy Baked Ground Beef Tacos with golden shells and savory, oven-crisped edges are perfect for a fast taco night.
The Mistake That Makes Baked Taco Shells Go Limp
Most baked tacos fail because the tortillas steam before they crisp. That happens when the shells are packed too tightly on the pan, brushed with too much oil, or filled before they’ve had time to set. The goal here is dry heat and space. When the tortillas have room around them, they brown instead of softening, and the edges turn shattery instead of leathery.
The beef filling matters just as much. If it’s too wet, it slides around and softens the shell from the inside within minutes. Simmering the meat with the seasoning and water until the liquid reduces gives you a thick, spoonable filling that stays in place and keeps the tacos crisp long enough to get them to the table.
What Each Ingredient Is Doing in These Tacos

- Ground beef — Use a standard 80/20 or 85/15 blend for the best balance of flavor and moisture. Leaner beef can work, but it needs a little more attention in the pan so it doesn’t turn dry and crumbly.
- Taco seasoning — A packet gives you that classic salty, spiced backbone without needing a long ingredient list. If you use homemade seasoning, keep the cumin and chili powder strong enough to stand up to the cheese and sour cream.
- Corn tortillas — These crisp up better than flour tortillas in the oven and give you the more traditional taco shell texture. If yours are stiff or cracking, warm them briefly before brushing with oil so they fold without breaking.
- Olive oil — This is what helps the tortillas brown and turn crisp instead of drying out pale and brittle. A light coating is enough; too much oil leaves them greasy and soft.
- Cheddar cheese — Sharp cheddar adds a little bite and melts cleanly over the hot beef. Pre-shredded cheese works fine here, though freshly shredded melts a little smoother.
- Sour cream — Use it as a cool finish, not a heavy topping. It softens the spice and adds richness, especially if your salsa has some heat.
Getting the Filling Thick and the Shells Crisp
Brown the Beef First
Start with a hot skillet and break the beef into small crumbles as it cooks. You want browned bits, not gray steam, because that deepens the flavor before the seasoning even goes in. Drain off excess fat after browning so the filling doesn’t turn greasy. If you skip that step, the taco shells pick up the fat and soften faster than they should.
Simmer Until the Seasoning Clings
Stir in the taco seasoning and water, then let it simmer until the liquid reduces and coats the meat. The filling should look glossy and thick, not soupy. If there’s still a puddle in the pan, keep cooking for another minute or two. That extra time is what keeps the tacos from collapsing once they’re assembled.
Shape and Bake the Tortillas
Brush both sides of each tortilla lightly with olive oil, then fold them into taco shapes on the baking sheet. Give them space so the hot air can move around each one. Bake until the shells are golden and crisp at the edges, then pull them out as soon as they hold their shape. If they go too far, they’ll get hard instead of crisp, and they’ll crack when you fill them.
Fill Right Before Serving
Spoon the beef into the shells while they’re still hot, then top with cheese, lettuce, tomatoes, onion, sour cream, and salsa. The cheese softens slightly from the heat of the meat, which is exactly what you want. Don’t build them too far ahead. Even a good crispy shell will start to lose its crunch once the filling sits inside.
How to Change These Tacos Without Losing the Crunch
Make them dairy-free
Skip the cheddar and sour cream, then finish the tacos with extra salsa, diced avocado, or a dairy-free crema. The texture stays crisp, but you lose the cooling richness, so use a sauce with enough body to replace it.
Use flour tortillas instead
Flour tortillas will give you a softer, slightly chewier shell with less shatter than corn. They still bake up nicely, but they’re less traditional for this style of taco and may need a minute or two longer to brown.
Swap in ground turkey or chicken
Lean poultry works well if you want a lighter filling, but it needs enough seasoning and a careful simmer so it doesn’t taste flat. Add a spoonful of oil to the skillet if the meat is extra lean, because a little fat helps carry the spices.
Storage and Reheating
- Refrigerator: Store the beef filling for up to 4 days. Keep the shells and toppings separate so the tacos don’t turn soggy.
- Freezer: The beef filling freezes well for up to 2 months. Cool it completely, seal it tightly, and thaw in the refrigerator before reheating.
- Reheating: Warm the beef in a skillet over medium heat with a splash of water if needed. Re-crisp the shells in the oven for a few minutes instead of microwaving them, which softens the tortillas fast.
Questions I Get Asked About This Recipe
Crispy Baked Ground Beef Tacos
Ingredients
Equipment
Method
- Brown the ground beef in a skillet over medium-high heat, breaking it apart as it cooks, about 8 minutes, until no longer pink. Drain excess fat and add taco seasoning, water, and salt and pepper.
- Simmer the mixture for 5 minutes, stirring until it thickens and looks evenly coated. Keep warm while you bake the taco shells.
- Brush both sides of the corn tortillas lightly with olive oil. Fold each tortilla in half and arrange them on a sheet pan.
- Bake at 400°F for 8-10 minutes until crispy and golden. Let them cool briefly so they hold their shape.
- Fill each taco shell with the seasoned ground beef. Top with shredded cheddar cheese, shredded lettuce, diced tomatoes, and diced onion.
- Drizzle with sour cream and salsa to taste, then serve immediately. The contrast of golden, crunchy shells with warm filling is best right away.