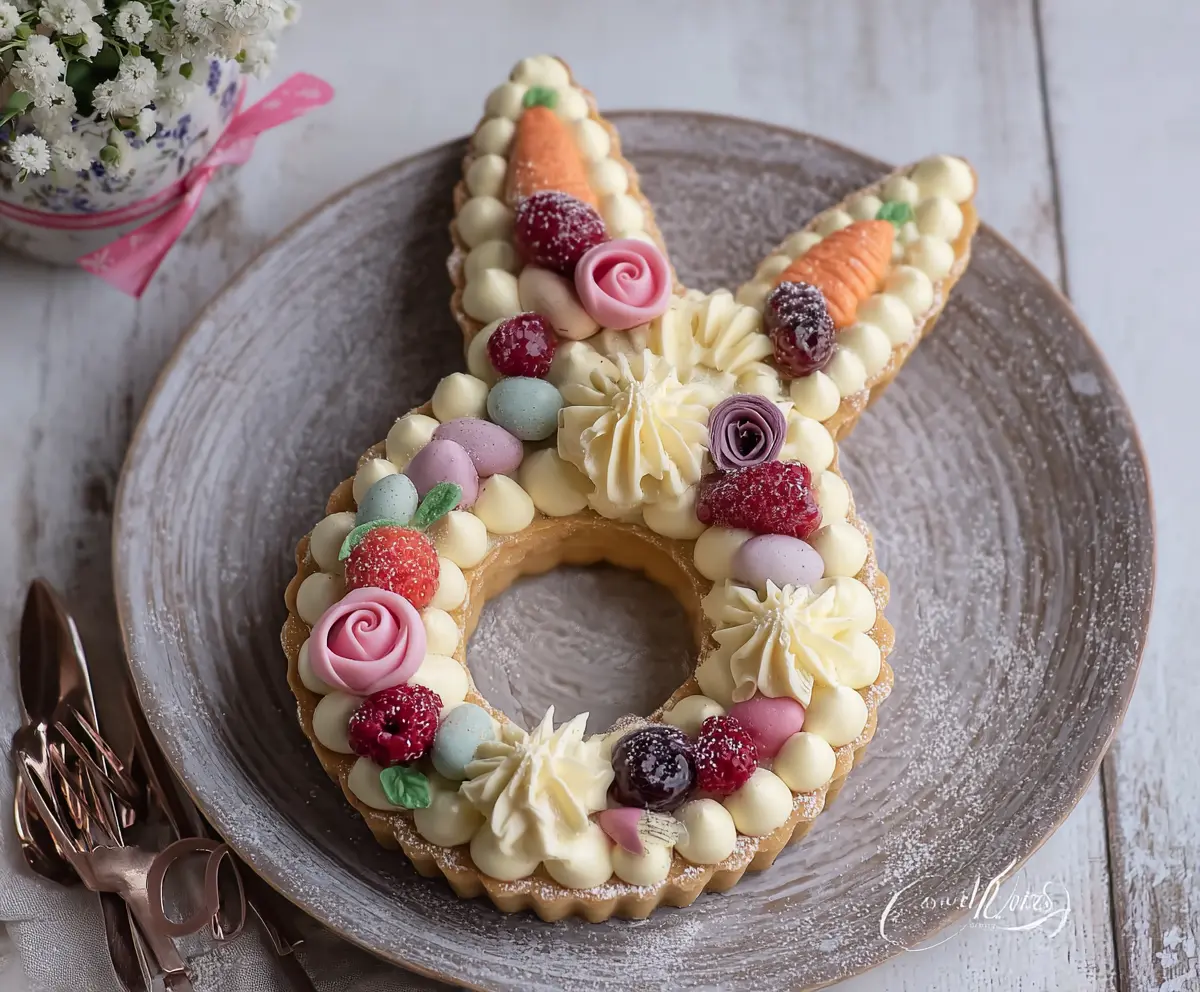
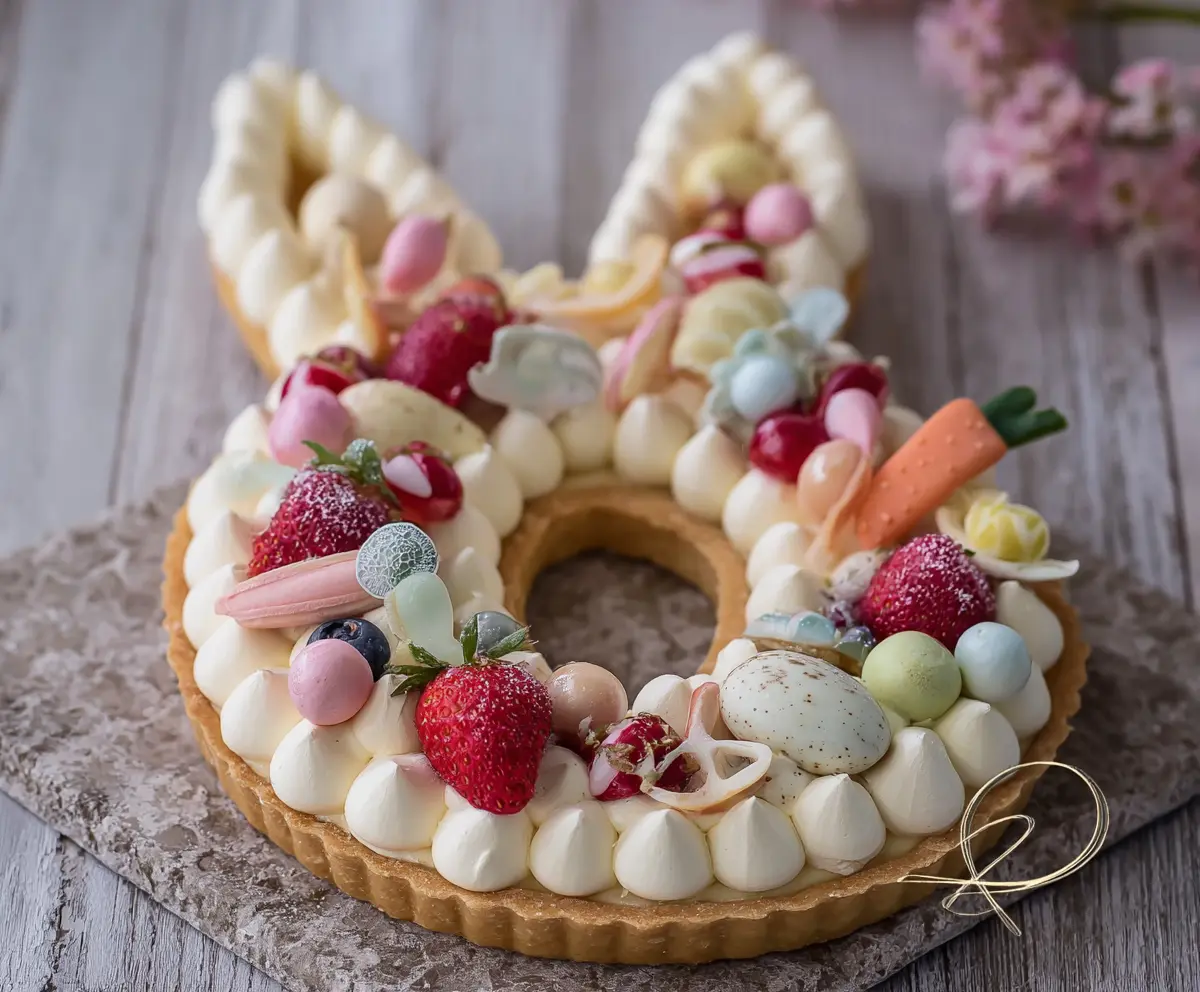
This Easter Bunny Cream Tart is a fun and colorful dessert perfect for spring celebrations! With a creamy filling and a buttery crust, it’s a lovely treat to brighten up any gathering.
Getting creative is part of the fun! I love decorating it with fresh fruits and whipped cream. It’s like an art project you can eat—what’s better than that? 🐰✨
Key Ingredients & Substitutions
All-Purpose Flour: This is essential for the tart crust. If you’re gluten-free, you can substitute with a gluten-free flour blend, which works well in crusts.
Unsalted Butter: Cold butter helps create a flaky crust. If you need a dairy-free option, try using vegan butter. Just ensure it’s cold, too!
Heavy Whipping Cream: This adds richness to your filling. If you prefer a lighter option, use half-and-half, but the texture will be less fluffy.
Mascarpone Cheese: I love mascarpone for its creaminess. Cream cheese is a good substitute, though it has a tangier taste. Greek yogurt can work too if you’re after a healthier option.
Decorations: Use any berries you like! If fresh isn’t available, frozen berries can also work. You can swap out marzipan for ready-to-roll icing or even chocolate for a different flavor.
How Do I Make a Flaky Tart Crust?
The secret to a great tart crust is in how you handle the dough. Here’s a step-by-step guide to getting that perfect flaky texture:
- Combine the dry ingredients in a food processor first – this ensures even mixing.
- Add the cold butter and pulse until it looks like sand. Don’t overmix! It’s okay to still have little chunks of butter.
- When adding water, go slow! Start with one tablespoon to avoid a sticky dough.
- Chill the dough for at least an hour. This keeps the butter cold and helps the crust hold its shape.
Once baked, keep an eye on the color. You want it golden brown but not too dark. If it puffs up during baking, simply prick it gently while still hot to release steam.
How to Make Easter Bunny Cream Tart
Ingredients You’ll Need:
For the Tart Crust:
- 1 1/4 cups all-purpose flour
- 1/4 cup granulated sugar
- 1/4 teaspoon salt
- 1/2 cup unsalted butter, cold and cubed
- 1 large egg yolk
- 2-3 tbsp cold water
For the Cream Filling:
- 1 cup heavy whipping cream
- 1/2 cup mascarpone cheese or cream cheese, softened
- 1/3 cup powdered sugar (adjust to taste)
- 1 teaspoon vanilla extract
For Decoration:
- Fresh raspberries
- Fresh strawberries
- Fresh blackberries or blueberries
- Small pastel-colored candy eggs or chocolate eggs
- Marzipan or fondant carrots (orange with green tops)
- Pink and purple fondant or marzipan roses
- Fresh mint leaves or edible leaves for garnish
- Powdered sugar (for dusting)
How Much Time Will You Need?
This Easter Bunny Cream Tart takes about 30 minutes to prepare, plus 20 minutes of baking time, and at least 30 minutes of refrigeration to set. Altogether, you’re looking at about 1 hour and 20 minutes from start to serve, with a touch of patience during chilling!
Step-by-Step Instructions:
1. Make the Tart Crust:
Start by combining the flour, sugar, and salt in a food processor. Add in the cold cubed butter and pulse until the mixture looks like coarse crumbs. Next, add the egg yolk and 2 tablespoons of cold water, pulsing until the dough begins to stick together. If it seems too dry, add a little more water. Turn the dough out onto a lightly floured surface and gently knead it just until smooth. Shape into a flat disk, wrap it in plastic wrap, and let it chill in the fridge for at least 1 hour.
2. Bake the Tart Shell:
When you’re ready, preheat your oven to 350°F (175°C). Roll out the chilled dough on a lightly floured surface into a shape resembling a bunny head with ears, or use a bunny-shaped tart pan for fun! Carefully transfer the rolled-out dough to your tart pan or a baking tray lined with parchment paper. Make sure to prick the base with a fork to prevent puffing. Bake for about 15-20 minutes, or until it’s golden brown. Once baked, let it cool completely.
3. Prepare the Cream Filling:
In one mixing bowl, whip the heavy cream until soft peaks form. In another bowl, beat the mascarpone cheese (or cream cheese) with powdered sugar and vanilla extract until it’s nice and smooth. Gently fold the whipped cream into the mascarpone mixture until everything is well combined and fluffy. This is the delightful filling!
4. Assemble the Tart:
Transfer the cooled tart shell to a serving plate. Using a piping bag with a round tip, pipe small dollops of the cream filling around the outer edge and inside the tart shell, creating a beautiful layered effect that looks as good as it tastes.
5. Decorate:
Now for the fun part! Place the marzipan or fondant carrots on top of the ears section for a cute touch. Arrange the raspberries, strawberries, blackberries, and pastel candy eggs around the border. Sprinkle in fondant roses and fresh mint leaves to add color and texture. To finish, lightly dust the completed tart with powdered sugar for an enchanting look.
6. Serve:
Before serving, refrigerate the tart for about 30 minutes to set. When it’s ready, slice it carefully and enjoy your festive Easter Bunny Cream Tart with friends and family!
Can I Use Gluten-Free Flour for the Tart Crust?
Yes, you can use a gluten-free flour blend in place of all-purpose flour! Just ensure that it’s a blend designed for baking, as this will provide a similar texture to traditional flour. The results may vary slightly, but it should still turn out delicious!
How Do I Prevent the Tart Shell from Puffing Up?
To prevent your tart shell from puffing, make sure to prick the base with a fork before baking. This allows steam to escape. Additionally, using pie weights or dried beans on parchment paper can help keep the crust flat while it’s baking.
How Should I Store Leftovers?
If you have any leftovers, store the tart in an airtight container in the refrigerator for up to 3 days. Keep in mind that the crust may soften slightly over time, so it’s best to enjoy it as fresh as possible!
Can I Prepare the Tart Ahead of Time?
Absolutely! You can make the tart crust a day in advance and store it in the refrigerator. The cream filling can also be prepared ahead of time, just wait to assemble and decorate the tart until you’re ready to serve to ensure it looks its best!