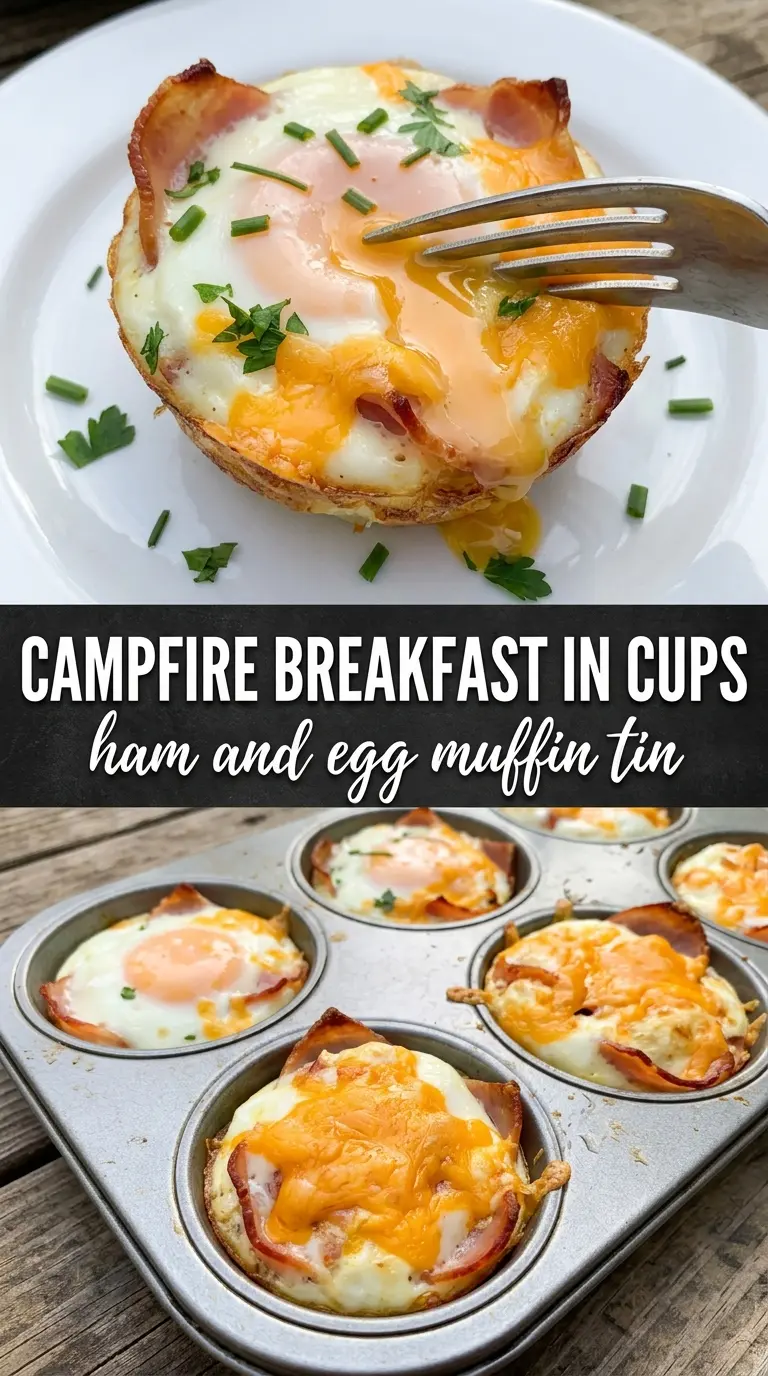
Golden egg cups baked inside salty ham hold their shape beautifully over a campfire, and the best part is the texture contrast: firm whites, tender yolks, crisped edges of ham, and melted cheddar in every bite. They’re the kind of breakfast that feels like a small win at the campsite because they come together fast, cook in one pan, and don’t require any delicate flipping or babysitting.
The trick is lining the muffin tin with ham all the way to the bottom so the egg has something sturdy to sit in. Cheese goes on top, not underneath, so it melts into the surface instead of sticking to the pan, and the foil cover helps the eggs set evenly without scorching the edges before the centers are done. A metal muffin tin matters here; thin disposable trays can warp over direct heat and cook unevenly.
Below you’ll find the little details that keep these from turning rubbery, plus a few smart swaps if you’re cooking at home instead of over a fire. Once you’ve made them once, they’re the kind of breakfast you’ll want to pack for camping, cabin mornings, or any weekend where cleanup needs to stay simple.
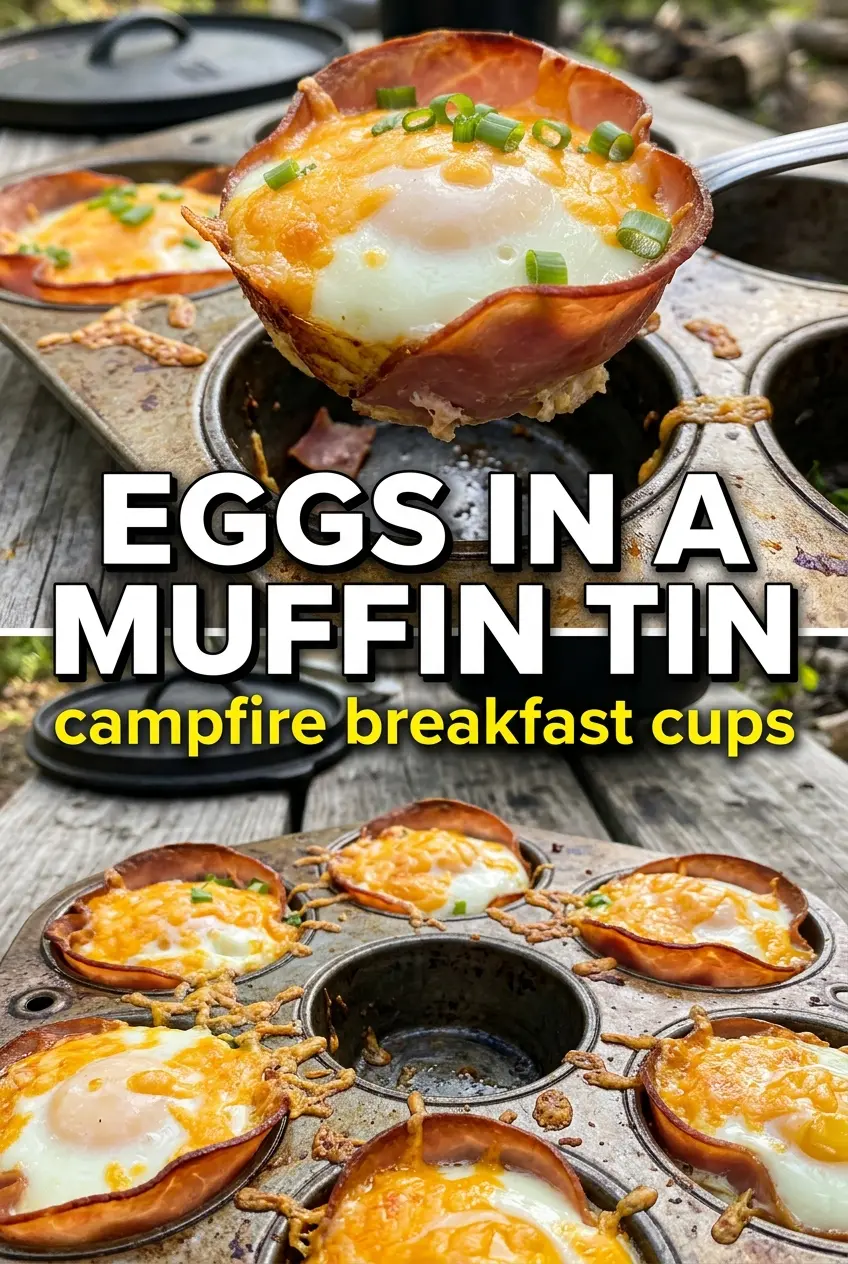
The ham held the eggs perfectly and the foil kept the tops from getting overdone. I pulled them off right at 19 minutes and the yolks were still tender with the cheese melted on top.
Campfire Egg Cups with Ham are perfect for a foil-covered muffin tin breakfast with salty ham, melted cheddar, and almost no cleanup.
The Trick to Keeping Campfire Eggs from Overcooking
The mistake with campfire egg cups is treating them like oven-baked muffins. Over open heat, the bottoms and outer edges cook much faster than the centers, so the eggs can go rubbery before the yolks are set. Foil is doing real work here: it traps heat, softens the direct blast from the grate, and gives the tops time to catch up with the bottoms.
Another thing that helps is using medium heat, not a roaring fire. You want steady coals or a controlled flame licking under the pan, not a flare-up under one side of the tin. If the ham edges start to brown hard before the eggs are set, the fire is too hot and the tin needs to move up, off the hottest spot, or farther from the flames.
What Each Ingredient Is Actually Doing in These Egg Cups
- Deli ham — This is the shell that holds everything together, and it brings enough salt that you don’t need to over-season the eggs. Thin slices work best because they drape into the muffin cups without fighting you; thick-cut ham gets stiff and can spring back, leaving gaps for the egg to leak underneath.
- Eggs — Use the freshest eggs you’ve got if you want the neatest shape. Older eggs still work, but the whites spread more, which makes the cups less tidy and more likely to overflow.
- Cheddar cheese — Sharp cheddar gives the most payoff for the amount you use. Pre-shredded cheese is fine here, but block-grated melts a little smoother because it doesn’t carry the same anti-caking coating.
- Bell peppers and onions — These are there for color, sweetness, and a little texture, but they need to be diced small so they soften in time. Big pieces stay crunchy while the eggs finish, which makes each cup harder to eat cleanly.
- Cooking spray — Don’t skip this on a metal muffin tin. The ham helps, but the cheese still wants to cling, and spray keeps the cups from tearing when you lift them out.
Building the Cups So the Eggs Set Cleanly
Line the tin with ham first
Spray the muffin tin well, then press one slice of ham into each cup so it forms a full little bowl. The ham should come up the sides and touch the bottom without bunching into thick folds, because those folds stay chewy while the rest cooks through. If a slice tears, overlap it with a second piece; gaps are where the egg sneaks out and sticks.
Add the egg before the toppings
Crack one egg into each ham cup, aiming for the center so the white stays contained. If the yolk breaks, the cup still works, but the texture will be more like a set egg scramble than a tidy baked egg. Add the cheese, peppers, and onions on top so the toppings stay visible and don’t sink under the egg white.
Cover and cook with patience
Set the tin over medium campfire heat and cover it with foil. The foil keeps the tops from drying out before the center firms up, which is the most common reason these turn tough at the campsite. Cook until the whites are set and the yolks still have a little give, then lift one cup and check the bottom if you’re unsure; if it releases cleanly, it’s ready.
Serve them while they’re still warm
These are best the minute they come off the heat, when the cheese is soft and the ham edges still have a little bite. If you let them sit too long in the hot tin, carryover heat keeps cooking the eggs and they lose that tender center. Use a spoon to loosen each cup before lifting so the ham stays intact.
How to Adapt These for Different Campsite Mornings
Make them dairy-free
Leave out the cheddar and the cups still hold together well because the ham is doing the structural work. You’ll lose the melty top layer, so add a pinch of extra pepper or a spoonful of diced sautéed vegetables if you want a little more personality in each bite.
Swap the ham for turkey or prosciutto
Turkey slices work, but they’re leaner and a little less sturdy, so press them carefully into the tin and don’t overcook. Prosciutto gives you a more delicate, salty cup with crisp edges, though it can brown faster than deli ham over direct heat.
Use bacon instead of ham
Partially cooked bacon can line the cups, but it needs more attention because it shrinks as it cooks and can pull away from the sides. The result is smokier and crispier, but the cups are less tidy and take a little longer to finish.
Use peppers, onions, and cheese only
If you want a meatless version, grease the tin a little more generously and lower the heat slightly so the eggs have time to set before the edges dry out. You won’t get the same built-in salt or structure from ham, so the seasoning matters more here.
Storage and Reheating
- Refrigerator: Store cooled egg cups in an airtight container for up to 3 days. The ham may soften a bit, but the flavor holds up well.
- Freezer: They freeze, but the texture changes and the eggs can turn a little spongy after thawing. If you do freeze them, wrap each cup individually and thaw in the fridge before reheating.
- Reheating: Warm in a 325°F oven or toaster oven until heated through. The common mistake is blasting them in the microwave, which makes the eggs tight and the ham leathery.
Answers to the Questions Worth Asking
Campfire Egg Cups with Ham
Ingredients
Equipment
Method
- Spray a metal muffin tin with cooking spray to lightly coat each cup for easy release.
- Line each cup with a slice of deli ham, pressing and shaping it to form a cup inside the muffin well.
- Crack one egg into each ham cup.
- Top each cup with shredded cheddar cheese, then add the finely diced bell peppers and onions.
- Season each cup with salt and pepper to taste.
- Place the muffin tin on a campfire grate over medium heat.
- Cover with aluminum foil and cook for 18-20 minutes until the eggs are set.
- Carefully remove the egg cups and serve warm.