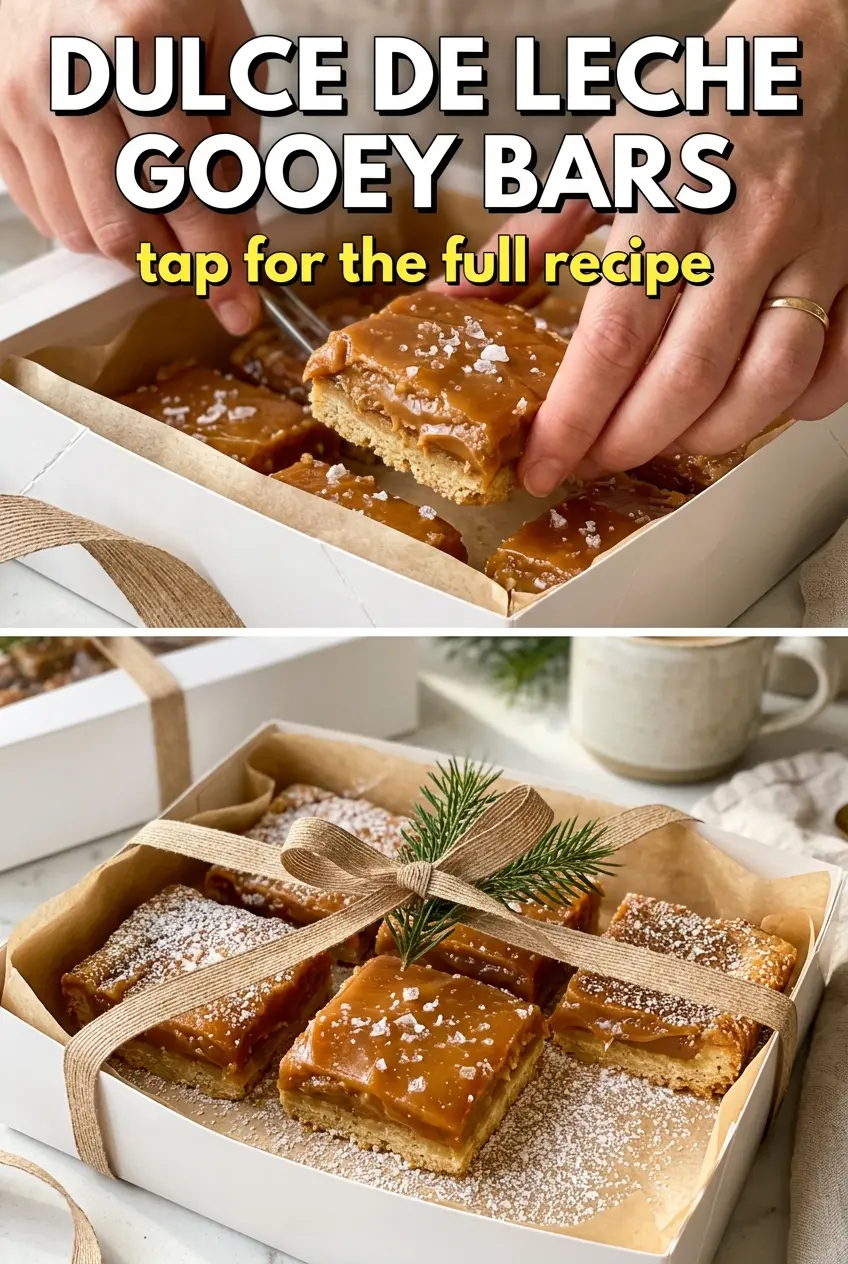
Golden shortbread, a glossy layer of dulce de leche, and a thin cap of dark chocolate make these bars hard to walk past once they’ve cooled. The base stays sturdy enough to cut cleanly, but it still melts fast against the caramel filling, which is the whole reason these bars disappear so quickly. That contrast is what makes them worth baking again: crisp edges, a soft center, and just enough salt on top to keep the sweetness in check.
The shortbread crust matters here because it has to hold the filling without turning soggy. Pressing it firmly into the pan and baking it until the edges are lightly golden gives you a base that can stand up to the dulce de leche instead of dissolving under it. The chocolate layer does more than decorate the top; it adds a little bitterness that keeps the bars from tasting one-note. A pinch of fleur de sel at the end sharpens everything and makes each bite taste more deliberate.
Below you’ll find the detail that keeps the caramel layer from sliding around when you cut the bars, plus a few swaps and troubleshooting notes that help if you want them a touch less sweet or a little easier to slice.
The crust stayed crisp even after chilling, and the dulce de leche layer set up enough to cut neat squares. I used the fleur de sel on top and that little salty hit made them taste bakery-level fancy.
These dulce de leche gooey bars bake up with a crisp shortbread base, a silky caramel middle, and that dark chocolate top that keeps each bite from getting cloying.
The Shortbread Base Has to Fight the Caramel, Not Just Hold It
With bar desserts like this, the crust is doing real work. If it’s pale and underbaked, the dulce de leche softens it fast and you lose that clean slice. A firmly packed, lightly golden shortbread layer gives you structure without turning hard or dry.
The other common failure is spreading the filling too soon. Warm crust is right, but scorching hot crust can make the caramel loosen and slide. Let the crust come out of the oven, give it a minute or two, then spread the dulce de leche in a calm, even layer before it has time to settle and drag.
- Firm packing matters — press the base down with the bottom of a measuring cup so there aren’t loose crumbs that later fall apart.
- Light gold is the goal — you want the crust set and just browned at the edges, not deeply colored.
- Chocolate protects the top — it adds a thin barrier that helps the bars slice more cleanly after chilling.
What Each Ingredient Is Actually Doing in This Dish
- All-purpose flour — gives the base its shortbread-like structure. Cake flour makes it too delicate; bread flour makes it tougher than you want.
- Butter — soft butter blends into the flour and sugar to create that sandy, press-in crust. Cold butter won’t mix evenly, and melted butter changes the texture into something denser and greasier.
- Granulated sugar — lightly sweetens the crust and helps it brown. You don’t need much because the filling carries most of the sweetness.
- Dulce de leche — this is the center of the bars, so quality matters here. Thick, spoonable dulce de leche gives you a glossy layer that holds shape better than a thinner caramel sauce.
- Dark chocolate chips — the bitterness balances the caramel and keeps the bars from tasting flat. If you only have semisweet chips, use them, but the finished bars will be sweeter.
- Extra butter for the chocolate — helps the chocolate melt smoothly so you can spread or drizzle it without clumping.
- Fleur de sel — adds little sharp pops of salt on the surface. Regular flaky salt works too; just use a light hand.
The 25 Minutes of Baking That Set the Whole Bar
Building the Crust
Mix the flour, softened butter, sugar, and salt until the mixture looks like damp crumbs that hold together when squeezed. If you overwork it, the crust gets dense instead of tender. Press it firmly into an 8×8 baking dish and push into the corners so the thickness stays even. An uneven base bakes unevenly, and thin corners can burn before the center is ready.
Giving the Base a Head Start
Bake the crust at 350°F until it’s set and the edges turn a light golden color. That first bake is what keeps the bars from collapsing once the caramel goes on. If the crust still looks pale and soft, give it another minute or two; if it starts to brown deeply, it’s already gone too far for this recipe.
Layering the Caramel and Chocolate
Spread the dulce de leche over the warm crust in an even layer, working gently so you don’t tear the base. Melt the chocolate chips with the butter, then drizzle or spread it over the caramel while it’s still fluid. If your chocolate seizes or looks grainy, the heat was too high; pull it off the burner and stir until it smooths out again.
Cooling for Clean Squares
Let the bars cool completely, then chill them for at least 30 minutes before slicing. That rest is what turns them from gooey pudding into neat, sturdy squares. If you cut them too soon, the caramel will pull and smear; a chilled bar gives you crisp edges and better layers. Sprinkle the fleur de sel after cutting so it stays on the surface instead of dissolving into the filling.
What to Change When You Want These Bars a Little Different
Make Them Less Sweet Without Losing the Gooey Center
Use dark chocolate instead of semisweet and finish with a little more fleur de sel. You can also spread the chocolate slightly thicker, which gives each bite more bitterness and keeps the caramel from tasting one-dimensional.
Gluten-Free Version That Still Cuts Cleanly
Swap the all-purpose flour for a 1:1 gluten-free baking blend that contains xanthan gum. The texture will be a little more delicate, but the bars will still hold together if you chill them fully before cutting.
Add a Nut Layer for More Crunch
Scatter a thin layer of chopped toasted pecans or walnuts over the caramel before adding the chocolate. That gives the bars a little crunch and a toasty note that works well with the dulce de leche.
Storage and Reheating
- Refrigerator: Store in an airtight container for up to 5 days. The bars stay firm and the caramel layer holds its shape well.
- Freezer: Freeze tightly wrapped squares for up to 2 months. Separate layers with parchment so the chocolate top doesn’t stick.
- Reheating: These are best served at room temperature, not hot. If they’ve been chilled hard, let them sit out for 15 to 20 minutes so the caramel softens without melting the chocolate.
Answers to the Questions Worth Asking
Dulce de Leche Gooey Bars
Ingredients
Equipment
Method
- Mix all-purpose flour, softened butter, granulated sugar, and salt until the mixture looks crumbly. Press it firmly into an even layer in an 8x8 baking dish.
- Bake at 350°F for 12-15 minutes, until the edges look golden and the center is set.
- Spread dulce de leche over the warm crust in an even layer, letting it settle into any surface gaps.
- Melt dark chocolate chips with 2 tablespoons butter until smooth, then drizzle or spread it over the dulce de leche.
- Bake again at 350°F for 8-10 minutes, until the chocolate looks set on top but the caramel beneath stays glossy.
- Cool completely at room temperature so the layers firm up without smearing.
- Refrigerate for at least 30 minutes, until the bars are sliceable.
- Cut into 16 squares, sprinkle with fleur de sel, and serve at room temperature or chilled.